
DIY Fixes for Leaking Toilets

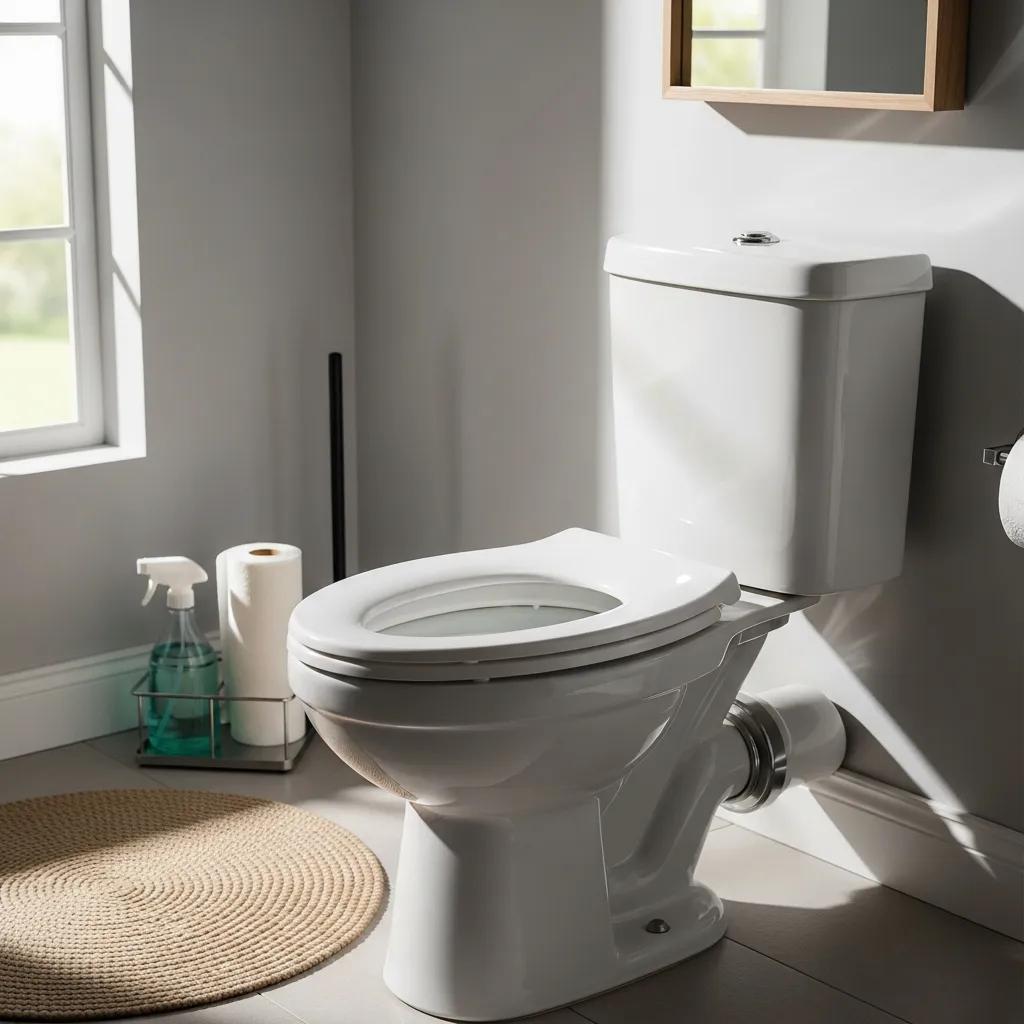
DIY Toilet Leak Repairs: A Practical, Step‑by‑Step Guide Any toilet that loses water where it shouldn’t—inside the bowl, from the tank, at the base, or along the supply line—counts as a leak. Left unchecked, leaks waste water, ruin finishes, and raise your bills. Most household toilet leaks come from worn parts or failed seals: a flapper that won’t seat, a misadjusted fill valve, a failed wax ring at the closet flange, or a corroded supply fitting. This guide walks you through why toilets leak, how to pinpoint the source, and clear DIY fixes that stop the waste and save money. You’ll also learn when it’s time to call a licensed plumber, how to compare DIY part costs vs. professional repairs, and simple maintenance to reduce future problems. Topics include common causes, a diagnostic workflow, hands‑on repairs (flapper swaps, wax ring reseats), emergency signs, cost comparisons, and a seasonal maintenance checklist to protect your home. What Are the Common Causes of a Leaking Toilet? Leaks usually come from worn internal parts, degraded seals, or damaged structure that lets water escape. Inside the tank, a tired flapper, a failing fill valve, or a cracked overflow tube can cause constant flow into the bowl. Outside the tank, leaks often show at the tank‑to‑bowl gasket, around closet bolts, from the wax ring at the base, or where the supply line connects. Knowing how each part works helps you choose the right repair and prevent water damage from getting worse. Typical mechanical and structural causes include: Worn flapper or a too‑short/too‑long chain that keeps the tank from sealing fully. A misadjusted or failing fill valve that overfills the tank or never shuts off. A failed wax ring or loose closet bolts letting water seep at the floor. Cracked porcelain in the tank or bowl, or corroded supply fittings that drip. Those causes point to likely fixes: swap internal tank parts for running issues, tighten or reseat bolts and the wax ring for base leaks, or replace supply hoses and fittings when external connections fail. Identifying the failing component sets you up to diagnose the specific leak type next. How Do Flapper Valve and Fill Valve Failures Cause Leaks? The flapper and fill valve control the tank seal and refill. When either fails, water can run continually or intermittently into the bowl, wasting water and often producing a steady hiss or frequent refills. The flapper seals the tank outlet and can wear from mineral deposits, heat, or a broken chain. The fill valve uses a float to stop water but can stick, misadjust, or leak past its seals. A simple dye (food coloring) test and watching refill cycles will tell you whether water is bypassing the flapper or the fill valve is overfilling the tank. Replacing a flapper or adjusting/replacing the fill valve usually stops internal leaks quickly. Start with these tests to isolate internal tank problems and avoid unnecessary disassembly. If replacing the flapper or adjusting the fill valve doesn’t fix the leak, the issue may be a cracked overflow tube, a tank crack, or multiple failures that need a deeper look. What Signs Indicate a Toilet Leaking from the Base or Tank? Leaks at the base or tank often show as water on the floor, discolored or soft flooring, or wetness directly beneath the tank after flushing—issues that call for quick containment and diagnosis. Remember: condensation can look like a leak, so check with dry paper towels under the toilet to confirm fresh water. A failed wax ring or loose closet bolts typically produce puddles near the base after a flush; a tank‑to‑bowl gasket leak will drip where the tank meets the bowl or under the tank. Containing the water and finding the true source early will limit repair scope and cost. If the base leak is from a bad wax ring or loose bolts, reseating the toilet and replacing the seal usually fixes it. If the tank is cracked, you’ll need replacement or a professional assessment. How Can You Diagnose Different Types of Toilet Leaks? Diagnosing a toilet leak follows a simple, logical workflow: check for internal running, inspect external connections, then test seals and fittings to decide whether a DIY fix or pro referral is best. Start with easy observations—listen for running water, do a dye test, watch refill behavior, and inspect the supply line—then move to tank and base checks if symptoms continue. A step‑by‑step checklist saves time and prevents buying the wrong parts. Use this quick diagnostic checklist to triage leaks: Dye test for internal leaks: Put food coloring in the tank and wait 10–15 minutes. If colored water shows in the bowl without a flush, the flapper is leaking. Visual inspection: Look for drips at the tank‑to‑bowl seam, around closet bolts, and at the supply line nut. Operate valves: Flush, watch refill cycles, listen for hissing, and gently tighten accessible fittings. Containment for base leaks: Place towels or a shallow tray under the base and observe after several flushes. This checklist narrows whether you’re dealing with a running toilet, a base leak, or a supply‑connection issue and points to the next repair steps. If multiple parts fail or you see structural damage, call a professional for a safer, more reliable fix. How to Identify a Running Toilet and Internal Leaks? A running toilet wastes water constantly and usually stems from a flapper that won’t seal, a misadjusted fill valve, or a broken chain. Signs include steady water noise, frequent refilling, and rising water bills. The dye test—dropping food coloring into the tank and watching the bowl—quickly reveals if water is bypassing the flapper. If the tank overfills and spills into the overflow tube, adjust or replace the fill valve. Fixes are straightforward: replace the flapper, adjust the chain, or install a new fill valve. After any repair, run several flush cycles to confirm the seal holds and the tank refills to the correct level. If issues persist, inspect for a warped tank seat or small cracks that stop
Fixing a Weak or Incomplete Toilet Flush
Fixing a Weak or Incomplete Toilet Flush: Clear Causes, Simple DIY Fixes, and When to Call a Pro A weak or incomplete toilet flush happens when the bowl doesn’t get enough water flow to form a proper siphon, leaving waste behind, prompting extra flushes, or causing slow drainage. It matters because a poor flush leads to recurring clogs, bad smells, and wasted water. This guide walks you through how the tank, rim jets, siphon action, and drain/vent system work together, shows practical DIY checks and fixes you can try safely, and explains when it’s time to call a professional. You’ll find common causes, step‑by‑step home repairs for water level and jet cleaning, clear signs that need a plumber, the professional services that fix the full range of problems, and simple maintenance tips to keep your toilet flushing reliably. Read on for straightforward, actionable steps to restore flush power and for help getting expert service if needed. What Are the Common Causes of a Weak or Incomplete Toilet Flush? Most weak flushes come from one of a few issues: not enough water in the tank, blocked rim or siphon jets, worn tank parts like the flapper or fill valve, or a partial clog or vent issue in the drain line. The tank’s job is to release enough water to start a siphon in the bowl—if volume or jet flow is reduced, that siphon never fully forms and the bowl won’t clear. Start diagnosing by watching symptoms: continuous running usually points to a flapper or fill valve problem, a weak swirl points to clogged jets, and gurgling drains point to venting or downstream clogs. Work through checks in order: tank water level and flapper first, visible jets and the trap next, and if problems persist move on to drain and vent diagnostics. The table below matches common causes to typical symptoms, homeowner fixes, and urgency to help you prioritize. The table below helps match observable symptoms to probable causes and recommended next steps. Cause Symptom Typical DIY Fix Urgency Low tank water level Weak flush, low waterline Adjust fill valve/float, check for leaks Low–Moderate Clogged rim jets / siphon jet Poor bowl sweep, lingering solids Clean jets with vinegar/brush, manually clear siphon jet Low–Moderate Faulty flapper valve Continuous running or weak suction Replace flapper or adjust chain Moderate Malfunctioning fill valve Slow refill, wrong water height Replace or rebuild fill valve assembly Moderate Partial drain or vent blockage Gurgling, slow drain, repeated clogs Snaking, camera inspection, vent clearing Moderate–High This quick comparison shows that many weak flushes start with tank or jet issues and can escalate into drain or vent problems if ignored. Next up: homeowner troubleshooting steps you can try safely. How Does Low Water Level in the Toilet Tank Affect Flush Power? Tank water level matters because flush force depends on the volume and height of water pushing into the trapway. If the fill valve is set too low or the tank leaks, there isn’t enough mass to create a full siphon, so each flush is weaker. To check the level, remove the lid, look for the marked water line or compare to the overflow tube height, and run a manual fill test to see if the valve stops where it should. If the level is low, adjust the float or replace an aging fill valve. If the water won’t hold, inspect the flapper for leaks or other hidden leaks. Once you understand tank volume, you’ll know which float or valve adjustments to make next. What Role Do Clogged Toilet Rim Jets and Siphon Jets Play? Rim jets and the siphon jet focus water to start the bowl’s swirl and lift waste into the trapway. Mineral deposits and debris shrink those openings and scatter flow, so the flush won’t form a full siphon. When rim jets are partly blocked the flush feels weak and solids may linger—use a flashlight to inspect the rim holes for reduced flow. Many deposits come off with safe household methods: vinegar soaks, brushing, or running water through the siphon jet. Severe encrustation may need professional descaling or part replacement. Since jet cleaning is low risk and often effective, try safe cleaning first before replacing tank parts or calling for drain work. How Can Homeowners Troubleshoot and Fix a Weak Toilet Flush Themselves? You can resolve many weak‑flush problems by following a simple, safety‑first sequence that moves from easy checks to basic repairs. Start with the tank water level, watch a full flush to see how the tank and bowl behave, inspect the flapper and chain, and look into the rim and siphon jets for buildup. If the water level is low, adjust the float or fill valve; if the flapper leaks or chain is off, reseat or replace it; if jets are clogged, try a vinegar soak and a small brush or flexible wire to clear deposits. Keep tools basic—adjustable pliers, a screwdriver, a small brush, vinegar, and gloves—and stop and call a pro if you find persistent leaks, sewage smells, or backups in multiple fixtures. These steps catch the most common causes and prepare you for any next actions. Before you start, gather tools and safety items and make sure you’re comfortable following step‑by‑step adjustments—accurate adjustments stop overflows and avoid repeat visits. Gather basic tools: adjustable pliers, screwdriver, towel, rubber gloves, small brush, and vinegar. Observe one complete flush: watch tank and bowl behavior and note whether water level or flapper action looks abnormal. Start with the easiest fixes: adjust float height, reseat or replace flapper, clean rim jets, then retest flush performance. Work through these steps in order to raise the odds of fixing the issue yourself and to avoid replacing parts you don’t need. How to Adjust the Water Level in Your Toilet Tank Step-by-Step Adjusting the tank level depends on the fill valve and float type. Common setups are float cup assemblies, float arms, and modern integrated fill valves—each adjusts a little differently. For a float cup, pinch the clip
Fixing a Running Toilet: Causes and Solutions
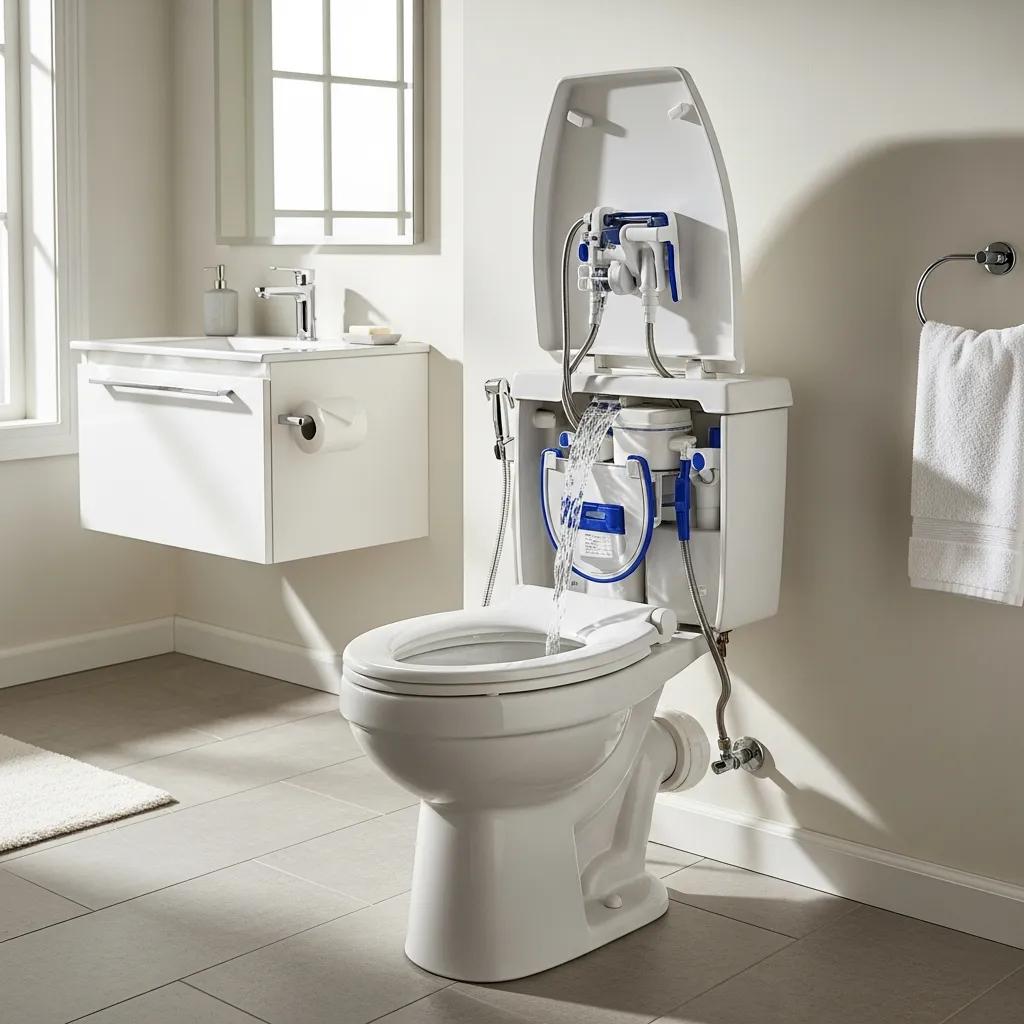
How to Fix a Running Toilet: Causes, Simple DIY Fixes, and When to Call a Pro A running toilet is one that keeps letting water flow from the tank into the bowl after a flush — either steadily or on and off. That wasted water raises your bill and creates annoying noise. This guide walks you through why toilets run, how the tank’s parts are supposed to stop the flow, and practical steps you can take: from quick DIY checks to knowing when to call a licensed plumber. You’ll get simple diagnostic methods (like the dye test), targeted fixes (flapper swaps, fill‑valve adjustments), and a ballpark idea of costs for Michigan homeowners. The focus is on safe, effective repairs and bringing in local pros when needed. For immediate service, call Frost and Kretsch Plumbing 24/7. Read on for clear steps, checklists, and quick reference tables to save water and get the job done right. What Is a Running Toilet and Why Does It Matter? A running toilet means water keeps moving from the tank to the bowl after the flush should be finished. That usually happens because seals, valves, or settings inside the tank aren’t doing their jobs. Even a small leak can waste a lot of water, push up your utility bills, and create noise or moisture problems in the bathroom. Fixing a running toilet quickly saves water and helps avoid long‑term damage to floors or nearby fixtures. Below we explain how the tank’s parts normally stop flow and how to weigh the environmental and cost impacts so you can prioritize the repair. Most running toilets are caused by failures or misadjustments in a few common parts: the flapper, fill valve, float, chain, or overflow tube. In the next section we’ll describe what each part does so you can match the symptom you see to the likely problem and pick the right fix. A running toilet is continuous or intermittent water flow from the tank to the bowl after a flush. Typical causes are a worn flapper seal, a misadjusted float, a faulty fill valve, chain or handle issues, or sediment-clogged parts. Fixing it promptly saves water, lowers bills, and prevents moisture damage to your bathroom. The short list above covers what you’re most likely to find. Next we’ll show how the tank’s mechanism is supposed to keep water from running so you can see why each part matters. How Does a Toilet Mechanism Work to Prevent Running? Your toilet tank stops water from running using a few parts that work together. The flapper or seal closes the flush valve after a flush so water stops entering the bowl. The fill valve and float let water back into the tank and shut it off once the right level is reached. The overflow tube prevents overfilling by sending excess water into the bowl instead of out of the tank. Knowing how these pieces interact makes it easier to trace a symptom — like a steady trickle or intermittent refills — back to the most likely faulty part. A normal flush starts when the handle lifts the flapper and water rushes into the bowl. After the tank empties the flapper should reseal and the fill valve should refill the tank to the float’s set level. If the float is set too high, water can run into the overflow tube; if the flapper is warped, it can leak. Understanding those relationships helps you follow the inspection and diagnosis steps below. What Are the Environmental and Cost Impacts of a Running Toilet? One running toilet can waste hundreds of gallons a day depending on the leak. Even small leaks add up quickly and raise your water bill while putting extra strain on municipal systems or septic setups. Beyond the monthly cost, persistent leaks increase the chance of moisture damage — mold, mildew, or subfloor rot — especially in older bathrooms with poor ventilation. Because of these risks, it pays to find and fix leaks early. The next section shows quick ways to identify leaks and decide which repairs will get your toilet back to efficient operation. Early detection reduces wasted water and the likelihood of secondary damage. The diagnostic steps ahead will help you judge leak severity and decide whether a simple parts swap or a professional visit is the best next move. You’ll use the dye test, listening checks, and water‑level inspections to map symptoms to causes. What Are the Most Common Causes of a Running Toilet? Most running toilets trace back to a handful of parts that either wear out or get out of adjustment. The usual suspects are the flapper, fill valve, float assembly, chain or handle linkage, and the overflow tube. Sediment inside the valve body can also keep parts from sealing. The table below is a quick reference to help you scan each component, see how it fails, and recognize the likely symptom. Intro: This table lists the main tank components that cause running toilets, how they typically fail, and the symptoms that point to each part. Use it while you inspect the tank. Component Typical Failure Mode Likely Symptom Toilet Flapper Wears out, warps, or won’t seal Slow, continuous leak into the bowl after a flush Fill Valve Clogs, wears internally, or sticks Constant trickle or occasional short refills Float (cup/ball) Set too high, binds, or misadjusted Tank water rises to overflow or won’t shut off correctly Chain / Handle Linkage Chain too long/short or caught on parts Flapper won’t seat or doesn’t lift fully Overflow Tube Cracked, damaged, or set too low Water flows into bowl while tank is refilling This quick table helps you focus your inspection. Next we’ll dig into the flapper — the part most often at fault — and what to look for when you open the tank. How Does a Faulty Toilet Flapper Cause Running? The flapper is the main seal between the tank and the flush valve. When it gets brittle, warped, or coated in mineral deposits it can’t
How to Stop a Toilet from Running Constantly
How to Stop a Toilet from Running Constantly: Simple DIY Fixes and When to Call a Plumber A toilet that runs non‑stop is more than a nuisance — it wastes water, drives up your bill, and can hide a more serious plumbing problem. This guide helps homeowners quickly diagnose why a toilet keeps running after a flush, walks through safe DIY fixes for the most common issues, and explains when it’s time to call a licensed plumber. You’ll learn how the flapper, fill valve, float, and overflow tube work together, step‑by‑step fixes for each part, what affects a professional estimate, and simple maintenance to prevent repeat problems. We include checklists, tool lists, and quick troubleshooting so you can act confidently — whether you fix it yourself or arrange professional service. Safety, efficient diagnosis, and clear signs that a job is beyond DIY are emphasized throughout. Why Does My Toilet Keep Running? Common Causes Explained A running toilet means water keeps flowing from the tank into the bowl after the flush cycle ends. That usually happens when a tank component won’t seal or shut off: a worn flapper, a misadjusted float, a failing fill valve, or a cracked overflow tube that lets water siphon away. The immediate result is wasted water and noise; left unchecked, these problems can get worse. Below we list common causes and the symptoms you can spot without special tools — this helps you decide whether a DIY fix is reasonable or if you should call a pro. What Is a Running Toilet and How Does It Waste Water? A toilet runs when the tank can’t stop water from flowing into the bowl after the tank should be full. The flapper or seal must close tightly and the fill valve must shut off at the correct level; if they don’t, water constantly bypasses into the bowl. Depending on the leak, one running toilet can waste dozens to hundreds of gallons a day, which raises your water bill and strains local supplies. In an emergency, close the toilet’s shut‑off valve to stop the flow, then start the diagnosis. Knowing how the parts interact will help you tell if the issue is a simple seal problem or a deeper internal fault. Which Toilet Components Cause Constant Running? Several tank parts must work together to control flushing and refill. The flapper seals the flush valve, the fill valve lets water in, the float tells the valve when to stop, and the overflow tube prevents overfilling. Common signs: a worn flapper often causes a slow hiss or intermittent refill; a misadjusted float lets water spill into the overflow tube; and a tired fill valve may constantly run or be noisy. Start by checking the chain, seat, and rubber flapper for wear or debris — that often points to the problem. More subtle issues, like internal valve failure or a cracked fitting, may need deeper troubleshooting. Identifying the faulty component directs you to the right repair steps below. How Can I Fix a Running Toilet Myself? Step-by-Step DIY Repairs Many running toilets can be fixed by a handy homeowner with a few basic tools, common sense, and the right steps. The usual process: shut off the water, drain the tank, inspect the flapper and seat, test and adjust the float/fill valve, and replace worn parts as needed. The sections that follow include a tools list, concise float adjustment tips, step‑by‑step flapper replacement, and fill valve troubleshooting so you can stop the most frequent causes of running. Use the correct replacement parts for your toilet model and follow manufacturer instructions; if you see tank damage or anything unclear, stop and call a professional. The quick reference table below links parts to likely fixes and suggested tools. Component Common Fix Suggested Tool/Part Flapper valve Replace worn rubber flapper Replacement flapper kit, adjustable wrench Fill valve Clean or replace the valve assembly Fill valve replacement kit (model specific), pliers Float (ball/ cup) Adjust the level or swap the float Screwdriver, adjustment clip or new float Overflow tube Lower water level or replace tube Overflow assembly or trim tool, utility knife Gathering the right parts and tools before you start cuts down trips to the store and makes testing adjustments faster. The following H3s break each repair into clear, actionable steps. What Tools Do I Need to Repair a Running Toilet? Put together a small toilet repair kit so each task is quick and clean. Essentials: an adjustable wrench for the shut‑off nut, flat and Phillips screwdrivers for clamps and brackets, a replacement flapper or universal kit, a fill valve kit if needed, and a sponge or towel for tank water. Optional but useful: needle‑nose pliers, a small flashlight to peer into the tank, and a bucket for catching water. Having parts and tools ready reduces mistakes and lets you test changes right away. If you find corrosion or cracked parts, consider a professional assessment. How to Adjust the Toilet Float to Stop Running Water Setting the float correctly stops the fill valve at the right water level and prevents overflow. For a ball float, gently bend the arm or turn the adjustment screw to lower the water level. For a float cup, squeeze the clip or turn the adjustment screw on the fill valve body to move the cup down a little at a time. After each small change, flush and watch the refill — the water should stop about one inch below the overflow tube. If adjustments don’t fix continuous running, the fill valve may be worn and need replacement. Float adjustments are quick and often solve the problem. How to Replace a Leaky Flapper Valve Replacing the flapper is one of the easiest, most effective fixes for a running toilet caused by a poor tank seal. Turn off the water and flush to drain most of the tank, disconnect the chain from the flush handle, and remove the old flapper from its pegs or seat. Wipe the valve seat to remove mineral
Quick Remedies for a Clogged Toilet
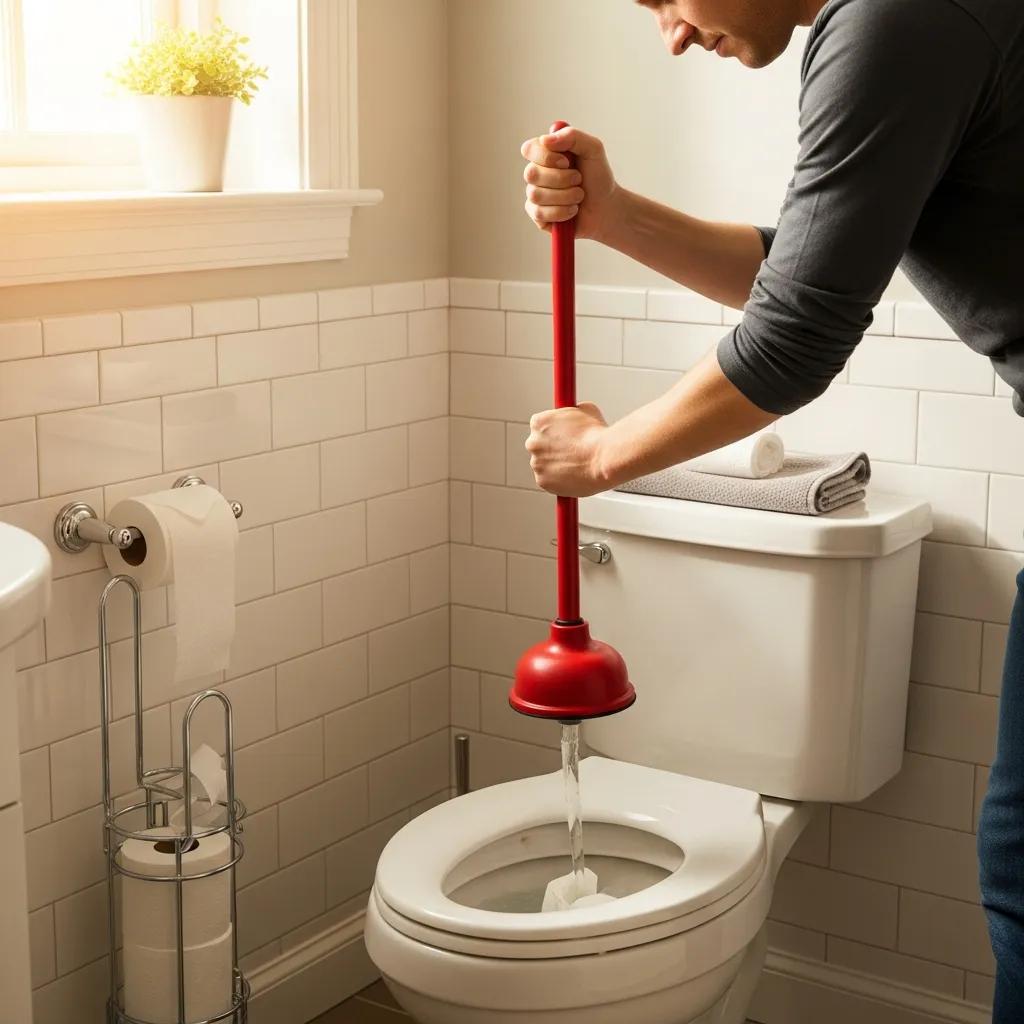
How to Unclog a Toilet Fast: Quick Remedies and Expert Solutions for Clogged Toilet Repair A clogged toilet is an unexpected hassle that can quickly turn into water damage or a health concern if left unchecked. Quick action and the right approach usually prevent bigger problems. This guide walks you through common causes of toilet blockages, prioritized DIY fixes you can try safely, signs that a clog is an emergency, and the professional tools and services that stop repeat problems for good. You’ll learn which plunger to use, when household fixes like dish soap and hot water help, and when it’s wiser to stop DIY and call a plumber. We also compare common homeowner methods with pro options — toilet augers, drain snakes, hydro jetting, and camera inspection — so you can match symptoms to the right solution. By the end you’ll have clear, practical rules for quick fixes, emergency indicators, and prevention habits that reduce future clogs. What Are the Common Causes of a Clogged Toilet? Toilets clog when the toilet trap, S-bend, or a downstream sewer line is blocked and water can’t flow normally. Typical causes include too much toilet paper, non-flushable wipes, sanitary products, or small objects pushed into the bowl. Sometimes the issue is outside your home — tree roots, collapsed pipe sections, or grease buildup in commercial systems create symptoms that plunging won’t fix. Identifying the likely cause helps you decide whether a quick DIY remedy will work or if you need professional help. The section below shows the usual offenders and the symptoms they create so you can size up the problem before you act. Common causes and how they usually show up: Excessive toilet paper: Large clumps slow flow and often respond well to a plunger. Wet wipes and sanitary products: These expand and tangle in the trap, creating stubborn clogs that basic plunging often won’t clear. Foreign objects (toys, small items): Objects can get lodged past the rim into the trap and cause immediate, persistent blockages. Symptoms that point to the root cause: Slow drain in one fixture usually signals a localized toilet trap clog. Multiple slow drains or gurgling suggest a main sewer-line issue that needs professional tools to diagnose and fix. Sewage odor or yard sinkholes indicate serious sewer problems beyond DIY repair. Which Household Items and Behaviors Lead to Toilet Blockages? Most residential clogs come from items people flush by habit. Wet wipes, paper towels, feminine products, dental floss, and similar non-degradable items usually catch in the trap or travel down the line and cause backups. In commercial or shared bathrooms, grease and heavy solids can build up over time and narrow pipes, raising the chance of sudden clogs. To reduce risk: toss non-flushables in a trash bin, use moderate amounts of toilet paper per flush, and remind household members or tenants what not to flush. These simple habits cut the number of clogs and make quick homeowner fixes more likely to succeed. How Do Sewer Line Issues Affect Toilet Clogs? If the blockage sits past the toilet — in the sewer main or lateral line — symptoms move from a single slow bowl to multiple fixtures acting up, often with gurgling sounds and sewer smells. Root intrusion, grease mats, collapsed pipe sections, or a blocked municipal line can back water into low points like toilets, basement drains, or shower pans. Plunging or enzyme cleaners rarely fix these conditions because the obstruction is out of reach, and repeated DIY attempts can push debris farther or damage the line. Spotting these signs early saves time and redirects you to professional inspection and cleaning that address the underlying sewer issue. What Are the Most Effective DIY Toilet Clog Solutions? For most household clogs, follow a step-by-step approach from least to most invasive: plunge correctly first, try safe household remedies next, and use a toilet auger only if needed. This sequence lowers the risk of damaging fixtures or pipes and maximizes the chance of a fast fix. A basic kit — flange plunger, rubber gloves, bucket, dish soap, and hot (not boiling) water — will handle about 80% of minor clogs. If these steps don’t clear the problem, or if multiple fixtures are affected or sewage is present, stop and call a licensed plumber to avoid worsening the situation. Quick how-to summary for the top three DIY methods: Plunge first to force out trap obstructions. Use dish soap + hot water if plunging doesn’t work and there’s no sewage exposure. Try baking soda + vinegar or enzyme cleaners for organic buildup, but never mix chemical products. Method Best for Time-to-effect Risk / When to stop Flange plunger Standard trap clogs Minutes Stop if water rises uncontrollably or sewage is present Hot water + dish soap Grease or soft paper clogs 10–30 minutes Avoid boiling water; stop if no improvement after two attempts Baking soda + vinegar / enzymes Organic buildup Several hours to overnight Do not mix with chemical cleaners; stop if multiple fixtures are affected How To Use a Toilet Plunger Effectively for Minor Clogs? Use a flange-style plunger for toilets — it seals the bowl outlet and uses pressure to dislodge material in the trap. Fit the flange into the outlet, get an airtight seal, then use slow push-pull motions to compress air before pumping with firmer strokes (10–20 pumps), then test the flush. Warm water in the bowl improves the seal and helps break up material. Wear gloves and clean the plunger head after use. If plunging moves the water but doesn’t clear the clog after several attempts, don’t overdo it — an auger or pro service is the safer next step. Which Household Remedies Work Without a Plunger? If you don’t have a plunger, a few household remedies can clear soft clogs if used carefully. Pour a generous amount of dish soap into the bowl, wait a few minutes, then add hot (not boiling) water to lubricate and break up paper or grease — this often works
Water Heater Sediment Buildup: Causes and Removal
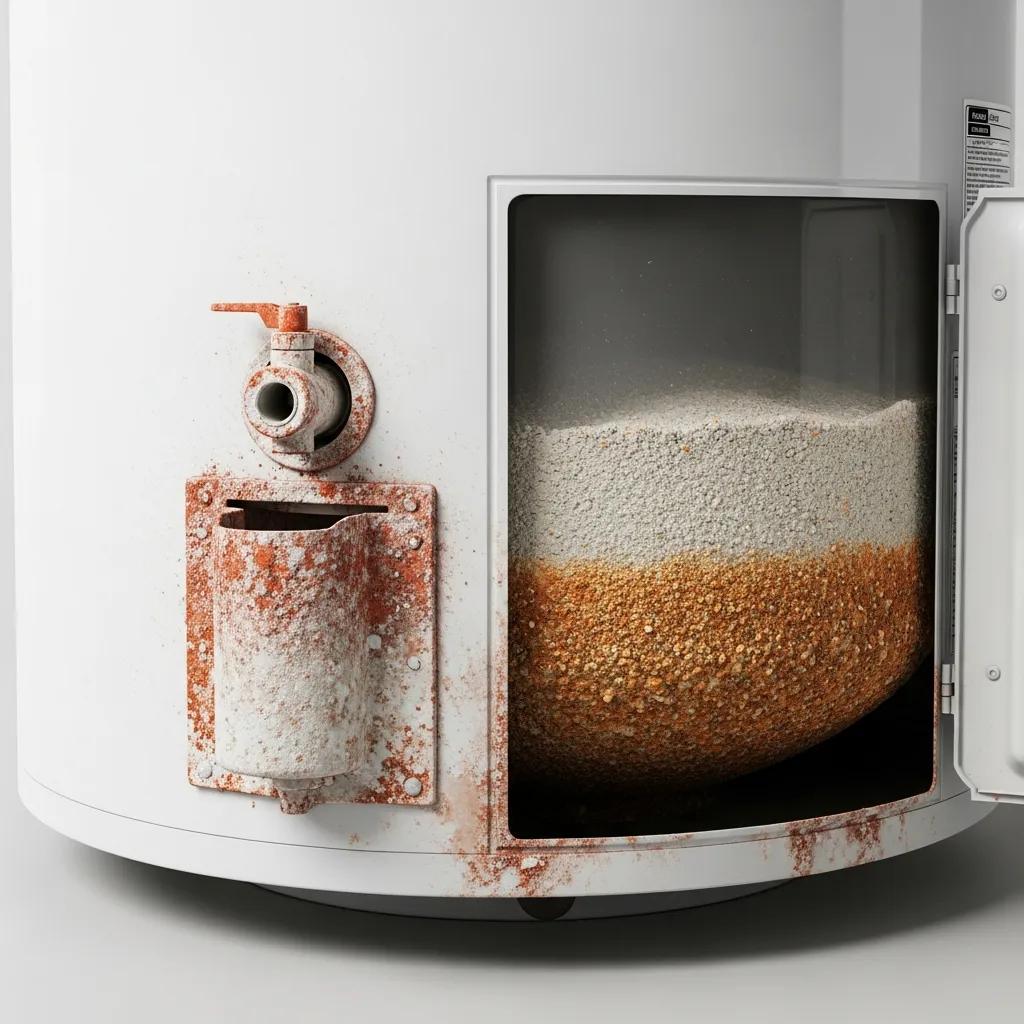
Water heater sediment: causes, signs, and professional removal for dependable hot water Sediment in a water heater is the build-up of mineral scale and particles—mostly calcium carbonate and magnesium—that settles in tanks and heat exchangers. Left unchecked, these deposits lower efficiency and shorten the life of your equipment. This guide helps homeowners and building managers spot early warning signs, weigh the risk, and pick the right fix—whether that’s a routine flush or professional descaling. You’ll learn why sediment forms, how it reduces performance, and what to do for gas, electric, and tankless systems. We cover the chemistry (hard water and heat), part wear (anode rods and dip tubes), symptom mapping (noise, less hot water, element failure), and practical DIY versus pro decision points. We also outline the professional flushing and descaling steps, when to call a licensed tech, and sensible maintenance like anode checks and water softening. Keywords such as flush water heater, sediment removal, water heater flushing, and water heater descaling are used here to guide practical next steps. What causes sediment buildup in water heaters? Sediment forms when dissolved minerals and tiny particles come out of heated water and settle on the tank bottom or inside heat exchangers. These layers act as insulation, trap water, and reduce heat transfer. The main chemical driver is that calcium and magnesium become less soluble at higher temperatures and form solid carbonates. Corrosion bits from internal parts and dirt from the supply can add to the problem. Knowing that both water chemistry and equipment condition play a role makes it clear why prevention involves both testing water and keeping parts in good shape. Common sediment sources and attributes: Source Characteristic Typical Impact Hard water Main minerals: calcium & magnesium Forms calcium carbonate scale that settles Corroding anode rod State: corroded or intact Produces rust particles and accelerates deposits Municipal changes Events: pipe work or flushing Introduces sand/silt that settles in tank This table shows how different sources produce different deposits, which affects how you remove them and what preventive steps work best. How does hard water contribute to mineral deposits? Hard water speeds up deposit build-up because higher levels of calcium and magnesium drop out of solution when the water is heated, forming insoluble carbonates that settle on the tank floor and heating surfaces. Each heat cycle concentrates more solids and thickens those layers—so homes with harder water need to flush more often. You might notice scale on fixtures, shorter element life, or the need for more frequent maintenance. Local water quality data often show higher element failure and efficiency loss where water is moderately to very hard, so use that information to set your maintenance schedule. Simple fixes include regular flushing or adding a water softener to reduce mineral load. What role does anode rod degradation play in sediment formation? The anode rod is a sacrificial part that corrodes to protect the tank’s steel shell. When it degrades, corrosion particles add to tank sediment. A good anode rod slows metal leaching and delays tank corrosion; a worn rod leaves behind rust and metallic particles that mix with mineral scale, increasing insulation and abrasive wear. Inspect and replace the rod on schedule—signs to watch for include heavy pitting, a noticeably thinner rod, or foul‑smelling hot water. Regular anode care reduces corrosion-derived sediment and helps avoid follow-on problems. What are the common symptoms and effects of sediment buildup? Sediment shows up as popping or rumbling noises, less available hot water, higher energy bills, and faster component wear. Deposits trap water against heat sources, encourage localized boiling, and form crusts that block heat transfer—these mechanisms lead to the symptoms homeowners notice. Below is a quick symptom-to-mechanism table to help you match what you hear or see with likely causes and decide whether to flush or call a pro. Symptoms mapped to mechanisms: Symptom Mechanism Resulting Issue Rumbling or popping Boiling of trapped water under sediment Audible noise and potential tank stress Reduced hot water supply Sediment reduces effective tank volume Perceived lower capacity and shorter hot cycles Element failure / high energy Insulating layer increases heat time Higher energy use and burned-out elements This table links what you observe to the underlying problem and why acting early prevents bigger damage and waste. How does sediment cause noisy water heater operation? Noise happens because sediment on the bottom traps pockets of water that heat to boiling and then release steam in bursts, producing rumbling or popping. Left long enough, those pressure changes can stress the tank and fittings. If the sounds persist or grow louder they usually point to moderate or severe buildup and often come before element failures or leaks. Listen during a heating cycle—if noise doesn’t ease after a basic flush, you likely need deeper descaling or a professional inspection. Treating noise as an early warning saves time and money. What impact does sediment have on hot water supply and efficiency? Sediment acts like an insulating blanket, reducing heat transfer from burners or elements to the water. The system runs longer to reach temperature, which raises energy use and reduces available hot water for back‑to‑back uses. Deposits also take up usable tank volume and create cold pockets, so a tank that once worked fine may suddenly fall short. Over time, increased cycling and overheating wear out elements, burners, and thermostats. Manufacturer guidance and studies show heavy sediment can cut efficiency noticeably—professional descaling often restores much of that lost performance. How can professional water heater flushing and descaling services help? Professional flushing and descaling remove settled minerals and corrosion by‑products using tools and techniques beyond a standard homeowner drain-and-flush. That work restores heat transfer, quiets noisy units, and extends service life. Pros follow safety checks, isolate gas or power, perform controlled draining, use mechanical agitation or high-flow rinsing, and apply chemical descalers when needed for tankless or confined heat exchangers. The result: better efficiency, restored hot water capacity, a component inspection, and a lower risk of premature failure when combined with anode checks
Smart Water Heaters: Features, Benefits, and Control
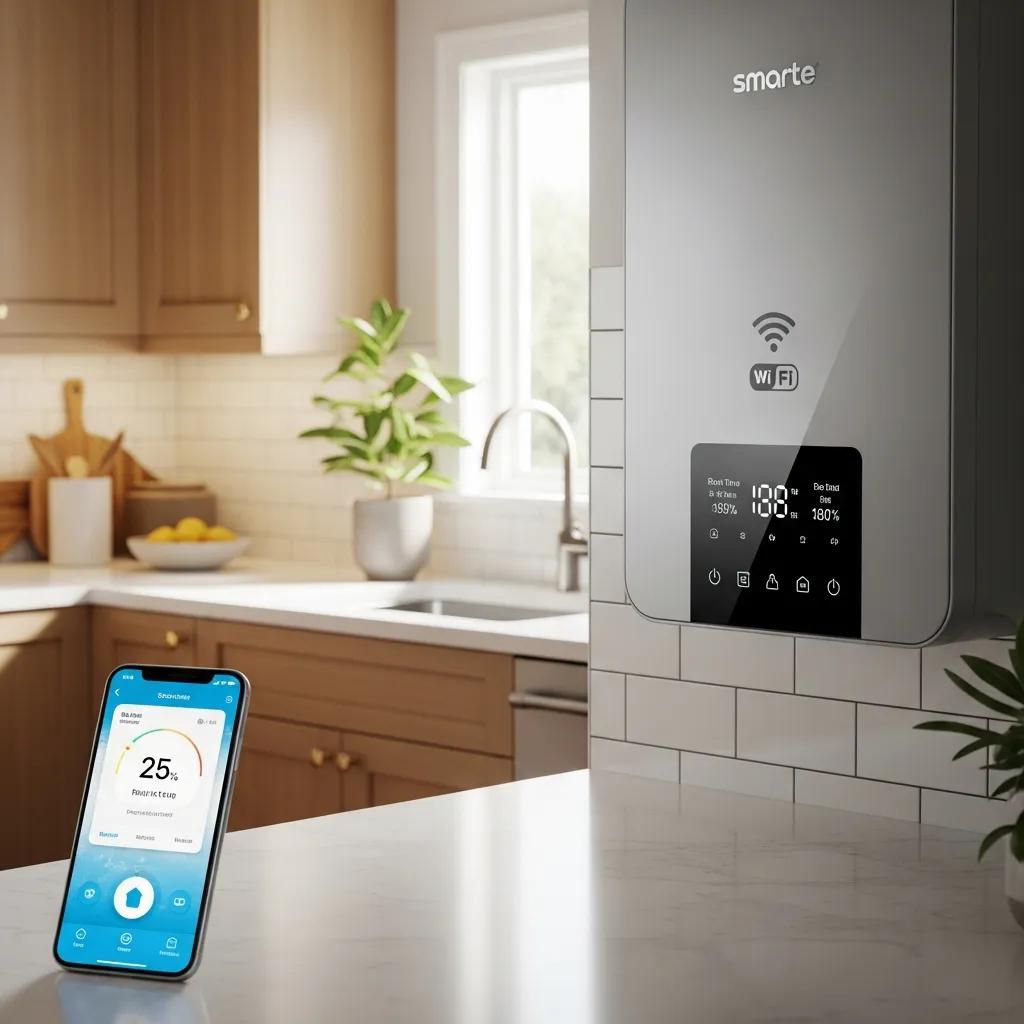
Smart Water Heaters: Features, Benefits, and Easy Control for Homes & Businesses Smart water heaters connect sensors, networked controls, and energy monitoring so you get hot water when you need it — with less waste. They use temperature probes, smart thermostats, and Wi‑Fi modules to adjust heating cycles, cut standby losses, and give homeowners and business operators clear usage data. This guide explains how smart water heaters work, highlights features like energy tracking and leak detection, compares electric, gas, hybrid and tankless smart models, and shows how to control and maintain them with apps and smart‑home systems. You’ll also find practical cost considerations for the Grosse Pointe area, typical savings examples, and clear signs to call a licensed local technician. Read on for a straightforward, actionable overview that helps you choose, install, and keep a smart water heater running reliably. What Is a Smart Water Heater and How Does It Work? A smart water heater adds sensors, a controller, and internet connectivity to a standard water heater so it can monitor temperature, track energy use, and accept remote commands. Sensors read tank or outlet temperature and flow, the controller adjusts elements or burners on a schedule, and a Wi‑Fi module sends data to an app or cloud service for monitoring and remote control. The result is on‑demand control, automatic schedules that cut energy waste, and diagnostic alerts that can spot problems before they interrupt service. Understanding these basics makes it easier to see how features like leak detection and utility demand‑response actually save money and hassle. What Are the Key Components of Smart Water Heaters? Smart systems depend on a few simple parts: temperature sensors, a thermostat/controller, a Wi‑Fi comms module, and a mobile app for the user. Sensors feed real‑time data to the controller, which runs heating cycles and can trigger modes like vacation or boost; the Wi‑Fi module relays usage and diagnostic information to the app for remote control and energy reports. Optional add‑ons include leak sensors that can shut off supply and energy monitors that log kWh and estimated cost. The chain is straightforward: sensor → controller → cloud/app — enabling automated responses and actionable alerts that reduce downtime and waste. How Do Smart Water Heaters Integrate with Home Automation Systems? Most smart water heaters work with common home automation tools — voice assistants and automation platforms — so you can use hands‑free commands and set routines. Integrations commonly let you change setpoints by voice, schedule preheats during off‑peak hours, and pause heating if a leak is detected or the house is set to “away.” These links usually run over Wi‑Fi, cloud APIs, or IFTTT‑style services; some brands may need a proprietary account or hub for full features. Planning your integration before a retrofit helps avoid compatibility issues and ensures the heater fits into your broader home energy plan. What Are the Main Features of Smart Water Heaters? Smart water heaters combine connectivity and sensors to save energy, increase safety, and simplify management. Core features include Wi‑Fi control and scheduling, energy monitoring with usage history, automatic leak detection and shutoff, remote diagnostics and alerts, plus demand‑response and vacation modes to shift use to cheaper times. Those features translate to lower bills, fewer emergencies, and more predictable hot water for homeowners and property managers. Below is a compact comparison of common features and the user value they provide. Feature Mechanism User Value Wi‑Fi control Remote setpoint and scheduling through an app Convenience and the ability to preheat before you arrive Energy monitoring kWh tracking and simple cost estimates Clear bill insights and behavior‑driven savings Leak detection Sensor alerts and automatic shutoff Helps prevent water damage and costly repairs Demand response Off‑peak scheduling and utility signaling Lower bills and more grid‑friendly operation This table shows how each feature moves from hardware to real benefits at home or work. The sections below look closer at Wi‑Fi control and energy monitoring in everyday use. How Does Wi‑Fi Control Enhance Water Heater Management? Wi‑Fi control turns a heater from a passive device into an actively managed system with schedules, remote temperature changes, and instant alerts. App features usually include programmable schedules, boost and eco modes, and push notifications for errors or leaks — so you can preheat for guests, scale back during long absences, and react fast to problems. Wi‑Fi also lets technicians check diagnostics before a visit, cutting unnecessary trips and speeding repairs. When planning an upgrade, check the app’s security, update policies, and account requirements so your connection stays reliable and private. What Energy Monitoring Benefits Do Smart Water Heaters Offer? Energy monitors show real‑time kWh and compile historical use so you can spot patterns and make smarter schedule choices. Seeing when the heater uses the most power — and how setpoints affect use — helps shift heating to off‑peak hours or lower standby temperatures during extended absences. Paired with adaptive scheduling, monitoring often reduces consumption by trimming unnecessary reheats and standby losses. For businesses, these reports make it easy to allocate costs across departments or tenants and find more efficiency opportunities. What Are the Benefits of Upgrading to a Smart Water Heater? Upgrading brings economic, safety, and operational gains for homes and businesses. Financially, smart scheduling and reduced standby loss lower energy bills and can speed payback, especially with efficient heat‑pump hybrids or tankless units. Safety features like leak detection with automatic shutoff and remote alerts reduce the risk of water damage, while remote diagnostics and predictive alerts cut downtime and repair expenses. There’s an environmental upside too: smarter use and load shifting reduce overall energy demand and emissions. Together, these benefits make smart water heaters a strong option for owners focused on efficiency and peace of mind. If you’re considering an upgrade, a local service partner can do a site assessment to estimate savings and recommend the right model for your hot‑water needs. Frost & Kretsch Plumbing provides clear estimates, works with brands such as Lochinvar and Bradford White, and sends licensed, insured technicians for installations and
Recirculating Hot Water Systems: Instant Hot Water & Savings
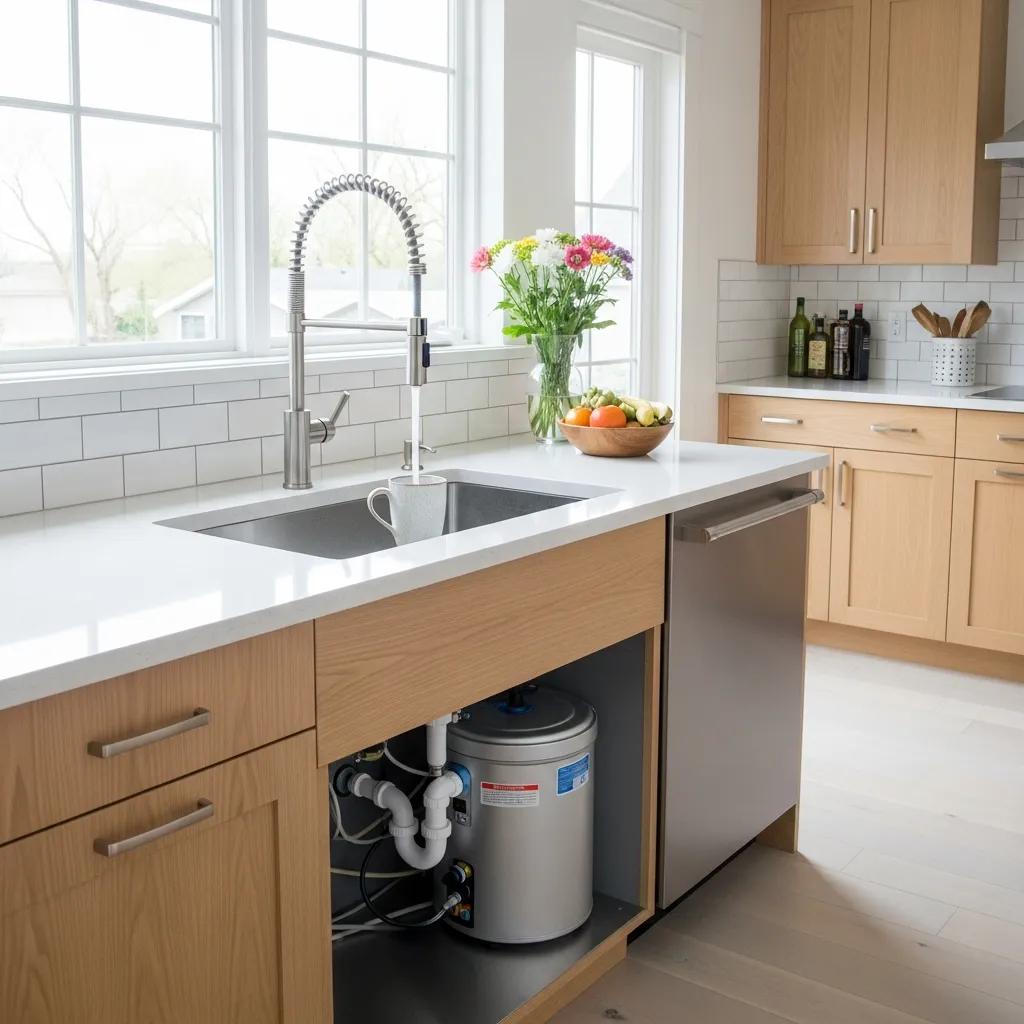
Recirculating Hot Water Systems: Instant Hot Water and Real Energy Savings for Grosse Pointe Homes and Businesses Waiting for hot water wastes time and gallons. A recirculating hot water system fixes that by keeping hot water moving through a loop so faucets and fixtures deliver warm water the moment you turn them on. This guide explains how recirculating and demand hot water systems work, estimates typical water and energy savings, and walks Grosse Pointe homeowners and business owners through installation, maintenance, and choosing the right system. You’ll learn the core parts of a recirculation loop, the difference between dedicated return lines and under‑sink crossover setups, common pump power and payback timelines, and practical steps for new construction and retrofit projects. We also include side‑by‑side comparisons, clear checklists for sizing and budgeting, and easy tables that match system types to installation complexity, pump wattage, water savings estimates, and cost ranges. Real examples and troubleshooting tips make it easier to decide whether a demand‑controlled pump, a continuous pump, or a tankless + recirculation hybrid is best for your Grosse Pointe property. Ready for a site assessment? We outline local service options and next steps so you can move from planning to action with confidence. What Are Recirculating Hot Water Systems and How Do They Provide Instant Hot Water? A recirculating hot water system keeps hot water moving through your supply piping so fixtures receive hot water immediately, which cuts waiting time and prevents wasted water. The system uses a pump to push water around a loop and either a dedicated return line or a crossover valve that lets cooled water at fixtures return to the heater; sensors or timers control the pump to reduce energy use. You get instant hot water because the pipes near your taps hold warm water instead of cold that must be run off. Understanding these basics helps you weigh retrofit effort against long‑term savings, which we cover next. Definition and Key Components of Hot Water Recirculation Pumps The recirculating pump is the system’s core — it moves heated water through the pipes so hot water is ready at fixtures and wait time drops. Pumps come in demand‑controlled and continuous styles: demand units work with sensors, timers, or motion detectors, while continuous pumps keep a low‑flow loop moving at all times. Both setups need check valves and often include a sensor/valve assembly for efficient operation. The return path can be a dedicated return line in new builds or an under‑sink crossover valve for retrofits; other parts like isolation valves, thermostatic mixers, and strainers affect durability and serviceability. Knowing each component’s role clarifies maintenance needs and shows where professional installation brings the most value — we compare loop designs next. How Demand Hot Water Systems Work: Dedicated Return Line vs. Crossover Systems A dedicated return line creates a true loop with separate supply and return piping, keeping hot water close to fixtures and minimizing mixing at endpoints. A crossover, or comfort, system uses an under‑sink valve or a pump‑with‑sensor‑valve arrangement that returns cooled water to the heater through the cold line during a demand event — a retrofit option that avoids opening walls but can increase cold‑line cycling slightly. Dedicated loops are usually the best choice for new construction or major remodels because they deliver top performance and lowest water waste. Crossover systems suit existing plumbing and moderate use patterns. Your choice depends on budget, how much disruption you’ll tolerate, and expected usage — all good reasons to compare benefits before deciding. What Are the Benefits of Energy Saving Hot Water Recirculation? Recirculating hot water systems cut wait time, save municipal water, and — when paired with demand controls — limit energy use while improving day‑to‑day convenience. Actual savings depend on household size and habits, but a well‑designed system can save thousands of gallons per year, reduce water‑heating waste, and often pay back within a few years depending on pump type and controls. Energy‑efficient pumps combined with timers, motion sensors, or smart controls run only when needed, keeping electrical draw low and producing net utility savings that can offset installation costs. Those practical benefits are why a professional assessment is worth considering. The table below ties common benefits to typical metrics so you can compare expected impacts at a glance. Different benefits can be compared by measurable metrics to evaluate system impact. Benefit Typical Metric Typical Range / Value Water saved per household Gallons/year 3,000 – 15,000 gallons Pump energy draw Watts (idle/active) 5 – 60 watts depending on model Estimated electrical use kWh/year (demand vs continuous) Low single-digit to low double-digit kWh/year for demand systems Typical payback period Years 1 – 3 years depending on water costs and usage In short: demand‑controlled recirculation often delivers large water savings with a small electrical footprint and competitive payback compared with other efficiency upgrades. We group the main benefits into clear categories so you can weigh what matters most to your household or business. Immediate convenience: Instant hot water saves time and smooths daily routines. Water conservation: Less cold water flushed down the drain reduces household use and strain on local resources. Energy savings potential: Demand controls cut pump runtime and lower net electricity use. Less wear on fixtures: Shorter flush cycles reduce faucet and valve wear, cutting maintenance over time. These categories show how recirculation systems address both behavioral waste and plumbing inefficiency. When you’re ready to move forward, Frost & Kretsch Plumbing offers local assessments and free estimates to match the right system to your building and usage. Call Frost & Kretsch Plumbing at (313) 881-2818 to schedule a free estimate and get started. How Is a Recirculating Hot Water System Installed and Maintained in Grosse Pointe? Installation varies between new construction and retrofits, but most projects follow a clear sequence: plan the loop and control strategy, choose the pump and its location, run or adapt piping, install sensors or valves, then commission and test the system while briefing the owner. Proper permits and code compliance matter —
Energy-Saving Water Heating Options for Your Home
Energy-Saving Water Heating Options for Your Grosse Pointe Home — Expert Installation and Real Cost Savings Energy-saving water heating covers systems and practices that deliver the hot water you need while using noticeably less energy than older, conventional units. With energy prices rising and Michigan winters demanding reliable hot water, choosing a more efficient system makes sense for comfort and for the monthly budget. This guide walks through the leading options—tankless, heat pump/hybrid, and solar-ready systems—explains how each one saves energy, outlines expected costs and typical payback, and offers practical steps to claim rebates in Michigan. You’ll also get straightforward criteria for repair versus replacement, maintenance tips to preserve efficiency, and notes specific to installation in Grosse Pointe. We focus on clear comparisons so you can decide which option fits your home and finances. What Are the Best Energy Efficient Water Heater Types for Homes? The main energy-efficient types are on-demand (tankless) units, electric heat pump (hybrid) water heaters, and solar-ready or solar-complement systems. Each reduces energy use in a different way: tankless units avoid standby losses by heating only when you need hot water; heat pumps move heat from the air into water and are far more efficient than electric resistance; and solar-ready setups use solar thermal or PV power to cut grid usage. The right choice depends on your household’s hot-water patterns, available space, Michigan’s climate, and your budget. The comparison below summarizes efficiency traits, cost ranges, typical operating costs, expected lifespans, and the best situations for each type so you can evaluate options quickly. This table compares energy-saving water heater types by efficiency, cost, and best use case. Water Heater Type Key Performance Attribute Typical Range / Best Use Tankless (on-demand) Stops standby loss by heating only when water flows Installation costs vary; best for homes with moderate GPM needs and limited space Heat pump / Hybrid Coefficient of performance (COP) >1; typically 2–3× the efficiency of resistance units Higher upfront cost but lower yearly bills; great for basements or spaces with good airflow Solar-ready / Solar-complement Offsets grid energy using solar thermal or PV-driven heating Best for houses with solid roof exposure and a long-term investment horizon Each option saves energy through different mechanics and delivers different return profiles. Matching those strengths to your priorities—lower bills, smaller footprint, or renewable energy—makes it easier to compare installation and lifetime costs in the sections that follow. If you live in Grosse Pointe and want a professional opinion, Frost & Kretsch Plumbing Inc. installs and services tankless, heat pump, and conventional systems. A local, on-site estimate will translate theoretical savings into a realistic payback for your home. How Do Tankless Water Heaters Save Energy and Space? Tankless water heaters save energy by heating water on demand rather than keeping a tank of hot water ready. That eliminates standby heat loss and lowers energy use when hot water is not being used. Inside, a powerful heat exchanger quickly raises water temperature when flow is detected, so energy isn’t wasted maintaining a stored volume. Tankless units also occupy far less floor space than storage tanks, freeing utility-room or basement area that many homeowners reclaim for other uses. Correct sizing—based on peak flow (GPM) and the temperature rise you need—is critical to avoid running short during simultaneous showers or appliance use. Tankless systems suit households with small-to-moderate hot-water needs or where space is tight, and they work well with point-of-use units to reduce wait time. Understanding flow-rate and sizing helps you compare lifetime operating costs and decide whether a whole-house or point-of-use approach fits your lifestyle. What Are the Advantages of Heat Pump and Hybrid Water Heaters? Heat pump water heaters save energy by transferring heat from the surrounding air into the water instead of creating heat through electric resistance. This method yields a coefficient of performance (COP) above 1.0 and commonly delivers two to three times the efficiency of standard electric models under good conditions. Hybrid models can switch to electric resistance for backup during very cold periods or peak demand, improving reliability year-round. Installation factors to consider include adequate surrounding air volume, possible compressor noise, and placing the unit where ambient temperatures stay within the recommended operating range. For many Grosse Pointe homes, a heat pump water heater can cut annual water-heating bills compared with electric resistance units—provided the site supports the unit’s airflow and temperature needs. Knowing how heat transfer differs from resistive heating helps you choose the right location and ventilation for best performance. How Much Does Heat Pump Water Heater Installation Cost in Grosse Pointe? Installed costs for heat pump water heaters in the Grosse Pointe area vary with unit size, brand, required site work, and labor complexity—there’s no one-size-fits-all price. Major cost drivers include the unit itself, any electrical upgrades for higher loads, plumbing relocation or changes, and the difficulty of removing the old heater. Understanding these elements helps you anticipate the total investment and estimate payback based on local energy rates and your household’s hot-water use. The table below outlines the typical cost pieces to help you budget for installation. This table explains the main cost drivers for heat pump water heater installation and provides typical ranges for local projects. Cost Element What It Covers Typical Impact / Range Unit Cost Purchase price of heat pump water heater Varies by capacity and brand; often the largest single expense Installation Labor Plumbing, mounting, electrical hookup, and testing Depends on accessibility and local labor rates Required Modifications Electrical service upgrades, ducting, platform or drainage work Can add cost if a home lacks 240V circuits or adequate space Permits & Inspections Local permit fees and mandatory inspections Smaller line-item but required for compliance Separating fixed equipment costs from site-dependent expenses makes it easier to compare bids and find savings. With a clear budget breakdown you can more confidently assess return on investment from reduced energy use. Factors that often affect the final price include whether the electrical panel needs upgrading, whether condensate drainage or extra clearances are
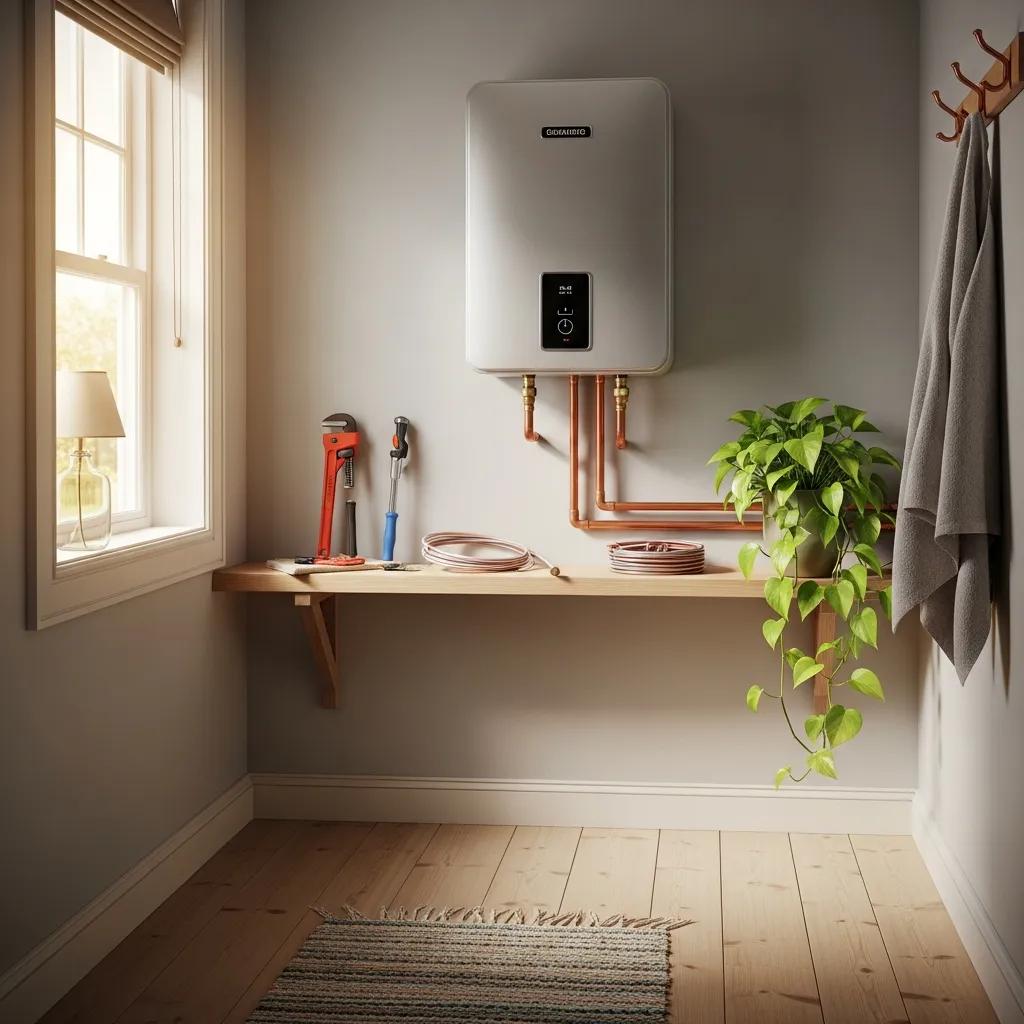
How to Flush Your Water Heater Annually
How to Flush Your Water Heater Each Year — A Practical, Safety-First Guide Flushing your water heater once a year means draining the tank to remove sediment that builds up over time. That sediment—mostly calcium and magnesium from hard water—acts like an insulating blanket, making the heater work harder, create rumbling noises, and corrode internal parts. This guide explains what flushing does, why it helps your energy bill and your heater’s lifespan, and how homeowners in Macomb, Oakland, and Wayne counties can perform a safe, effective maintenance flush. You’ll learn the common warning signs, follow an easy step‑by‑step DIY process for gas and electric tanks, spot when a problem needs a pro, and adjust schedules for Michigan’s hard water. At the end, we’ll explain Frost and Kretsch Plumbing’s local professional options if you’d rather leave this to a licensed technician. Frost and Kretsch Plumbing serves homes and businesses across Macomb, Oakland, and Wayne counties. We offer maintenance, installation, and 24/7 emergency response backed by a 100 percent satisfaction guarantee. If you’d rather book a professional inspection or flushing service than DIY, call Frost and Kretsch Plumbing at (586) 675-0097 or visit our Google Business Profile to request service. This article focuses on clear, safety-first instructions and shows when calling a licensed technician is the smarter choice. Why You Should Flush Your Water Heater Every Year Annual flushing removes mineral and particulate buildup that blocks heat transfer and speeds corrosion, restoring efficiency and lowering the chance of tank failure. Sediment forms when dissolved minerals precipitate as water heats and cools, creating insulating layers on elements or along the tank bottom that force the heater to run longer and use more energy. Regular flushing reduces that insulating effect, cuts down on popping or rumbling noises, and helps preserve the anode rod and tank shell. Following a flushing schedule also aligns with manufacturer recommendations and energy‑efficiency guidance showing real savings and longer equipment life when tanks are kept free of heavy sediment. Here’s a quick look at common sediment types and why they matter before you inspect your tank. Common sediment types and how they affect tank performance and life. Component Cause Impact Mineral Sediment (calcium/magnesium) Hard water minerals that precipitate when heated Poor heat transfer and higher energy use Rust / Corrosion Particles Corrosion of internal steel surfaces Discolored water and shorter tank life Organic or Sand Particles Particles from source water or supply lines Abrasive wear on drain valves and elements Removing these deposits improves efficiency, lowers operating costs, and slows component wear—making annual flushing a smart preventative step. Understanding how sediment forms helps you diagnose causes tied to your supply and usage patterns. What Causes Sediment to Build Up in Water Heaters? Sediment builds up when dissolved minerals—mainly calcium and magnesium—precipitate out of hot water and settle on the tank bottom. In hard-water areas, repeated heating cycles concentrate those minerals. Household factors like heavy water use, no water softener, or well water with suspended solids speed the process. Sediment can also include tiny bits of corroded metal or sand that wear on drain valves and heating elements over time. Regular checks and flushing break up layered deposits, restore heat transfer, and slow corrosion—lowering the risk of early tank failure and reducing energy use. Knowing these causes leads naturally into how flushing helps your heater work better and last longer. How Flushing Boosts Efficiency and Extends Tank Life Flushing removes the insulating sediment that slows heat transfer so burners and elements heat water with less runtime and lower energy use. Clearing deposits also prevents element overheating and reduces stress on the tank, which slows corrosion and lengthens component life. A well‑flushed tank provides steadier hot water, fewer on/off cycles, and less noisy operation. In short, regular flushing is a low-cost maintenance step that improves performance, reduces the chance of repairs, and helps you avoid an early replacement. Signs Your Water Heater Needs a Flush You don’t need special tools to spot a tank that’s overdue for flushing. Watch for shorter hot showers, rumbling or popping noises, rusty or discolored water, visible sediment when draining, and unexpected jumps in energy bills. Simple at-home checks—like running hot water into a clear bucket to check for particles or listening during a heating cycle—help you decide whether a DIY flush is likely to fix the issue or if it’s time to call a pro. Here are the most common signs and what to look for. Reduced hot water capacity: Shorter showers or quick cool-downs mean usable volume is down from sediment taking up tank space. Noisy operation: Rumbles, pops, or knocking usually mean steam pockets are forming under sediment layers. Discolored or rusty water: Brown or red tint suggests rust or corrosion particles in the system. If you see these signs repeatedly, schedule a flush or inspection soon to prevent further damage. How to Spot Reduced Capacity and Noisy Operation Sediment on the tank bottom displaces water and lowers your usable hot-water volume, which shortens shower times and appliance performance. Noise happens when trapped water beneath sediment flashes to steam and pops through the deposits. You can test capacity by timing a hot-water draw or filling a container to check temperature and volume. Note whether noises only occur during heating cycles or are constant. A successful flush usually improves these issues; persistent noise with leaks or corrosion means call a technician. These simple checks lead into how to evaluate discolored water and what safety steps to take next. When Rusty or Discolored Water Is a Red Flag Brown or metallic‑tasting water can come from loose rust particles, a worn anode rod, or internal tank corrosion. Light discoloration after a period of inactivity may clear with a flush, but ongoing discoloration or metallic taste suggests internal corrosion and needs prompt attention to avoid contamination and leaks. Stop using discolored hot water for drinking until you know the source. Drain a small amount into a clear container to inspect particulates. If discoloration remains after flushing or