
Step-by-Step Guide to Shut Off Main Water Supply
Step-by-Step Guide: How to Shut Off Your Main Water Supply in an Emergency Knowing how to shut off your main water supply is one of the simplest ways to stop a small problem from becoming a disaster. This guide walks you through what the main shutoff does, where to find common valve types, and a safe, tested sequence to turn the water off and bring it back on without making things worse. You’ll learn how to spot ball and gate valves, what to keep in an emergency kit, when to call a licensed emergency plumber, and how to check for leaks after you restore water. We also cover practical upgrades—like smart leak detectors and automatic shutoffs—that cut future risk. Read on for clear steps, quick decision checks for urgent situations, and maintenance actions to keep your plumbing ready for Michigan winters and sudden failures. Why knowing how to shut off your main water supply matters The main shutoff is the single control that separates municipal water from your home’s pipes. Using it right away limits how much water gets into your home, reduces soak time for building materials, and lowers the chance of mold and costly repairs. Knowing valve types and where they’re located gives you the ability to act fast—before finishes, structure, or electrical systems are damaged. The next section lists emergencies that call for an immediate shutoff and offers quick cues to help you decide whether to act now or call for help. What emergency scenarios require a water shutoff? Certain failures demand instant action, especially in cold climates where freezing raises the odds of bursts. A burst pipe can flood a room in minutes and needs the main shutoff immediately. Major appliance failures—like a ruptured water heater or a dishwasher hose that splits—also require isolating the water quickly. If you hear water running with no obvious source, or you see water coming through walls or ceilings, those are red flags to stop water at the main and investigate. Immediate shutoff scenarios include obvious flooding from burst pipes, continuous high-volume leaks from appliances, and water actively entering walls or ceilings. Acting fast reduces how far water spreads and limits repair scope. If you suspect a frozen pipe that might burst, shut off the main and call a pro before attempting to thaw it. These examples show why locating and operating the shutoff matters; the next section explains how shutting off the main prevents cascading water damage. How prompt shutoff reduces water damage Turning off the main cuts the total volume of water entering a damaged line and shortens exposure for floors, walls, and possessions—directly reducing mold risk and structural harm. Faster isolation lowers saturation in drywall and framing, which can turn a major restoration into a much smaller repair. Insurance claims and out-of-pocket costs are often lower when homeowners mitigate quickly. Because preparedness matters, the next major section shows how to find and identify your main shutoff valve so you can act without hesitation. How to locate your main water shutoff valve The main shutoff is usually where the service line enters the house or at the property edge. Common indoor spots are near the water meter, in basements, crawl spaces, or utility rooms. Outdoor shutoffs are often in a buried meter box or at a curb stop by the street. Being able to tell a lever-style ball valve from a circular gate valve makes operation faster in an emergency. If you can’t find the valve when things are calm, have a pro map your service line and label the shutoff for future emergencies. Identifying valve features ahead of time helps you operate them correctly when you’re under stress. Valve Type Identification Common Location Ball valve Lever handle; quarter-turn (90°) closes Indoors near the meter or main entry pipe Gate valve Round handwheel; several turns to close Basements, utility rooms, older homes Curb stop (curb key) Buried box with removable lid; turned with a curb key At the street or property edge on the service line Automatic shutoff device Electronic module with motorized shutoff Installed near the meter or main line as a retrofit What types of main shutoff valves should you know? Main valves come in a few practical types: ball valves use a quarter-turn lever and are quick and reliable for emergencies; gate valves use a wheel and require multiple turns and can seize if corroded; curb stops sit at the property edge and need a curb key; and automatic shutoffs work with sensors to close the main automatically. Ball valves are preferred for emergency use because they move quickly and resist seizing. Recognizing the type tells you the safest way to close the line in an emergency. Where are indoor and outdoor shutoffs usually located? Most mains are where the service line enters the structure—basements, utility rooms, near the water heater, or in crawl spaces. Outdoors, look for a meter box near the property edge or a curb stop near the street. Older homes sometimes have the valve at the foundation wall; newer setups often have a labeled meter box. Use a flashlight and gloves when inspecting tight or dark spaces, and never force a stuck valve. If you can’t find or safely operate the valve, call a licensed plumber for an inspection and labeling service so it’s easy to access in an emergency. If you’d rather have a pro locate and map your valve, the next section shows the exact shutoff steps and lists essential tools. If you want professional valve mapping and labeling, Frost and Kretsch Plumbing offers inspection services to mark your main shutoff for quick access. Our licensed, insured technicians serve Macomb, Oakland, and Wayne counties and can save you critical time in an emergency. To schedule an inspection or request emergency help, call (586) 675-0097 or visit our Google Business Profile for directions and reviews. This quick service note explains options for homeowners who want certainty before an emergency occurs. Step-by-step: How to turn off your main water supply
Why Commercial Backflow Testing is Crucial
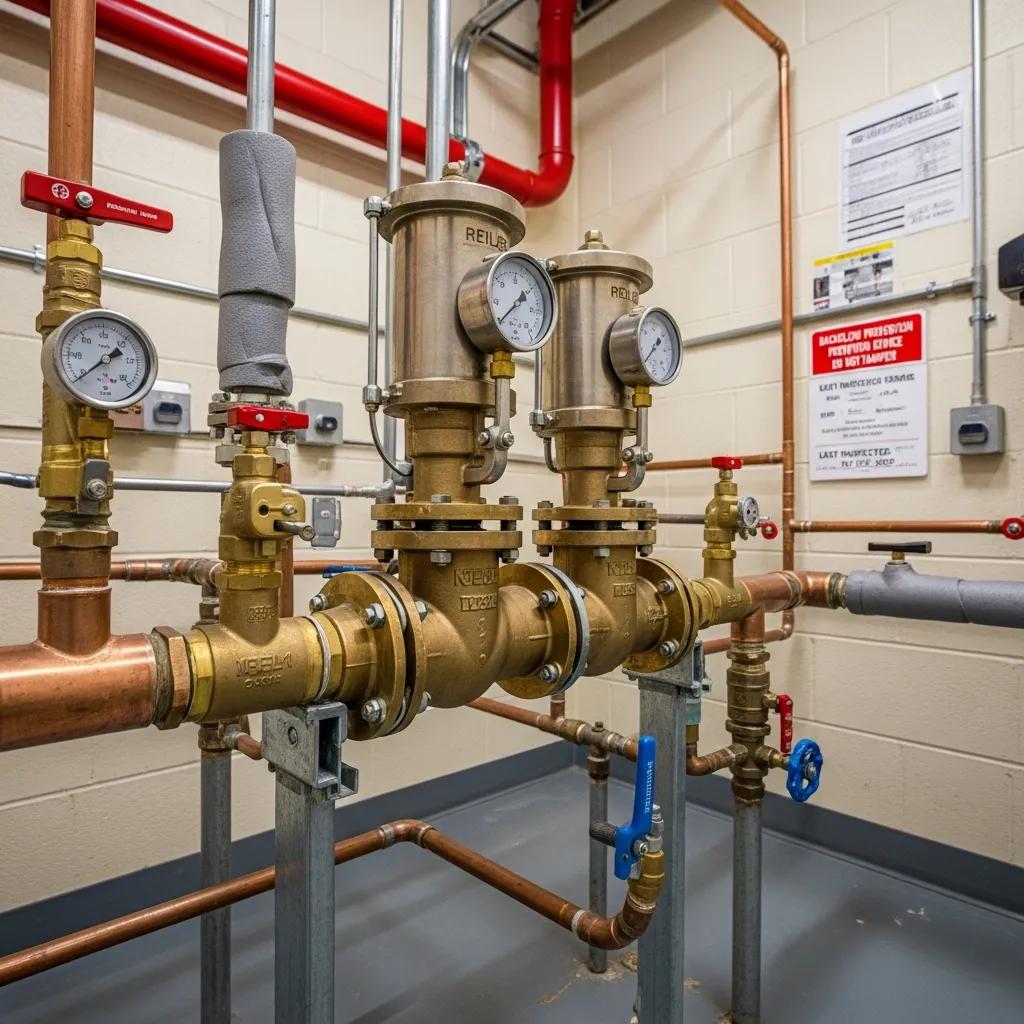
Why Commercial Backflow Testing Matters for Michigan Businesses — Safety, Compliance, and Peace of Mind Backflow happens when non-potable water reverses into a building’s drinking supply — a direct threat to health and a compliance risk. This guide explains why commercial backflow testing is essential for Michigan businesses, how backflow occurs, which devices stop it, and why annual testing is required in Macomb, Oakland, and Wayne counties. You’ll get clear, practical steps testers use, a rundown of common device types found in commercial properties, and the main cost drivers that affect inspection and repair pricing. We balance straightforward technical detail with actionable advice so facilities managers and property owners can prioritize prevention, stay compliant, and reduce liability. Read on for easy-to-understand explanations of back-siphonage and back-pressure, the testing steps certified professionals follow, recommended maintenance schedules, and when to call licensed commercial plumbers for ongoing compliance or emergency help. What is Commercial Backflow and Why Does it Threaten Water Safety? Commercial backflow is when water flows the wrong way and lets contaminants get into the potable supply. That can introduce biological, chemical, or particle hazards into drinking water. Two main causes are back-siphonage — when a pressure drop pulls contaminants back into the system — and back-pressure — when higher downstream pressure pushes contaminated water upstream. In commercial buildings, common contamination sources include chemical feed lines, boiler returns, irrigation systems, and wastewater cross-connections. Preventing backflow protects employees, customers, and the public, preserves the municipal supply, and reduces regulatory exposure. Knowing how contamination travels makes it clear why the right backflow preventer and regular testing are core parts of a business’s risk-management plan. How Does Backflow Occur in Commercial Plumbing Systems? Backflow shows up during normal operations and unexpected events when pressure relationships shift and contaminants move toward the potable line. For example, an irrigation system tied to the building supply can siphon fertilizers or pesticides into potable piping after a main break or sudden pressure dip. Boiler or pump systems can create back-pressure that pushes rusty or chemically treated water back toward drinking water. Restaurants and labs are higher risk because hoses, sinks, or chemical lines may cross-connect with potable sources if not properly isolated. Mapping these scenarios helps facility managers spot likely cross-connections and choose device types and placements that block probable backflow paths. What Are the Health Risks of Water Contamination from Backflow? Contaminated drinking water can bring bacteria, harmful chemicals, or organic waste into a building’s supply, causing illnesses ranging from stomach bugs to severe toxic exposures depending on the contaminant and level of exposure. Beyond immediate health impacts, contamination events can lead to shutdowns, regulatory investigations, and costly liability claims that interrupt operations and harm reputation. Regularly tested and maintained backflow devices, plus prompt remediation when issues arise, protect public health and help keep businesses operating smoothly. What Are Michigan’s Commercial Backflow Prevention Regulations? Michigan requires commercial properties to protect potable water with appropriate backflow prevention devices and periodic testing in line with state safe drinking water standards and local water authority rules. Many municipalities in Macomb, Oakland, and Wayne counties require annual testing by certified testers and submission of results to the local water authority; missing those filings can trigger enforcement. Testing frequency, filing steps, and device selection often follow state guidance and municipal ordinances that classify connections as high or low hazard. Businesses should confirm county and local requirements and keep up-to-date records; proactive testing helps avoid enforcement and service interruptions. Which Laws Mandate Annual Backflow Testing in Macomb, Oakland, and Wayne Counties? Local ordinances and water utility rules in Macomb, Oakland, and Wayne counties typically mirror state safe drinking water policies and call for annual certification of commercial backflow preventers, especially on high-hazard connections. Each county or water authority sets its own filing procedures and may specify which sectors — industrial sites, medical facilities, multi-tenant buildings — need certain devices or more frequent inspections. Confirm testing schedules, approved tester credentials, and report formats with your local water authority. Staying current with these rules lowers your risk of noncompliance and keeps testing cycles aligned with municipal records and emergency-response protocols. What Are the Consequences of Non-Compliance with Backflow Regulations? Failing to follow backflow rules can lead to fines, required repairs, water service suspension, and legal exposure if contamination occurs. Utilities may shut off service to protect the wider system if a facility doesn’t install, maintain, or test required devices — which can cause immediate operational loss. In addition to fines, businesses can face cleanup costs, lawsuits, and damage to reputation. Scheduling regular testing and addressing repairs promptly is the best way to reduce these risks and keep operations running. The most common municipal and operational consequences for non-compliance include: Fines and administrative penalties: Local authorities may assess monetary penalties for missed tests or unfiled reports. Service interruption: Utilities can mandate repairs or disconnect water service to protect the system. Liability and cleanup costs: Contamination can trigger expensive remediation and legal claims. These outcomes show why timely testing and recordkeeping are essential. Acting early keeps issues from escalating and protects business continuity. After confirming regulatory obligations and potential penalties, businesses should schedule annual testing with qualified technicians to maintain compliance and reduce operational risk. With regulatory duties handled and filing steps understood, the next step is to look at the concrete benefits regular testing brings to public health and business resilience. What Are the Benefits of Regular Commercial Backflow Testing? Regular testing confirms devices are working, protects public health, keeps you compliant, and extends equipment life. Routine inspections catch worn seals, failing check valves, or misadjusted parts before they fail — lowering the chance of contamination and expensive emergency repairs. A well-maintained preventer also shows auditors and customers you take safety seriously. On top of that, scheduled testing helps with predictable maintenance budgeting and reduces downtime by allowing repairs to be planned during off hours instead of in an emergency. How Does Testing Protect Public Health and Ensure Compliance? Testing checks device performance with calibrated
Understanding Your Home’s Water Supply System
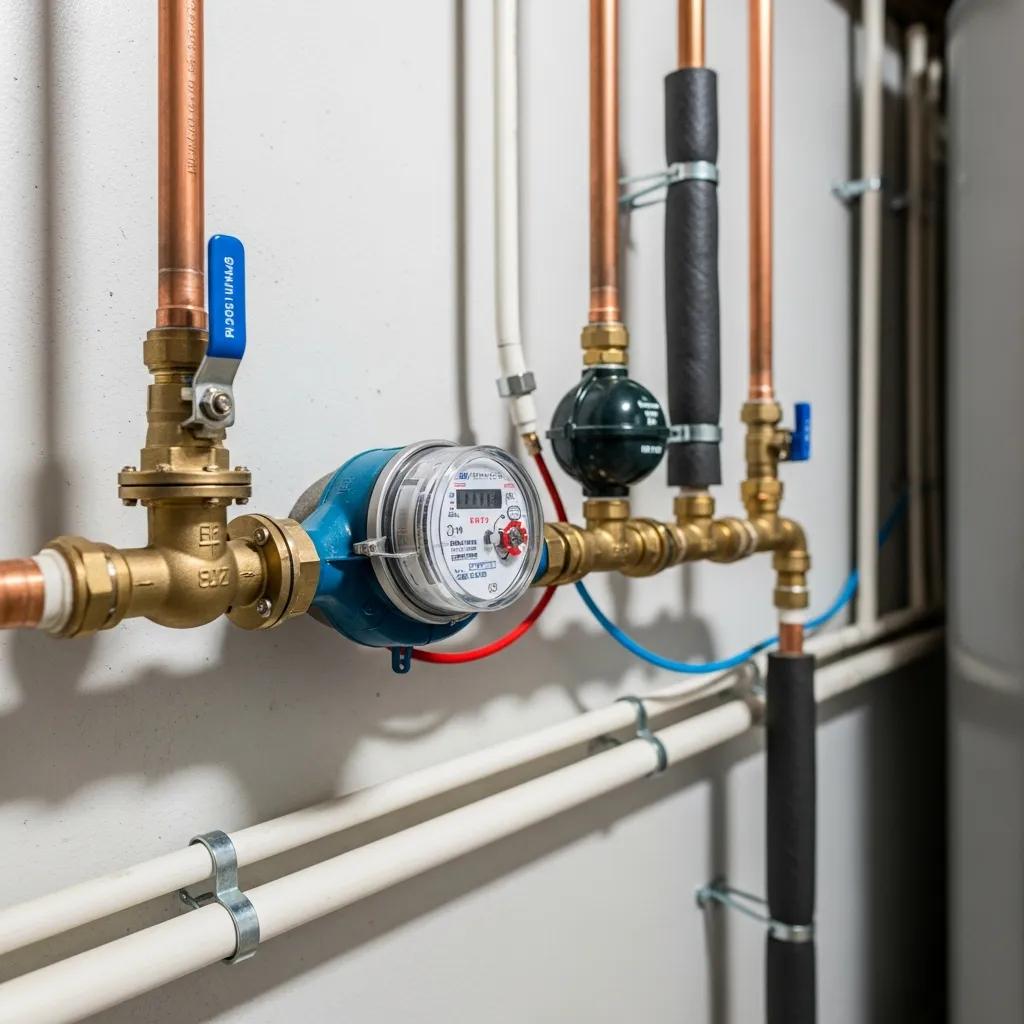
Your Home’s Water Supply: A Practical Guide to Water Lines, Shutoff Valves, and Leak Detection Your home’s water supply is the system that brings municipal or well water from the street into your house, sends it to faucets and appliances, and routes wastewater out to the sewer or septic system. Knowing how that system works helps you avoid damage, lower bills, and act quickly in emergencies — which often saves time and money. This guide walks through the main parts—water meter, service line, shutoff valves, branch lines, and pressure regulators—plus common pipe materials, leak-detection tips, and when to call a pro. You’ll learn how to read a meter, find and operate your main shutoff, spot pipe types like copper, PEX, and PVC, and take practical steps to find hidden leaks or prevent frozen pipes in Michigan winters. The guide ends with clear signs you might need water main repair and how professionals handle complex jobs so you can make informed choices about inspections, repairs, or repiping. Relevant search terms like water meter, water supply lines, main water shutoff, water leak detection, and water main repair are included to help local homeowners find the right information and action steps. What Are the Key Components of Your Home Water Supply System? Think of your water supply as a chain of parts that bring clean water into the house and protect your plumbing from pressure and leaks. The system begins at the municipal connection or a private well, travels through the service line and water meter, passes a main shutoff and pressure regulator, and then splits into branch lines to fixtures and appliances. The water heater ties into the hot-water branches. Every piece has a job: the meter tracks usage, the main line moves the water in, shutoff valves let you isolate sections for repairs, and regulators keep pressure at safe levels. Understanding these parts makes it easier to diagnose low pressure, discolored water, or leaks — and to describe the problem clearly when you call a plumber. Below are the main components and what each one does. Key components of a typical residential water supply system include: Water Meter: Tracks how much water your household uses and helps spot unexplained consumption. Main Water Line: The service pipe that connects the municipal supply to your home and feeds the meter. Main Shutoff Valve: The single valve that isolates your entire home’s water supply for emergencies or major repairs. Branch/Fixture Shutoffs: Local valves that let you turn off individual fixtures or appliances for maintenance. Pressure Regulator: Lowers incoming pressure to a safe level to protect pipes and fixtures. These parts link the street to your fixtures. Knowing their names and roles helps you inspect issues and explain them when you contact a technician. Next we’ll cover where to find your water meter and how to read it. Where Is the Water Meter Located and How Does It Work? A water meter records how much water flows into your property. Where it’s located depends on local setup — it’s often at the property line in a meter box near the street, or inside a basement or utility room. Meters can be mechanical, using a rotating element and odometer-style readout, or electronic “smart” meters that send usage data to the utility. You can read a standard meter by noting the odometer digits for total use and watching the small sweep hand or leak indicator for continuous flow, which signals a possible leak. If your meter is outside in a freeze-prone spot, insulating the box or moving the meter indoors (if the utility allows) can prevent freeze damage. Unexpected or erratic meter readings usually lead to troubleshooting to determine whether the meter itself, a hidden leak, or an appliance is the cause. How Does the Main Water Line Connect to Your Home? The main water line ties the municipal distribution main to your service via a curb stop or shutoff, a buried (or sometimes exposed) service line, and the water meter before the pipe enters your house at the service entry point and reaches the main shutoff and distribution manifold. Common materials include copper, galvanized steel, and plastics like PVC or PEX; each affects longevity, flexibility, and how the line responds to corrosion or freezing. Service lines under driveways or sidewalks can fail from ground movement, corrosion, or freeze-thaw cycles — often showing up as reduced flow, damp spots in the yard, or sudden meter spikes. When fixes require excavation or curb-stop access, professionals handle permits and coordinate with the utility because the municipal connection and service routing determine the scope of work. Recognizing these connection parts helps you tell whether a yard symptom is a buried service-line issue rather than an indoor fixture problem. How Do You Locate and Use Your Main Water Shutoff Valve? The main shutoff valve is the single control that isolates your house from the water supply — and it’s essential for emergencies, maintenance, and controlled repairs. Operating the main shutoff correctly prevents flooding, limits damage, and lets you or a technician work on internal plumbing without shutting service at the street. You’ll typically find it near the water meter, inside the basement where the service line enters, or outside in a ground box near the foundation. Valve types range from older multi-turn gate valves with wheel handles to modern quarter-turn ball valves that are less likely to seize. Knowing its location and how to use it is high-value preparedness: during a leak, closing this valve quickly reduces water loss and gives time to call for help. The next section walks through typical placements and a safe, step-by-step shutoff routine. Where Is the Main Water Shutoff Valve Typically Found? Most homes have the main shutoff installed right after the water meter or inside where the service line enters the basement or crawlspace. In slab homes it may be in a utility closet or mechanical room. Outside shutoffs are often in a protective curb box near the street; that curb stop may
DIY Faucet Installation Guide for Homeowners

DIY Kitchen Faucet Installation Guide for Homeowners — How to Install and Replace Kitchen Faucets Safely and Efficiently Replacing or installing a kitchen faucet is one of the most rewarding DIY jobs — it improves function, updates the look of your sink, and often saves on labor. This guide walks homeowners through every step: tools and supplies to have ready, how to remove an old faucet, correct installation and sealing, common mistakes to avoid, and when to call a professional. Safety is front and center: you’ll learn the correct shut-off and pressure-relief steps, how to secure gaskets and supply lines to prevent leaks, and how to test flow and seals after installation. We cover the full process — costs, faucet types that suit DIYers, and post-install testing and troubleshooting — and include practical search terms like how to install a kitchen faucet, kitchen faucet install, and faucet installation cost to help you find the right guidance quickly. What tools and supplies should you have before starting a kitchen faucet install? A smooth faucet install starts with preparation. Having the right hand tools and consumables on hand cuts down delays and lowers the chance of mistakes. The right wrenches, good lighting, and proper sealing materials help you remove old parts, secure the new faucet, and create reliable, leak-free connections. Getting these supplies together also tells you whether your project is a simple deck-mounted swap or something more complex that might need extra parts or professional help. Below is a compact, easy-to-follow list of what to gather before you begin. Basin wrench — Reach and loosen mounting nuts in tight under-sink spaces to remove or secure the faucet. Adjustable wrench — Turn fittings and supply line nuts without rounding edges. Slip-joint pliers — Grip stubborn parts or remove old hose clamps safely. Plumber’s tape (PTFE) — Seal threaded pipe connections to prevent slow leaks. Plumber’s putty or silicone caulk — Create a watertight seal between the faucet base and sink deck. Replacement supply lines and gaskets — Swap worn parts to prevent future leaks and ensure compatibility. With these tools and supplies ready, you’ll move through removal, mounting, and final sealing much more efficiently. The sections that follow explain each tool’s practical use and rental options. Which essential plumbing tools make faucet replacement easier? Each tool has a clear job: a basin wrench reaches mounting nuts behind the sink, an adjustable wrench fits supply line nuts of various sizes, and slip-joint pliers give extra leverage on stuck fittings. A flashlight and small mirror help when access is tight. Specialty tools like a basin wrench are inexpensive to buy or easy to rent for a single project, so you don’t have to own a full toolbox to get the job done. Knowing which tools are optional and which are necessary helps you decide whether to borrow, rent, or buy. Which consumable supplies should you prepare before starting? Stock up on plumber’s tape, spare gaskets, and supply lines that match your shut-off valve threads. Bring plumber’s putty or silicone for sealing the faucet base — silicone is best for stone or composite sinks. Double-check thread sizes and valve compatibility before you shop to avoid extra trips. If your faucet uses replaceable cartridges or aerators, keep a spare on hand in case the originals are damaged during removal. Preparing these consumables in advance helps the project run without interruptions. Tool / Supply Purpose Estimated Cost / Tip Basin wrench Reach and remove mounting nuts under sink $10–$25; rentable from tool-lenders Plumber’s tape (PTFE) Seal threaded pipe connections $3–$8 per roll; wrap clockwise Supply lines Replace worn flexible lines $10–$25 each; match valve thread size Plumber’s putty / silicone Seal faucet base to deck $5–$12; use silicone for granite/composite sinks Adjustable wrench Tighten fittings without damage $15–$40; choose the correct jaw size This table shows which items are budget-friendly essentials and which you might rent. Next, we’ll walk through the step-by-step installation process. How to install a kitchen faucet — step-by-step DIY instructions Follow a clear sequence to reduce mistakes: shut off water, relieve pressure, remove the old faucet, position and secure the new one, attach supply lines, and test for leaks. Make safety a priority — turn off the shut-off valves and place a bucket beneath connections. If you run into hard-to-reach mounting nuts, seized fittings, or uncertain hot/cold orientation, that’s a reasonable time to pause and consider professional help. Frost and Kretsch Plumbing offers licensed, insured technicians with upfront pricing, a 100 percent satisfaction guarantee, and 24/7 response often within an hour across Macomb, Oakland, and Wayne counties — a solid fallback when a job gets complicated. Turn off the supply valves and open the faucet to relieve pressure and drain remaining water. Disconnect supply lines, remove mounting nuts, and lift out the old faucet; clean the sink deck thoroughly. Install the new gasket or apply putty, position the faucet, secure mounting hardware, reconnect supply lines, and test for leaks. That summary sets up the more detailed removal and installation steps that follow. What are the key steps to remove an old kitchen faucet? Start by shutting off both the hot and cold shut-off valves under the sink and opening the faucet to drain pressure. Disconnect supply lines with an adjustable wrench while holding the valve body with pliers to avoid twisting the plumbing. Use a basin wrench to loosen mounting nuts and lift the old fixture free, protecting the sink surface from scratches. If hardware is seized or corroded, penetrating oil and steady force can help; when corrosion is severe, a professional can remove the fixture without causing additional damage. How do you properly install and connect a new kitchen faucet? Clean the sink deck and inspect holes and seals before assembly. Follow the manufacturer’s instructions: place gaskets or putty where required and hand-thread mounting nuts from below, then tighten evenly with a basin wrench — avoid over-tightening that can crack composite sinks. Attach new supply lines to the faucet and shut-off
Using Thermal Cameras for Hidden Water Leak Detection

Thermal Imaging Leak Detection — Professional, Non‑Invasive Hidden Water Leak Location with Infrared Cameras Thermal imaging leak detection uses infrared cameras to reveal hidden water by mapping small temperature differences on surfaces. It’s a precise, non‑destructive way to locate moisture without tearing out walls or floors. This page walks you through how thermal cameras spot leaks, why infrared scans are usually faster and less damaging than traditional methods, and which leak types—slab, in‑wall, ceiling, and some shallow underground runs—show up best on a scan. You’ll get practical tips for spotting early signs of a concealed leak, a clear outline of how a thermal inspection is performed and read, and what happens afterward when we plan repairs. Along the way we compare infrared testing to other diagnostic tools and explain how Grosse Pointe homeowners can request a free estimate from Frost & Kretsch Plumbing. What is Thermal Imaging Leak Detection and How Does It Work? Thermal imaging leak detection is a diagnostic method that records surface temperature differences with an infrared camera, creating thermograms that point to suspect areas. The basic idea is simple: escaping water changes how materials absorb and release heat, so wet spots often show up as slightly warmer or cooler areas on a surface. Because the inspection is non‑invasive, it narrows the search area, reduces unnecessary demolition, and speeds up a correct diagnosis—saving time and money. Below, the first H3 explains how the cameras and thermogram interpretation work in the field, and the second H3 summarizes the practical benefits of infrared plumbing leak detection. How Do Thermal Cameras Detect Hidden Water Leaks? Thermal cameras sense infrared energy and translate it into a temperature map, or thermogram, where moisture‑related anomalies appear as distinct hot or cold patches. Technicians look for patterns—like a vertical cool streak on drywall or a warm line across a concrete slab—to infer a leak’s path. Conditions such as insulation, drafts, sun exposure, and surface material affect what the camera sees, so experienced techs pair thermograms with a visual inspection and site context. When contrast is weak, we confirm with moisture meters or borescopes to avoid false positives; these complementary tools are discussed in the advantages section below. What Are the Advantages of Infrared Plumbing Leak Detection? Infrared leak detection offers clear, practical benefits: it’s non‑destructive, speeds up diagnosis, and lets us pinpoint repairs so we cut down on unnecessary work. By visualizing temperature differences across finishes, thermal scans let crews isolate the problem without opening large sections of wall or floor—reducing labor, restoration time, and cost. Early scans also limit secondary damage like mold and rot, protecting indoor air quality and avoiding more expensive remediation later. Below we break these advantages into a short list and compare infrared testing with other diagnostic approaches. Thermal imaging is even more powerful when used with other diagnostic tools; each method contributes unique, confirmatory information that improves repair planning. Key benefits of infrared leak detection: Non‑invasive diagnosis: Locate suspect areas without demolition so finishes stay intact and disruption is minimal. Faster diagnosis: Scans narrow likely leak zones quickly, shortening on‑site investigation time. Smaller repair scope: Pinpointing the leak limits the cutting or excavation needed, lowering restoration costs. Limits secondary damage: Early discovery reduces the risk of mold and structural deterioration from prolonged moisture. Together, these benefits help homeowners and building managers get focused repairs and lower overall project costs. Different diagnostic methods trade off invasiveness, speed, and cost. Diagnostic Approach Typical Time to Diagnose Typical Damage Reduction Typical Cost Impact Infrared thermal scan Short (hours) High (pinpoint repairs) Low‑to‑moderate (saves demolition) Moisture meter + probe Short‑to‑moderate Moderate Moderate Acoustic detection Moderate Moderate Moderate‑to‑high Exploratory demolition Long Low (wider damage) High Why Choose Frost & Kretsch Plumbing for Thermal Leak Detection in Grosse Pointe? When hidden leaks threaten your home, you want a local team that moves fast, explains clearly, and stands behind their work. Frost & Kretsch Plumbing is family‑owned and serves Grosse Pointe with licensed, insured technicians, 24/7 emergency availability, and a 100% satisfaction approach. We use thermal imaging as part of a practical diagnostic toolkit—paired with moisture meters and video inspection when needed—so you get a clear report, repair options, and a plan that minimizes disruption. The next section outlines the qualifications and reliability measures that support our thermal leak inspections. What Makes Our Thermal Leak Inspection Professional and Reliable? Professional thermal inspections need trained technicians, calibrated equipment, and consistent reporting so thermograms become actionable repair plans. Our techs perform methodical visual checks, controlled thermal scans, and document findings with thermograms and contextual photos. That documentation supports accurate estimates and gives you options while protecting your property. Our licensing, insurance, and customer‑first approach are built to give you confidence in the diagnosis and the next steps. How Does Thermal Imaging Minimize Property Damage and Repair Costs? Thermal imaging reduces property damage by narrowing the search area to a few square feet instead of opening large wall or floor sections. For example, a thermogram that locates a leak behind drywall allows a focused cut‑and‑repair instead of removing entire panels—saving on labor, materials, and restoration time. Faster diagnosis also shortens the time moisture is in your home, cutting down mold risk and the need for larger remediation projects. What Types of Hidden Water Leaks Can Thermal Cameras Detect? Thermal cameras are effective for leaks that create a detectable surface temperature difference—slab leaks, in‑wall leaks, ceiling leaks, and some shallow underground runs. Deeply buried or thermally masked leaks may need supporting tools. Technicians interpret thermograms with an understanding of heat flow and material behavior; for slow or nearly isothermal leaks we combine infrared with acoustic sensors, moisture meters, or sewer video cameras to increase confidence. The table below quickly maps common leak types to typical signs and how thermal imaging helps. Leak Type Common Signs How Thermal Imaging Helps Slab leak Warm or cool floor spots, unexplained dampness Shows linear or localized thermal anomalies across the slab surface Wall leak Stains, bubbling paint, cool streaks Reveals vertical or
The Role of Water Pressure Regulators in Plumbing

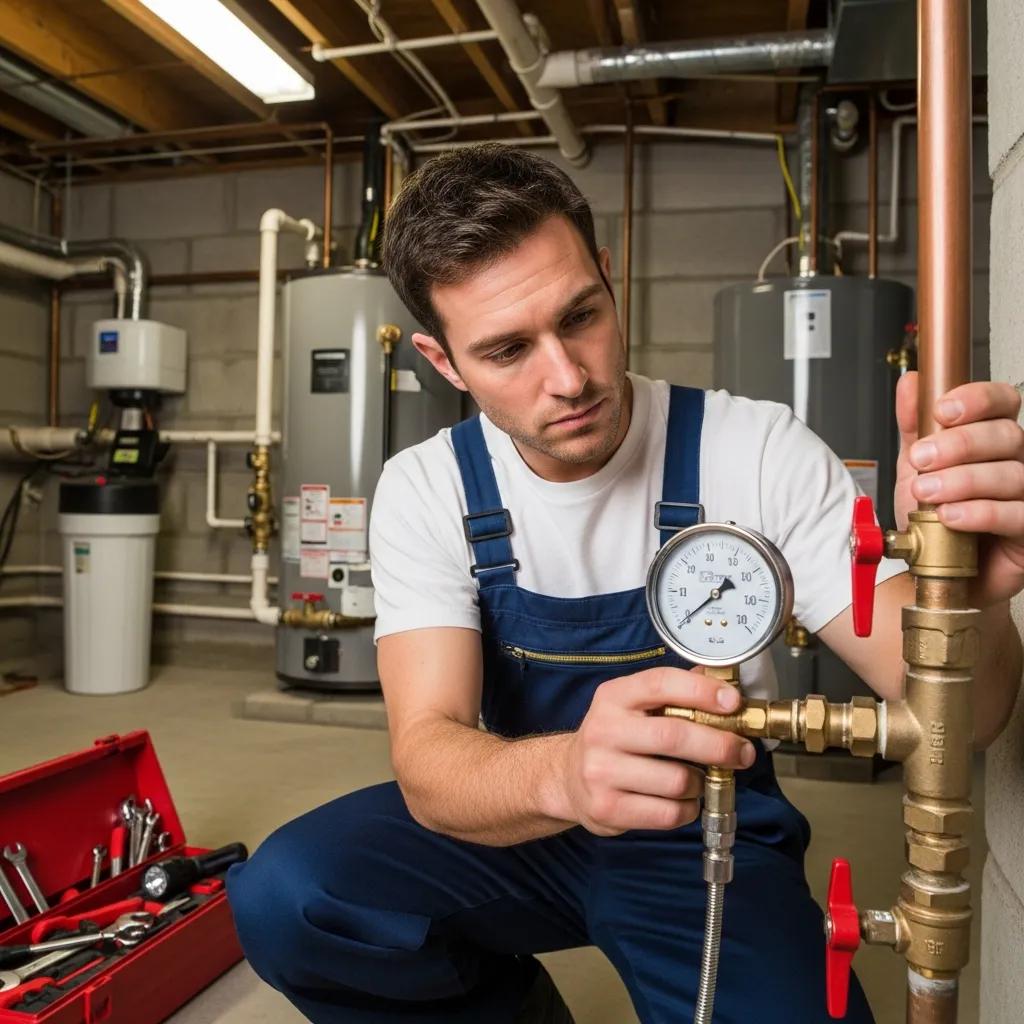
Water Pressure Regulator Services — Installation, Replacement & Repair for High Water Pressure A water pressure regulator (also called a pressure reducing valve) sits on the incoming water line to reduce and steady high municipal or well pressure. That protects your pipes, fixtures, and appliances from extra stress and premature failures. This guide walks you through how a regulator works, how to spot problems, typical Michigan repair and replacement cost drivers, and simple maintenance homeowners can do to extend regulator life and avoid costly water damage. High pressure often shows up as banging pipes, worn faucet cartridges, or recurring leaks — and correct pressure control is the most effective fix. Spotting symptoms early and picking the right remedy saves money and water over time. You’ll find clear steps to measure PSI, a practical repair vs. replace comparison, and a homeowner-friendly maintenance schedule with inspection triggers. We also explain how Frost and Kretsch Plumbing handles diagnostics, installations, emergency response, and straightforward pricing so you’ll know when to call a licensed technician. The guide uses local terms like water pressure regulator, pressure reducing valve, pressure regulator installation, and high water pressure repair Macomb to connect advice with service options in your area. What a Water Pressure Regulator Does — and Why It Matters A water pressure regulator lowers incoming water pressure to a safe, steady PSI for your home or business. Inside the valve a diaphragm and spring work together to reduce upstream municipal pressure to a preset downstream level, giving consistent flow and reducing wear on fixtures. A properly sized and set regulator helps prevent pinhole leaks, cuts down on water hammer, and extends the life of water heaters and appliances — a small investment that avoids big repairs later. Knowing the main parts and their roles makes it easier to decide when a regulator is needed, especially after a municipal pressure increase, renovation, or for older homes with fragile piping. Below is a simple parts table you can reference during inspections or when talking with your technician. Component Function Role Diaphragm Detects pressure differences Adjusts valve opening to keep downstream PSI steady Spring Opposes the diaphragm Determines the target pressure and lets a technician fine-tune it Valve seat Forms the seal Controls flow and prevents leaks when closed Adjustment screw Changes spring tension Allows technicians to set downstream pressure Pressure gauge (tool) Reads PSI Confirms setpoint and regulator performance during testing Seeing how the parts interact makes it clear why wear, debris, or incorrect settings cause pressure problems — and why regular testing matters. After you understand what a regulator does, many homeowners choose a professional assessment to confirm whether a regulator is needed or needs adjustment. Frost and Kretsch Plumbing offers evaluations, recommendations, and scheduling for inspections and installations across Macomb, Oakland, and Wayne counties — call (586) 675-0097 to request an inspection. How a Water Pressure Regulator Controls Your Home’s Water Pressure The regulator balances incoming water force against an internal spring and a flexible diaphragm. If upstream pressure rises, the diaphragm compresses the spring and closes the valve slightly to hold downstream pressure at the setpoint. If downstream pressure drops, the valve opens to restore flow. You can measure downstream pressure with a gauge at a hose bib or a washing machine outlet — most homes aim for 40–60 PSI. Readings above 80 PSI usually indicate a high-pressure condition that justifies a pressure reducing valve. Both simple mechanical gauges and smart monitors work to verify readings, but any replacement or adjustment should be done by a licensed plumber to meet local code and ensure proper calibration. Benefits of Installing a Water Pressure Reducer Valve A pressure reducer valve delivers several practical benefits that lower long-term maintenance and replacement costs while improving everyday performance: Less stress on pipes — fewer leaks and burst fittings. Longer appliance life — water heaters, dishwashers, and washers face less wear from sustained high PSI. Less water waste — stable pressure cuts dripping and turbulent flow, which can lower bills and conserve water. Together, those benefits create steadier system behavior and fewer emergency repairs — a pressure reducer is a smart preventive investment. Knowing these benefits makes it easier to recognize when a regulator might be failing. Often the symptoms start small and grow into system-wide issues that need a professional check. Signs Your Water Pressure Regulator May Be Bad A faulty or misadjusted regulator causes symptoms across a home’s water system that point to excessive or unstable downstream pressure. Look for noisy or banging pipes (water hammer), persistent drips at faucets and showerheads, unusually fast wear on faucet cartridges and washing machine hoses, fluctuating pressure when you run water, and appliance problems tied to overpressure. These issues can come from a worn diaphragm or spring, debris at the valve seat, or changes in municipal supply that the regulator can’t handle. Finding problems early and fixing them reduces the risk of pipe bursts and appliance damage. Common symptoms to watch for: Fluctuating pressure: Pressure swings between fixtures without valve changes. Banging pipes: Water hammer when taps shut off or during pump cycles. Persistent leaks or drips: Fixtures that used to seal well now drip regularly. These clues help you decide the right diagnostic steps, which we cover next. How to Identify Regulator Problems in Your Plumbing System Start by measuring upstream and downstream PSI with a reliable pressure gauge at a hose bib or a designated test point. Consistent downstream readings above 80 PSI usually mean a failing or missing regulator. Visually inspect the regulator and nearby piping for corrosion, leaks, or bypass plumbing that defeats the regulator. Listen for water hammer or rapid cycling to distinguish regulator faults from other issues like bad check valves or air chambers. You can try basic isolation checks — shutting off branches to see if pressure stabilizes — but avoid disassembling the valve since internal springs and diaphragms need trained handling. If tests point to regulator failure, contact a licensed plumber for a full pressure
Diagnosing & Fixing Low Water Pressure Issues
Diagnosing and Fixing Low Water Pressure in Michigan Homes and Businesses Low water pressure shows up when faucets, showers, or mains deliver less flow than they should — a nuisance that can affect comfort, operations, and appliance performance. It can be something simple, like a clogged aerator, or something that needs a pro, like a failing pressure regulator, a leaking service line, or a well-system fault. This guide walks Michigan homeowners and business owners through the signs to watch for, likely causes, step-by-step diagnostics you can try, and the professional fixes that restore reliable pressure. You’ll learn how to check pressure with basic tools, read PSI numbers, isolate fixture problems, and weigh long-term options such as PRV replacement, booster pumps, or repiping. We also explain what to expect from licensed plumbers — transparent pricing, emergency response, and clear next steps — so you can decide whether to DIY or call for service. What Are the Common Signs of Low Water Pressure? Low water pressure usually looks like weak, inconsistent flow across one or more fixtures. The key is telling a local problem apart from a system-wide issue. Typical signs include slow-filling sinks, a weak shower spray, multiple fixtures with low flow at the same time, or noticeable drops when irrigation or laundry runs. Spotting these early saves time and prevents bigger headaches. The next section shows simple DIY checks to determine the scope. If you spot these signs and want a professional check, Frost and Kretsch Plumbing offers on-site diagnostics to confirm whether the cause is a clogged fixture, the PRV, a leak, or a well/pump problem. Our technicians will inspect, explain findings, and recommend either a targeted repair or a bigger solution. If you prefer professional confirmation after your DIY checks, call Frost and Kretsch Plumbing to schedule an inspection. Here are the most reliable, observable signs of low pressure to watch for at home or work. Slow flow at multiple fixtures: Reduced flow at several taps at once usually points to a system-wide issue. Weak shower performance: A weak shower often signals whole-house pressure problems or partially blocked supply lines. Pressure drops when appliances run: If the flow falls off when the dishwasher or washer runs, the supply may be limited. Normal pressure at only one fixture: Strong flow at one tap but poor flow elsewhere usually means a local clog or valve problem. These clues help you separate fixture-level problems from supply issues and guide the diagnostic steps that follow. How to Identify Low Water Pressure in Your Home or Business To tell whether low pressure is local or system-wide, use a few quick checks with common fixtures and a pressure gauge if you have one. Test multiple outlets: turn on an outside hose spigot, a kitchen sink, and a shower one at a time and note the flow. If every outlet is weak, it’s likely a supply issue; if only one is weak, it’s probably a local clog. If you have a pressure gauge, attach it to a hose bib or test port and record static (no-flow) and running readings — consistent readings well below the expected range point to low main pressure. Also check visible valves (main shut-off and PRV) to make sure they’re fully open and look for leak signs like wet spots, damp soil by the foundation, or a sudden jump in your water bill. Those observations lead into targeted fixture checks like aerator cleaning or cartridge inspection. Symptoms of Weak Water Flow in Faucets and Showers Weak faucet and shower flow is often a fixture issue that’s quick to fix — but it can hide a larger problem if ignored. Watch for sputtering streams, uneven spray, a slow trickle after an initial surge, or mineral buildup around aerators and showerheads; those usually mean clogged screens, scale, or worn cartridges. Try cleaning aerators, soaking removable parts in vinegar to dissolve scale, or replacing a cartridge. If several fixtures show the same mineral-clog symptoms or cleaning doesn’t help, the cause is likely upstream — a PRV, corroded piping, or supply main issue — and you’ll need the diagnostic steps below. What Causes Low Water Pressure in Residential and Commercial Plumbing? Low pressure can stem from municipal supply issues, property-level equipment, or the piping itself. Common causes include low mains pressure or main breaks, failing pressure-reducing valves (PRVs), clogged or corroded pipes that narrow flow, hidden leaks in service lines, and well pump or pressure tank faults on private systems. Each cause shows different patterns — neighborhood-wide issues usually mean the mains, PRV failures affect the whole building, and localized corrosion affects specific branches. The list below summarizes these causes to help you match symptoms to likely problems. Municipal water main issues: A drop in supply or a main break can lower pressure across multiple properties in the area. Pressure reducing valve (PRV) malfunction: A stuck or misadjusted PRV can keep downstream pressure lower than it should be. Clogged or corroded pipes: Scale and corrosion reduce the pipe’s effective diameter and restrict flow. Hidden leaks and main-line breaks: Leaks divert water and cause pressure loss that worsens over time. Well pump or pressure tank problems: On private wells, pump failures or tank issues cause intermittent or sustained low pressure — sometimes only on hot water if sediment affects the heater. Knowing the cause helps you choose the right fix — from a simple fixture cleaning to PRV replacement, leak repair, or a pump/system upgrade. The next sections explain PRV and pipe behaviors in more detail. How Do Faulty Water Pressure Regulators Affect Water Flow? The pressure reducing valve (PRV) controls downstream pressure using a spring-and-diaphragm mechanism. When it wears out, the result can be sustained low pressure, pressure spikes, or unpredictable fluctuations. Typical signs include consistently low flow at every fixture, pressure jumps when valves close, or steady decline despite the main being open. You can check the PRV’s adjustment screw and measure pressure upstream and downstream, but internal wear or diaphragm failure usually
Expert Leaky Faucet Repair Services

Leaky Faucet Repair You Can Trust — From Small Drips to Full Cartridge Replacement A dripping faucet is more than an annoyance — it wastes water, raises your utility bill, and can be the first sign of a larger plumbing problem. This guide walks through professional repair options for dripping faucets and faucet cartridge replacement so you can make smart choices: how to spot common causes, which faucet types need specific parts, and the step-by-step repair workflow technicians follow. We focus on practical fixes for kitchen and bathroom faucets, cartridge and washer failures, and why prompt repairs stop water damage and save resources. Each H2 and H3 below breaks the topic into clear diagnostics, repair methods, and cost considerations, plus what to watch for in emergencies and what licensed technicians will do. Keywords covered include dripping faucet, faucet cartridge replacement, leaky faucet repair Michigan, and emergency faucet repair 24/7 — information tailored for homeowners and businesses in Macomb, Oakland, and Wayne counties. Why Is Expert Faucet Leak Repair Essential for Your Home? Fixing a faucet leak properly stops continuous water loss and lowers the chance of structural damage or mold by addressing the mechanical cause instead of patching symptoms. A steady drip runs all day and can erode valve seats, stain fixtures, and hide leaks behind cabinets. Fast, professional service also helps preserve water quality by preventing corrosion and failed seals that can create contamination paths. Knowing when to repair parts and when to replace them saves money over time and restores reliable operation in kitchens and bathrooms — protecting your home’s plumbing system. Most faucet leaks come from small parts that are inexpensive to replace compared with the cost of water damage, so early detection is key to avoiding more invasive repairs. The next section spells out the environmental and cost impacts to show why acting quickly matters. What Are the Environmental and Cost Impacts of a Leaky Faucet? One constant drip can waste thousands of gallons a year. According to the EPA, a single leaking faucet can exceed 3,000 gallons annually — roughly the water for many showers or several weeks of household use. That waste raises monthly water bills and adds strain to local water systems, while treatment and heating of that water increase energy use. Small leaks also lead to slow structural damage: repeated dampness causes stains, soft cabinet material, and mold that requires remediation. Putting numbers to the problem makes it clear: repairing leaks is both a cost-saving and environmentally responsible step. Fixing leaks promptly prevents escalation and supports resource conservation — which also protects your home’s structure and indoor air quality. How Does Timely Repair Prevent Water Damage and Conserve Resources? Timely repairs stop a minor drip from turning into ongoing damage by removing the constant moisture that causes staining, wood rot, and mold over weeks or months. Replacing worn washers, O-rings, or cartridges restores the seals that stop slow leaks and protects finishes and underlying materials. Professional repairs conserve water and energy by eliminating wasted hot water and preventing the need to re-treat or reheat leaked water. Acting quickly saves on repair costs, reduces environmental impact, and helps keep indoor air healthier for your family. Preventive work also reduces the need for emergency calls and larger plumbing projects later. Next, we’ll cover common causes and symptoms so you can spot trouble early. What Are the Common Causes and Symptoms of Leaky Faucets? Knowing the usual mechanical failures helps you decide whether a simple DIY fix is reasonable or a licensed plumber is needed. Common causes include worn washers and O-rings, corroded valve seats, failing cartridges, and loose handle assemblies — each produces recognizable symptoms like steady dripping, leaks at the base, or stiff handles. Spotting those patterns gives you useful information for a technician and can often mean a straightforward part swap instead of replacing the whole fixture. The table below pairs common causes with symptoms and recommended action (DIY vs. professional). Intro table: This table summarizes common causes of faucet leaks, the symptoms to look for, and whether a homeowner can attempt a DIY fix or should call a professional. Cause Symptom Professional vs DIY (recommended action) Worn washer Intermittent drip from the spout DIY if you’re comfortable with compression faucets; call a pro if you’re unsure Faulty O-ring Leak at the handle or base Often a DIY swap for a single O-ring; call a pro for widespread corrosion or multiple leaks Corroded valve seat Persistent drip, lower flow Professional service recommended for seat repair or replacement Cracked or failed cartridge Continuous flow or stiff/erratic handle Pro replacement advised to ensure correct parts and alignment This quick guide helps you tell which problems are commonly DIY-capable and which usually need licensed tools and experience. Next we’ll explain the faucet components that most often fail and why. Which Faucet Components Typically Cause Leaks? Most leaks start in the small seal components: washers, O-rings, cartridges, and valve seats. In compression faucets a washer compresses against a seat and will eventually flatten and let water past. O-rings seal stems and bases and can shrink, crack, or break down from age or chemicals. Cartridges combine several seals and need precise replacement when worn — a failing cartridge often causes constant flow or trouble regulating temperature. Inspecting these parts for corrosion, flattening, or mineral buildup helps decide the right repair approach. Knowing each part’s role makes it easier to describe symptoms to a technician and to safely perform basic checks, which we cover next. How to Identify Signs of a Dripping or Leaky Faucet? A quick, structured check gives the most useful information for diagnosis: look for water on counters, wet cabinet surfaces, or mineral deposits around spouts and handles; listen for steady drips or ticking noises that indicate slow leaks. Compare recent water bills or meter readings to spot unexplained increases, and note when the leak happens (constant, only at night, or after specific use) to help pinpoint the source. Take photos of visible corrosion,
Bathroom Plumbing Repair & Installation Services
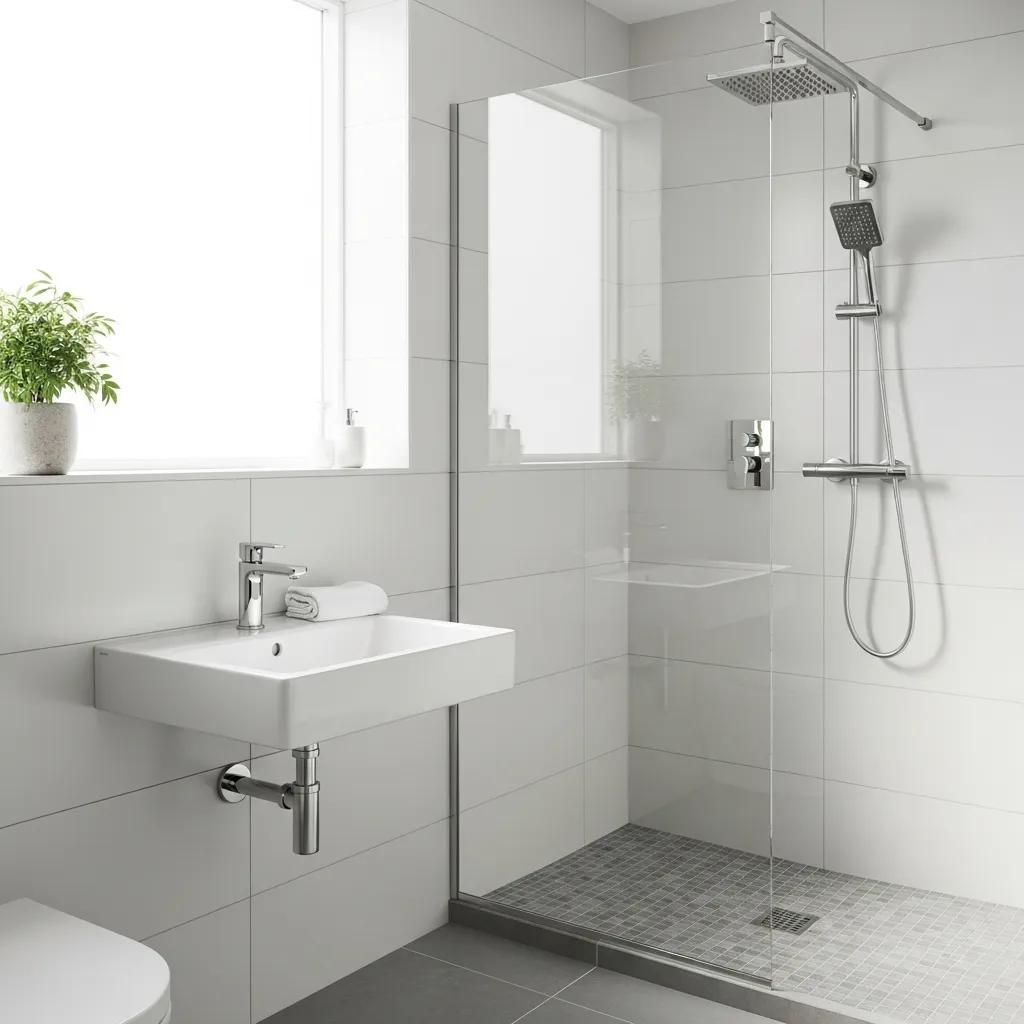
Bathroom Plumbing Repair & Installation — Serving Macomb, Oakland and Wayne Counties Bathroom plumbing repair and installation covers everything needed to keep toilets, showers, tubs, sinks and faucets working safely and efficiently in single-family and multi-family homes. Below we walk through the most common bathroom plumbing problems and practical repair steps, outline how professional installations are planned and what drives cost in Michigan, describe emergency warning signs and quick homeowner triage, and recommend maintenance and upgrades that cut water waste and prevent damage. You’ll learn how to spot typical toilet and shower issues, what to expect from a licensed installer, when to call an emergency plumber, and which upgrades deliver real savings. Each section includes clear, actionable steps you can use right away and guidance on when to schedule a technician for a lasting fix. The following sections cover repair services, installation benefits and process, emergency triage in Wayne County, routine maintenance and high‑impact upgrades, and why Frost and Kretsch Plumbing is a local partner that follows these best practices. Bathroom Repair Services We Offer in Macomb County Our bathroom repair work includes diagnosing and fixing fixture leaks, clearing drain clogs, stopping running toilets, addressing valve failures, and repairing damaged drain assemblies. Repairs begin by identifying the failed part—like a worn flapper, corroded valve, or cracked drain—and replacing or resealing it to restore function and stop water loss. Timely repairs prevent secondary problems such as mold, structural water damage, and higher water bills. Knowing common symptoms and a few quick homeowner steps helps us diagnose faster and deliver more effective repairs; the subsections below explain how. Here’s a quick summary of typical bathroom repairs and simple actions you can take before we arrive: Toilet repairs: Fixes for running toilets, weak flushes, and flange or seal leaks to stop waste and odors. Shower and bathtub leak repairs: Valve or cartridge replacement, pan repairs, and grout/caulk restoration to protect the subfloor. Sink and faucet repairs: Cartridge swaps, P‑trap and drain assembly repairs, and leak sealing to restore drainage and stop drips. Those categories lead into step‑by‑step diagnostic approaches for each fixture, beginning with the toilet—often the first place homeowners notice an issue. How We Diagnose and Fix Common Toilet Problems Our toilet diagnosis follows a short checklist to isolate the failure and choose the right repair. Start by checking whether the toilet runs continuously—inspect the flapper and flush valve for wear, then watch the fill valve and water level for float or fill‑valve issues. Next, test around the base with a piece of tissue or paper to detect flange or wax‑ring leaks, and assess flush force for partial clogs or venting problems. Common fixes include replacing the flapper or fill valve, repairing or replacing the flange and wax ring, using a drain snake for stubborn clogs, or reseating/replacing the toilet if the glaze is cracked or the base is compromised. If you find flange corrosion, cracked porcelain, or sewer odors, a professional repair is recommended because those issues can lead to structural damage and code concerns. The next section explains how we approach shower and tub leaks when the source sits behind tile or under the pan. Effective Solutions for Shower and Bathtub Leak Repairs Leaks around showers and tubs usually come from a handful of sources—failed valves or cartridges, degraded grout or sealant, a compromised shower pan, or hidden pipe failures. The right solution depends on finding the exact source. We use visual checks and simple tests—isolating the valve, looking for discoloration or soft spots, and running controlled flow tests—to pinpoint the leak. If the valve or cartridge is at fault, a targeted replacement often fixes the issue without disturbing tile. If grout or caulk has failed, resealing and grout repairs stop surface leaks. Pan or concealed pipe leaks typically require access through tile, an adjacent panel, or the ceiling below to complete a durable repair. Choosing repair versus replacement depends on damage and long‑term risk: a reseal can be enough for surface‑only leaks, but recurring leaks, visible mold, or structural dampness usually call for component replacement or a full reassembly. After any repair we test and monitor the area to confirm the leak is resolved and to reduce the chance of recurrence. Benefits of Professional Bathroom Plumbing Installation A professional installation makes sure fixtures are sized correctly, meet code, and are water‑tight from day one—reducing the chance of future failures and improving efficiency. Licensed installers evaluate existing rough‑ins, inspect flanges and drains, and plan waterproofing and valve placement to avoid common mistakes like poor slope, improper sealing, or restricted access for future service. Professional work comes with warranty‑backed workmanship, adherence to local plumbing codes, and fewer callbacks—important when you’re thinking about long‑term reliability and resale value. Below is a comparison of common toilet installation types and the attributes most homeowners weigh when choosing between standard, high‑efficiency, and ADA‑compliant models. The table clarifies water use, typical install time, and considerations that affect cost and scope. Toilet Type Typical Water Use Typical Installation Time Key Considerations Standard gravity-feed 1.28–1.6 gallons per flush 1–2 hours Cost-effective; often a simple flange/wax‑ring swap High-efficiency (low-flow) ≤1.28 gallons per flush 1.5–3 hours May need pressure adjustment or different trapway size ADA-compliant pedestal or elongated 1.28–1.6 gpf 2–4 hours Requires height and clearance planning; possible floor work This quick comparison helps you weigh water savings against installation complexity and expected disruption. The next paragraphs outline the standard installation steps and the main cost drivers that affect timeline and price. New Toilet Installation Process and Cost Considerations in Michigan Typical toilet installation follows a clear workflow: assess the existing flange and drain, remove the old fixture carefully, inspect and repair the flange or subfloor if needed, set a new wax ring or gasket, bolt the new toilet to the flange, and test for a watertight seal and proper flush. Cost depends on the fixture type (standard vs. high‑efficiency or ADA), whether the flange or drain pipe needs repair, and if subfloor or tile remediation is required. Permit
How to Choose the Best Toilet for Your Bathroom
How to Choose the Best Toilet for Your Bathroom: The Ultimate Toilet Buying Guide for Homeowners Picking the right toilet affects more than how your bathroom looks — it changes daily comfort, water bills, accessibility, and how often you’ll need repairs. This guide walks you through the most common toilet types, the features that matter (comfort height, flush tech, bowl shape), how to measure for a correct fit, and which options suit small bathrooms or accessibility needs. You’ll also learn about WaterSense, MaP scores, and gallons-per-flush so you can balance performance and savings. Finally, we explain when it’s worth calling a licensed plumber to avoid installation mistakes and ensure a code-compliant job. What Are the Different Types of Toilets and Their Benefits? “Toilet type” refers to overall design and how the unit flushes. Different styles fit different spaces, budgets, and plumbing setups — and each has trade-offs in cleaning, installation, and water use. Knowing the basics — one-piece, two-piece, wall-hung, smart, and tankless — helps you narrow choices based on maintenance needs and bathroom layout. Every toilet clears waste using a combination of tank (or valve), bowl, trapway, and flush mechanism; performance is often tied to trapway design and the flush system used. Below is a quick rundown of common types and why homeowners choose them. Common toilet types and their primary benefits: One-piece toilet: Smooth, seamless look that’s easier to clean and keeps grime out of seams. Two-piece toilet: Tank and bowl separate for easier handling, replacement parts, and generally lower upfront cost. Wall-hung toilet: Opens up floor space and makes cleaning under the bowl simple — requires in-wall support. Smart toilet: Adds bidet functions, heated seats, and sensors for comfort and hygiene — higher price and more complex service. Tankless toilet: Sleek, compact profile that relies on strong water supply or specialized valves — may need plumbing upgrades. The list above shows the main trade-offs. The table that follows compares cost, cleaning, installation complexity, water use, and best use-cases to help you decide. Toilet Type Typical Cost & Complexity Best Use-Case One-piece Moderate to higher cost; fewer crevices for cleaning Main bathrooms where easy cleaning matters Two-piece Lower initial cost; simpler repairs because parts separate Budget-conscious homeowners and simple installs Wall-hung Higher install complexity due to in-wall carrier; modern look Small baths and accessible layouts that need floor clearance Smart Higher purchase and maintenance cost; advanced features Luxury baths and users who want integrated bidet/comfort tech Tankless Needs steady water pressure; compact profile Contemporary builds with adequate plumbing capacity How Do One-Piece and Two-Piece Toilets Compare? The main difference is construction. One-piece toilets are molded as a single ceramic unit, which removes a seam that can trap dirt and gives a sleeker look — but they’re heavier and often pricier. Two-piece toilets separate the tank and bowl, making transport and repairs easier and usually lowering initial cost. Your choice will depend on budget, how much cleaning matters, and whether you want a lighter unit for delivery and installation. Later sections cover specialty designs that change installation needs even more. What Are Wall-Hung, Smart, and Tankless Toilets? Wall-hung toilets mount to an in-wall carrier to free floor space and create a minimalist look; they require structural support and pro installation. Smart toilets add electronics — heated seats, automatic flush, bidet sprays — for comfort and hygiene but add repair complexity. Tankless toilets hide the tank (or use a valve) and need strong, steady water pressure to flush properly; they work well in modern plumbing systems but aren’t ideal where pressure is low. Each type targets a different user: wall-hung for tight layouts, smart for luxury-minded owners, and tankless for homes with the right plumbing capacity. Which Toilet Features Should You Consider for Comfort and Efficiency? Features shape daily comfort and long-term costs. Focus on seat height, bowl shape, flush type, and water-efficiency ratings when you compare models. Comfort-height or ADA-aligned seats make sitting and standing easier; elongated bowls add comfort but take more room. Flush tech — gravity, pressure-assisted, or dual-flush — affects both clearing power and water use. Look for WaterSense certification and low GPF numbers to save water, and check MaP scores to see real-world clearing performance. The table below links features to benefits and who typically benefits most. Feature Benefit Who It’s Best For Comfort height (17–19″) Easier to sit and stand; less knee strain Seniors, taller users, and people with mobility concerns Elongated bowl More seating comfort Adults and shared bathrooms with space Dual-flush system Lower water use for liquid-only flushes Environmentally conscious households Pressure-assisted flush Stronger flush with fewer clogs High-use homes or commercial settings WaterSense certification Verified water efficiency (<1.28 GPF) Anyone looking to cut water bills and waste This table helps you rank features by measurable benefit. If you’re considering pressure-assisted or tankless systems, we recommend a pro assessment to confirm your water pressure and supply can support them. If you want help comparing advanced flush systems or tankless units, an on-site check will confirm whether your water pressure and drain layout can support the technology. Frost and Kretsch Plumbing offers measurements and installation guidance so you don’t buy a model that needs costly retrofit work. To schedule an assessment — pressure test, trapway check, or in-wall carrier evaluation — call (586) 675-0097. What Are the Benefits of Comfort Height and ADA-Compliant Toilets? Comfort-height toilets raise the seat to about 17–19 inches, which makes sitting and standing easier and lowers strain on knees and hips. ADA-compliant models add specific clearances and grab-bar placement guidance for safer transfers. Before you swap a standard bowl for a comfort-height unit, check vanity heights and grab-bar positions so everything lines up. Also consider compatibility with seat accessories or bidet attachments. If you’re planning broader accessibility upgrades, coordinate measurements with a licensed plumber to meet code and get the right fit. How Do Bowl Shapes, Flush Systems, and Water Efficiency Impact Performance? Bowl shape and flush system together determine comfort and how reliably the toilet clears