
Backflow Prevention Testing in Farmington Hills, MI
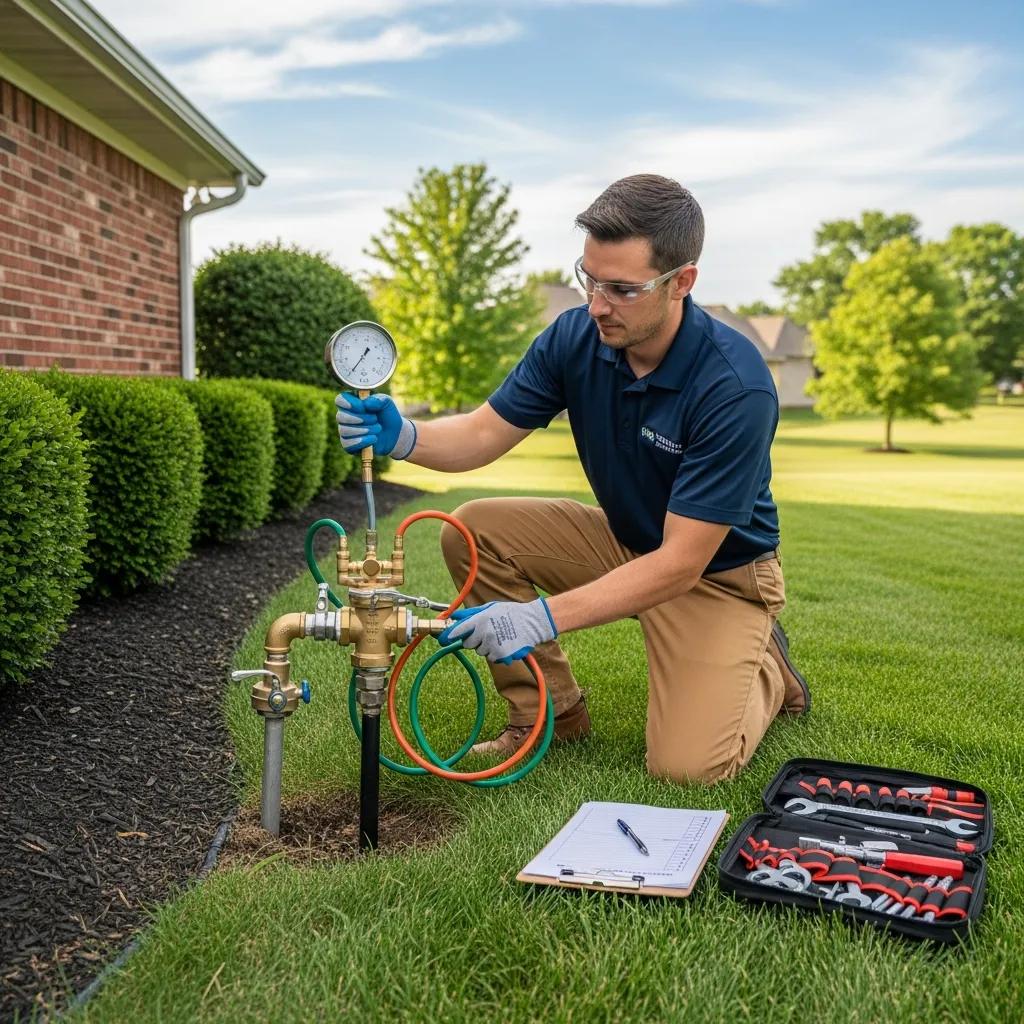
Backflow Prevention Testing in Farmington Hills, MI — Expert Service and Local Compliance Backflow testing makes sure your drinking water stays safe. It confirms backflow preventers stop contaminated water from flowing back into a building’s water supply. This guide focuses on backflow prevention and testing for Farmington Hills, MI, and gives straightforward next steps for property owners. You’ll learn what backflow is, how contamination can happen, which Farmington Hills and Oakland County rules typically require annual testing, how common devices work, and what to expect for installation, repair, and costs. Many homeowners and facility managers find local compliance confusing — we pair clear technical explanations with practical steps so you can protect water quality and meet municipal rules. We also identify typical cross-connections, explain RPZ, DCVA, PVB, and AVB devices, and include checklists to simplify decisions for both homes and businesses. If you need a licensed tester in the Farmington Hills area, you’ll find a clear call-to-action at the end. What is Backflow and Why is Backflow Prevention Crucial in Farmington Hills? Backflow is the unwanted reversal of water flow that can let non-potable or contaminated water enter the drinking system. Prevention devices stop that reversal at cross-connections. Backflow happens two main ways: back-siphonage, when negative pressure draws contaminants into the potable supply, and back-pressure, when higher downstream pressure pushes effluent upstream. In Farmington Hills — where irrigation systems, commercial boilers, and fire suppression systems are common — the risk of cross-connection contamination goes up if preventers aren’t maintained. Proper backflow prevention protects drinking water, lowers public health risk, and keeps properties in line with Oakland County and city codes. Knowing where and how backflow happens is the first step to effective testing and remediation required by local authorities. How Does Backflow Contaminate Drinking Water? Backflow contaminates drinking water by two primary mechanisms: back-siphonage and back-pressure. Back-siphonage occurs when a drop in supply pressure — from main breaks or heavy demand — creates suction that pulls irrigation runoff, fertilizers, or chemicals into the water system. Back-pressure happens when downstream systems (like boilers or pumps) exceed supply pressure and push contaminated fluids back into the potable lines. Examples include lawn chemicals entering the drinking system during a pressure drop, boiler treatment chemicals migrating into a building’s water loop, and stagnant auxiliary water being forced back into the main when valves fail. These events can cause illnesses or chemical exposure, which is why selecting and maintaining the right backflow preventer matters. Recognizing these pathways helps property managers prioritize testing and device choices. What Are Common Cross-Connections Causing Backflow? Cross-connections are physical links between potable water and non-potable sources that allow contaminants to bypass protections when flow reverses. They’re common in homes and businesses. Typical examples include irrigation outlets and hose bibs that can draw lawn chemicals into supply lines, chemical feed lines on boilers and cooling towers, and fire suppression hydrants or sprinkler systems that may be connected to non-potable sources during testing or maintenance. Commercial kitchens and labs also present risks through process connections and equipment drains. Cataloging these cross-connections at your property is the first step in choosing the right preventer and setting an annual testing schedule to keep potable water protected. What Are the Farmington Hills Backflow Testing Regulations and Compliance Requirements? Farmington Hills follows Michigan and Oakland County cross-connection control principles that generally require periodic testing and maintenance of backflow prevention assemblies to protect the public water supply. In practice, properties with irrigation, commercial process connections, or fire suppression devices typically must complete annual testing to stay compliant. Testers should document results using ASSE-standard procedures. Local authorities commonly require certified test reports and timely repairs for failing devices, and those records become part of a property’s compliance file. Knowing who must test, how often, and what qualifications testers need reduces the chance of enforcement actions. The table below summarizes typical local expectations by property type. Before the table below: this table summarizes common local testing requirements for Farmington Hills and nearby Oakland County offices so property owners can quickly see who typically needs annual tests and what permit or certification elements are involved. Property Type Typical Testing Frequency / Permit Needs Notes Commercial properties (restaurants, manufacturing) Annual testing; permit/compliance notices may apply Multiple devices often require coordinated testing and reporting Irrigation on residential properties Annual testing when connected to potable system; notification-based enforcement Homeowners may be contacted if cross-connection risks exist Fire suppression systems (hydrants/sprinklers) Annual inspection/testing depending on system design Some systems require special test procedures and documentation This table highlights that annual testing is standard for most commercial sites and many residential irrigation systems, and that timely repairs plus documentation finish the compliance process. Who Needs Annual Backflow Testing in Farmington Hills? Annual testing usually applies where cross-connection risk is higher. That includes commercial buildings, medical facilities, restaurants, and sites with chemical injection or industrial processing. Residential properties with irrigation systems tied to the potable supply are often required to test yearly as well. Local water authorities and the Farmington Hills Building Division may notify property owners when a device is registered to a parcel. Property managers and homeowners are responsible for scheduling tests and keeping records. Knowing your category helps you budget and plan ahead. What Are the ASSE Certification and Licensing Requirements for Testers? Testers should hold ASSE 5110 certification or an equivalent credential showing they know backflow assembly testing protocols. That certification indicates the tester follows nationally recognized procedures. Many local rules also expect testers to be licensed plumbers or similarly qualified professionals familiar with mechanical assemblies. Before you schedule work, ask for written proof of ASSE certification and any required local plumbing licenses. Verifying credentials helps ensure accurate test results and proper documentation for authorities, reducing the chance of failed inspections from improper technique or incomplete reporting. Which Backflow Prevention Services Does Frost and Kretsch Plumbing Offer in Farmington Hills? We provide full backflow prevention services in Farmington Hills: testing, certification, repair, installation, and emergency response to keep your potable water
Reliable Plumber Services in Wayne County, Michigan
Reliable Plumbing in Wayne County, Michigan — Trusted 24/7 Emergency & Residential Service Frost and Kretsch Plumbing offers dependable 24/7 emergency and residential plumbing across Wayne County, Michigan. We combine fast response, licensed technicians, and local know-how to protect your home or business. Below we explain how modern diagnostics, routine maintenance, and practical repairs limit damage and disruption. Read on to learn why a local Wayne County plumber matters, which services solve common plumbing problems, how sewer and drain cleaning works, when excavation is required, and how transparent pricing helps you make confident decisions. By the end you’ll know when to call, what to expect from pros, and how to engage a licensed team. Why Choose Frost and Kretsch Plumbing for Wayne County Plumbing Services? Good local plumbing starts with quick diagnostics, skilled work, and clear communication. Fast, accurate diagnosis catches failing parts early. Targeted repairs limit collateral damage. Clear expectations reduce delays and confusion. Hiring a licensed plumber also keeps work code-compliant and protects your property and occupants. Below we share the specific customer protections and proof points that make choosing local easier. Frost and Kretsch Plumbing backs those reliability promises with customer-first policies drawn from our service profile. We offer round-the-clock availability without inflated emergency rates, a transparent pricing guarantee that work won’t exceed the quoted cost, and a 100% satisfaction promise or your money back. Local credibility comes from named contacts—Dave Kretsch, Mark Frost, and Jeff Kretsch—and strong customer ratings online. These details give you a clear sense of what happens when you call for help. This mix of operational reliability and clear commitments reduces uncertainty at the moment of service. Knowing a crew often arrives within an hour for urgent jobs helps homeowners prioritize mitigation and limit secondary damage. The next section explains our crew credentials and what makes Wayne County plumbers dependable in the field. What Makes Our Wayne County Plumbers Reliable and Experienced? Licensed technicians and master plumber credentials mean work meets industry standards and local codes — that matters for complicated repairs and installations. Our crews complete ongoing training and follow diagnostic workflows to find root causes like failing seals, corrosion, or mainline blockages rather than just treating symptoms. Having named company contacts gives you a local point of accountability for permits and coordination. For homeowners that usually means fewer return visits and clearer timelines, which reduces the disruption of emergency repairs. Understanding our team’s qualifications also helps you know when a job is DIY-safe and when it needs a licensed pro. How Does Our 24/7 Emergency Plumbing Service Benefit Wayne County Residents? 24/7 emergency coverage limits water damage by enabling immediate containment, temporary fixes, and quick scheduling for permanent repairs. Common emergencies include burst pipes, major leaks, and severe clogs that risk backups into living areas. A typical crew arrival time is often within an hour, which helps reduce property exposure. Emergency response also focuses on safety—shutting off mains and isolating electrical hazards—until permanent repairs are in place. Quick action preserves finishes and possessions, eases insurance claims, and gets you back to normal sooner. What Comprehensive Plumbing Services Are Available in Wayne County? Comprehensive plumbing covers diagnostics, repairs, and installations that keep homes and businesses running and code-compliant. We handle immediate failures—leaks and clogs—as well as longer-term needs like water heater replacement and sump pump installs. Technicians use handheld diagnostics and mechanized equipment to locate problems and restore function efficiently. The table below compares common services, the problems they solve, and the typical outcomes for Wayne County properties. Service Typical Problem Addressed Typical Outcome/Benefit Residential Repairs & Installations Leaky fixtures, failing faucets, broken toilets Restored use and lower water waste Water Heater Services Not enough hot water, leaking tanks, inefficiency Reliable hot water and better energy performance Sump Pump Installation Basement flooding risk, standing water after storms Lower flood risk and protected basements Sewer & Drain Cleaning Slow drains, backups, recurring clogs Restored flow and fewer emergency calls This comparison helps match symptoms to the right service and shows what to expect after a certified technician completes the work. Which Residential Plumbing Repairs and Installations Do We Offer in Wayne County? Our residential work covers fixture repairs, appliance hookups, and whole-system services that keep daily life comfortable and safe. Common homeowner issues—running toilets, dripping faucets, low water pressure, and failing disposals—are fixed with targeted repairs or replacements that save water and restore normal use. We also handle water heater replacements (including tankless options) and sump pump installs for basements prone to stormwater. If you’re unsure what’s happening, a professional assessment will show whether a repair, replacement, or maintenance plan is the most cost-effective path. Typical residential interventions include: Toilet and faucet repairs to restore function and reduce waste. Water heater repair or replacement for dependable hot water. Sump pump installation and maintenance to prevent basement flooding. These services minimize interruption, extend equipment life, and clarify next steps for larger upgrades. What Commercial Plumbing Solutions Does Frost and Kretsch Provide in Wayne County? Commercial plumbing serves larger systems, regulatory requirements, and the need to minimize downtime. We provide backflow prevention, commercial water heater systems, grease trap maintenance, and large-scale mainline or sewer work. Regular maintenance keeps businesses open and compliant, and our technicians understand commercial codes and inspection processes. For bigger projects we plan and stage work to limit operational disruption while meeting timelines and accountability. Common commercial services include: Backflow prevention and testing to protect municipal water and meet compliance. Commercial water heater and boiler services to support continuous operations. Main line and grease trap cleaning to prevent backups and health-code issues. These commercial offerings reduce business risk and keep facilities operating under regulatory expectations. How Do We Address Sewer and Drain Cleaning Needs in Wayne County? Sewer and drain work starts with accurate diagnosis followed by targeted cleaning or repair to restore flow and prevent repeats. We use camera inspections to find blockages, scale, or root intrusion; cleaning options range from mechanical rooter work to high-pressure hydro jetting for heavy
DIY Toilet Sweat Prevention
DIY Toilet Sweat Prevention: Effective Solutions to Stop Toilet Condensation and Protect Your Bathroom Toilet “sweat” is condensation that forms on the outside of a cold toilet tank when warm, humid bathroom air meets the cool surface of the tank, and it can quickly lead to warped flooring, staining, and mold growth if left unchecked. This guide explains why toilet condensation happens, how a running toilet or hidden leak increases the problem and water waste, and practical steps homeowners in Michigan can take—both DIY and professional solutions—to stop sweating and protect finishes. You will learn the science behind condensation, step-by-step DIY tank insulation and humidity-control tactics, clear signs that require a plumber, cost ranges for anti-sweat valves and professional fixes, and how to choose a toilet less prone to sweating. Throughout the article we use concise, actionable lists, comparison tables of common insulation materials and professional services, and decision-checklists that help you identify when to escalate to licensed technicians. By the end you’ll have both immediate fixes you can implement and an understanding of long-term solutions that preserve surfaces and save water and energy. Why Does My Toilet Sweat? Understanding Toilet Condensation Causes and Effects Toilet sweat is simply condensation: warm, moist air transfers heat to a cooler toilet tank surface, causing water vapor to condense into liquid. This physical mechanism—temperature differential driving phase change—means tanks fed by cold water or subject to frequent refill are especially susceptible. The result is visible moisture on the tank exterior, puddling on flooring, and elevated humidity that can promote mold and finish damage. Understanding these mechanics shows why controlling indoor humidity and reducing the temperature gap between tank water and room air are central to prevention. What follows are the primary causes and the practical effects homeowners see, each of which points to a complementary corrective approach that ranges from ventilation to plumbing repairs. What Causes Toilet Tank Sweating and Bathroom Humidity? High ambient humidity combined with a cool tank surface is the most common cause of toilet sweating, particularly during warm, humid months in Michigan when indoor moisture rises. Poor ventilation—no exhaust fan or infrequent fan use—lets humid air linger and increases condensation risk. A tank that fills with very cold incoming water, such as from a deep main or well, worsens the temperature differential and accelerates sweating. Hidden leaks and continuous filling can also maintain a cold tank and contribute to persistent condensation; a single running toilet can waste significant water, with some hidden leaks totaling roughly 200 gallons per month. Taken together, these causes indicate two parallel strategies: reduce humidity and raise tank surface temperature or block heat transfer to prevent moisture formation. This dual approach leads into practical DIY remedies that follow. How Does a Running Toilet Increase Toilet Sweat and Water Waste? A running toilet causes continuous cold water flow into the tank, keeping tank water temperature lower than ambient air for extended periods and creating persistent condensation. Mechanically, a failing flapper or maladjusted fill valve lets water trickle in after each flush or continuously, and that steady inflow prevents the tank from warming enough to stop sweating. Beyond condensation, the water loss from a running toilet can materially add to utility bills and overall household water use; addressing leaks promptly reduces both sweat and waste. A simple dye or food-coloring test in the tank lets homeowners quickly check for a running toilet: add color, wait 10–15 minutes without flushing, and watch the bowl for color migration. If the dye test confirms continuous flow or you observe repeated refill cycles, repairing a flapper or calling a professional for leak detection should be the next step to stop both waste and condensation. How Can I Prevent Toilet Sweat Myself? DIY Toilet Tank Insulation and Humidity Control Tips Preventing toilet sweat yourself focuses on three complementary actions: insulating the tank interior to block condensation, lowering bathroom humidity through ventilation and dehumidification, and diagnosing running toilets or leaks that sustain cold-water flow. Insulation interrupts heat transfer and is often the quickest visible fix, while improved ventilation reduces the moisture load that causes condensation. Portable dehumidifiers and proper exhaust-fan use help in seasonal humidity spikes common to Michigan summers; combine these measures for best effect. DIY interventions are effective for many households but have limits in complex plumbing layouts or when leaks are present. Below are step-by-step DIY actions that prioritize safety, reversibility, and measurable results so you can see reduced moisture within hours to days. Install a foam tank liner or adhesive insulation kit: remove the tank lid, dry the interior, fit liner per instructions, and replace the lid carefully. Increase ventilation: run an exhaust fan for 20–30 minutes after showers or install a timer switch to ensure consistent operation. Use a portable dehumidifier: place near the toilet or central bathroom area, set to 50% relative humidity, and empty condensate as needed. Check for running toilets: perform a dye test and replace a worn flapper or adjust the fill valve if the test shows leakage. Temporarily insulate with bubble-wrap padding only as a short-term measure, ensuring it does not obstruct tank components or trap moisture. These steps are practical and often low-cost to implement, but if condensation persists after completing them you should consider professional evaluation for permanent solutions or leak detection. Before the table below, note this comparison of common DIY insulation materials helps you choose an option that balances effectiveness, cost, and longevity for your situation. Insulation Material Effectiveness Ease of Install Typical Cost Longevity Closed-cell foam liner High Moderate (cut-to-fit) Low–Moderate Several years Preformed foam kit High Easy (designed for tanks) Moderate Several years Bubble-wrap padding (temporary) Low–Moderate Very easy Very low Short-term This table shows that preformed foam liners and closed-cell foam best balance performance and durability for most DIYers. For short-term or emergency fixes, bubble wrap is inexpensive but less durable and may trap moisture if not monitored. Improving ventilation and humidity control complements insulation: the next subsection explains fan and dehumidifier use in more
Frost & Kretsch Plumbing Reviews
Frost & Kretsch Plumbing Reviews: Trusted Customer Feedback and Service Quality Insights Frost & Kretsch Plumbing Reviews provides a centralized look at customer experiences, ratings, and service-quality indicators that help homeowners and property managers decide who to call for plumbing work. This reviews hub summarizes what customers across Macomb, Oakland, and Wayne counties say about emergency response, drain and sewer work, water heater replacement, and routine residential service, and it explains how to interpret review language and common metrics. Many readers seek clear evidence of reliability and transparent pricing before scheduling service, and reviews provide that social proof by documenting response time, workmanship, and communication. This article walks through top themes in customer feedback, breaks down which services earn the strongest praise, profiles the licensed technicians tied to those outcomes, and synthesizes review evidence that supports key value propositions. Along the way you’ll find practical tips for reading plumbing testimonials, EAV tables that map services to praise, and targeted answers to common questions about licensing, emergency availability, and cost expectations. By the end you’ll be positioned to evaluate review signals for hiring a plumber with confidence and to follow a direct contact path if you decide Frost & Kretsch Plumbing fits your needs. What Do Customers Say About Frost & Kretsch Plumbing? Customer feedback for Frost & Kretsch Plumbing centers on three recurring themes: prompt emergency response, clear upfront pricing, and workmanship that resolves repeat issues. Review language frequently links those themes to specific service types—emergency calls, drain cleaning, and water heater work—so the sentiment is both service-specific and consistent across platforms. Readers should interpret these reviews as practical evidence of reliability rather than marketing claims: multiple reviewers note the same operational behaviors (fast arrival, visible diagnostics, and explanation of costs) that form repeatable decision criteria for hiring. The next paragraphs break down which services receive the most positive feedback and how ratings reflect satisfaction, giving you a concise map of customer priorities. Which Services Receive the Most Positive Customer Feedback? Drain and sewer cleaning, water heater replacement, and emergency plumbing consistently appear as the services most praised in customer feedback. Reviewers often highlight successful clog removal, effective hydro-jetting or camera inspection follow-through, and long-term fixes for recurring blockages when discussing drain and sewer work. For water heater replacements, customers emphasize clear explanation of options, timely installation, and resolved hot-water reliability. Emergency plumbing praise typically focuses on rapid response and problem containment until a permanent repair can be scheduled. These patterns show that technical competence paired with clear communication shapes highest-rated experiences. The study highlights the critical importance of effective service delivery and customer satisfaction, particularly in public service organizations, by employing a survey method to gather customer feedback. How Do Frost & Kretsch Plumbing Ratings Reflect Customer Satisfaction? Star ratings and short-form testimonials tend to cluster around three satisfaction drivers: communication, price clarity, and problem resolution. When reviewers give the highest ratings they frequently reference direct interactions—technicians explaining findings, transparent cost breakdowns before work begins, and visible cleanup afterward—linking qualitative descriptors to numerical ratings. Readers should look beyond the star count to the review text for indicators like documented arrival times, referenced guarantees, and mentions of licensed technicians, which better predict consistent service quality. Understanding the language reviewers use helps prospective customers weigh ratings against their own priorities. Introductory table: this EAV table maps common services to the praise themes they receive in reviews so readers can quickly see which offerings generate consistent positive feedback. Service Type Common Praise Representative Feedback Drain & Sewer Cleaning Thorough clearing, long-lasting results Feedback often notes recurring clogs were resolved and technicians explained causes. Water Heater Replacement Clear options, reliable installation Customers praise timely installs and restored hot-water reliability. Emergency Plumbing Rapid response, effective containment Reviews typically reference quick arrival and immediate leak control. This table helps readers scan where Frost & Kretsch Plumbing earns the most consistent positive signals and guides the deeper case studies that follow. How Reliable Are Frost & Kretsch Plumbing’s Emergency and Residential Services? Reliability in emergency and residential plumbing is defined by availability, arrival behavior, and the ability to contain damage until a full repair is completed. For Frost & Kretsch Plumbing, customer feedback repeatedly references 24/7 emergency availability and technicians who prioritize stabilizing the home environment—shutting off flows, isolating leaks, and explaining interim steps. Review descriptions of residential jobs also emphasize courteous, neat technicians who protect floors and leave work areas tidy, which reduces secondary costs and homeowner stress. These operational patterns are central to evaluating an emergency-capable local plumbing provider; the next subsections provide targeted evidence about 24/7 performance and geographically specific residential feedback across Macomb, Oakland, and Wayne counties. What Do Customers Say About 24/7 Emergency Plumbing Service? Customers commonly describe emergency responses in terms of speed and effectiveness rather than only the final bill, noting that rapid containment prevented further water damage and reduced emergency repair scope. Review narratives highlight technicians arriving outside normal hours, assessing the situation quickly, and offering transparent options for immediate fixes versus scheduled permanent repairs. That pattern—fast stabilization followed by clear next steps—is the most reliable indicator of emergency competency, and it’s why many reviewers recommend the company for overnight and weekend callouts. This trend underscores why availability plus decisive action forms the core of emergency reliability. How Do Residential Plumbing Reviews in Macomb and Surrounding Counties Reflect Service Quality? Residential reviews from Macomb, Oakland, and Wayne counties emphasize common local concerns: sump pump reliability, aging water heaters, and seasonal drain backups. Customers in these areas praise technicians who explain local causes (soil conditions, tree roots, seasonal freeze-thaw) and propose solutions that balance cost with long-term performance. Reviews often stress convenience factors—scheduling options and follow-up checks—indicating that reliability includes both technical resolution and service processes. These location-tagged patterns help homeowners anticipate typical problems and identify which services merit preventative investment. What Are the Experiences With Frost & Kretsch Plumbing’s Commercial and Drain Cleaning Services? Commercial clients and property managers evaluate plumbing firms on different criteria than homeowners:
Get a Plumbing Quote Online
Get a Plumbing Quote Online: Request Your Free, Transparent Plumbing Estimate from Frost & Kretsch Plumbing Getting a plumbing quote online lets you understand costs and options quickly so you can decide with confidence before work begins. This guide explains how online plumbing estimates work, what types of quotes you can request, the main factors that influence pricing, and how to get a reliable, written estimate without surprises. Many homeowners and property managers want transparent pricing, clear timelines, and an accurate comparison between remote estimates and on-site assessments; this article delivers practical steps and examples you can use right away. You will learn the step-by-step online request process, how residential and commercial quotes differ, common price drivers like parts and access, and the exact information that speeds an accurate quote. Later sections outline why a local provider can help, answer common questions about hourly and diagnostic fees in Michigan, and give a direct checklist to request your quote online or by phone. How Does the Online Plumbing Quote Process Work? An online plumbing quote process converts your problem description into an actionable estimate using photos, forms, and optional on-site assessment scheduling. The mechanism starts with submission of details, moves to rapid review by a trained dispatcher or estimator, and ends with a written estimate you can approve or decline. The main benefit is time-savings and a clearer expectation of cost and scope before a technician arrives. Below are the core steps that most providers use to create accurate online plumbing quotes and how to prepare for each stage. How Can I Request a Plumbing Quote Online or by Phone? Begin by entering basic details about the issue: service address, brief description, and available photos or videos that show the problem. Phone requests follow a similar script—have the same details ready so the dispatcher can triage urgency and assign the correct technician. Typical response times for an online form review are a few hours for non-urgent concerns and much faster for emergency calls. Preparing photos and model numbers in advance speeds diagnosis and reduces the need for an expensive diagnostic visit, which improves estimate accuracy. What Happens During the On-Site Plumbing Assessment? A concise on-site assessment focuses on diagnosing root cause, checking access, and verifying parts needed for repair or replacement. Technicians use visual inspection and may bring diagnostic tools such as leak detectors or camera equipment for sewers to confirm scope. The assessor documents findings with photos and notes to create a line-item written estimate after inspection. This documentation ensures the quote reflects actual conditions and provides a basis for any change orders if hidden issues appear later. How Is Transparent Upfront Pricing Provided? Transparent upfront pricing comes as a written, itemized estimate that separates labor, parts, and any service or permit fees to show how the total is calculated. Estimates should state what is included and list exclusions or potential additional costs caused by unforeseen conditions. Providers often require customer approval before beginning work that would increase the quoted price, protecting you from surprise charges. Clear estimates make it easier to compare options and decide whether to proceed, and they form the contract for the agreed work. What Guarantees and Services Follow the Quote Approval? After you accept a written estimate, scheduling, parts procurement, and warranty information are confirmed in writing so expectations are clear. Common follow-up elements include a timeline for completion, warranty coverage on parts and labor, and a satisfaction policy that outlines remedial steps if problems persist. The assurance of a documented guarantee reduces risk and clarifies responsibilities for both the homeowner and the service provider. Knowing these post-approval processes helps you plan for access, payment, and any needed permits before the crew arrives. What Types of Plumbing Quotes Are Available Online? Online plumbing quotes generally fall into four categories: residential repairs and replacements, commercial projects and maintenance, emergency dispatch estimates, and specialized services requiring advanced diagnostics or excavation. Each category has different scopes, typical turnaround expectations, and information requirements. Understanding which category your situation fits helps you choose the right submission path and prepare the specific details needed for an accurate quote. Below is a quick breakdown to help you match your issue to the appropriate quote type. Residential estimates cover everyday household issues and typical replacements. Commercial estimates address larger systems, scheduling constraints, and compliance needs. Emergency estimates provide fast triage and preliminary costs for urgent situations. Specialized service quotes include sewer cleaning, leak detection, water heater replacement, and excavation work. This comparison helps you decide whether a remote estimate is sufficient or if an on-site assessment is required before a final price is given. Service Type What the Quote Covers Typical Turnaround / Notes Residential plumbing estimate Common repairs, fixture replacement, water heater work Remote quote possible; on-site for replacements Commercial plumbing estimate System upgrades, permits, business scheduling Proposal or bid process may be required Emergency plumbing quote Rapid response, temporary fixes, damage control Preliminary pricing; final quote after assessment Specialized service estimate Sewer camera, excavation, leak detection, sump pumps May require diagnostics or permits before final pricing How Do Residential Plumbing Estimates Work? Residential plumbing estimates often cover common tasks like fixture repair, water heater replacement, drain cleaning, and leak repair, and they can be delivered remotely for simple jobs. Flat-rate pricing is typical for straightforward, repeatable tasks such as unclogging a drain or replacing a faucet cartridge, while complex repairs may be quoted hourly or after on-site diagnosis. Homeowners should include clear photos, appliance model numbers, and a short history of the issue when requesting a quote to improve accuracy. Expect scheduling windows and clear written estimates before any work begins. What Should I Know About Commercial Plumbing Quotes? Commercial quotes usually involve larger systems, multi-unit coordination, and compliance requirements that influence scope and cost. Providers prepare proposals that itemize labor, materials, downtime mitigation, and any required permits or inspections; bidding or phased proposals are common for larger projects. Commercial timelines often require coordination with building managers or tenants to
How to Fix a Running Toilet
How to Fix a Running Toilet: Step-by-Step Repair Guide and When to Call a Plumber This guide explains what “running toilet” means, how the tank components (flapper valve, fill valve, float, overflow tube, chain) interact to control water flow, and how diagnosing and fixing the right part saves water and money. You will learn clear diagnostic tests, step-by-step DIY repairs for the most common causes, tools and parts to have on hand, and when a licensed plumber should take over. The article also previews transparent cost ranges and practical next steps so you can decide whether to DIY or schedule professional service. Throughout, keywords like fix running toilet, toilet repair, and toilet fill valve replacement cost are used naturally to help you find relevant actions fast. If the toilet is making loud hissing noises, refilling repeatedly, or causing continuous water flow, act promptly—hydro-waste accelerates. For urgent issues, Frost and Kretsch Plumbing offers 24/7 emergency service with licensed and insured technicians and transparent upfront pricing to address problems quickly. Their local expertise serving Macomb, Oakland, and Wayne counties means a prompt assessment when DIY checks show persistent leaks or supply-line problems. Contacting a local pro is the fastest way to stop major water waste and prevent secondary damage while preserving warranty and safety. The next section explains the most common causes so you can pinpoint which repair to try first. Why Does My Toilet Keep Running? Common Causes Explained A running toilet occurs when water continuously flows from the tank into the bowl because the flush mechanism fails to form or maintain a proper seal or the refill mechanism misregulates tank level. The immediate mechanism is simple: the flapper or seal allows water to leak into the bowl, or the fill valve/float fails to shut off when the tank reaches the correct level; both lead to continuous refill cycles that waste water. Understanding the root cause enables targeted repairs—flapper replacement, chain adjustment, float height correction, or fill valve replacement—so you fix only the broken component. Recognizing these causes reduces guesswork and prevents repeated repairs. Causes and Solutions for a Running Toilet A running toilet is a toilet that continues to flush after the initial flush, or that refills repeatedly. This can be caused by a number of factors, including a faulty flapper valve, a leaky fill valve, or a clogged overflow tube. A running toilet can waste a significant amount of water, and it can also be a source of noise and other problems. In this paper, we will discuss the causes of running toilets and how to fix them. Inspection of septic systems, 2023 What Role Does the Flapper Valve Play in a Running Toilet? The flapper valve is a rubber seal that sits on the flush valve seat and controls whether tank water stays sealed until a flush lifts it. When the flapper warps, mineral-scaling develops, or the chain misaligns, water can seep past the seal and continuously flow into the bowl, causing periodic or constant refilling. Inspect the flapper for warping, brittle edges, or mineral deposits; a quick cleaning can restore the seal temporarily, but replacement is often the reliable fix. If the flapper is degraded, replacing it with a compatible flapper valve (universal or OEM) is normally a quick DIY resolution. How Can a Malfunctioning Fill Valve Cause Toilet Running? The fill valve controls how the tank refills and relies on a float or pressure diaphragm to stop the water when the tank is full; when it fails, water continues to flow into the overflow tube. Common issues include debris lodging in the valve, worn seals inside diaphragm-style valves, and misadjusted float height that allows excess water to escape into the overflow tube. Testing involves watching the fill cycle and noting whether water rises above the overflow tube or whether the valve hisses; small adjustments can correct float cup or float ball valves, but worn internal parts usually require fill valve replacement. Choosing the right valve type—float-cup, diaphragm, or integrated refill—impacts compatibility and longevity. Optimizing Valve-Float Mechanism for Toilet Water Level Regulation The valve-float mechanism is a device that regulates the water level in the tank. The mechanism consists of a float, a lever arm, and a valve. The float rises and falls with the water level, and the lever arm transmits the motion of the float to the valve. The valve opens and closes to allow water to enter or exit the tank. The method for determining the optimal geometric parameters of the valve-float mechanism, which ensures the stable operation of the valve and the desired water level in the tank, is presented in this paper. Methodology for determining optimal parameters of the valve float level regulator, 2022 How Do I Diagnose a Running Toilet? Simple Tests and Inspections Diagnosing a running toilet uses simple, low-cost tests to identify whether the flapper, chain, float, or fill valve is the culprit so you can pick the correct repair path. Effective diagnosis follows ordered inspections: visual observation during refill, an in-tank dye test to catch slow leaks, chain and float checks for alignment, and listening for valve hissing that signals fill-valve problems. These diagnostic steps separate quick DIY fixes from issues needing a professional, so you avoid replacing the wrong parts. If tests point to complex supply-line or valve body problems, scheduling a licensed technician prevents escalation. Prepare materials (food coloring, pen, paper towel) and observe the tank while it refills after a flush to note unusual sounds or overflow behavior. Add several drops of food coloring to the tank, wait 10–15 minutes without flushing, and check the bowl for colored water to detect tank-to-bowl leaks. Inspect the chain for slack or tangles and verify float position; gently lift the float to see if the valve shuts off, and watch the fill valve for continuous water flow or hissing. The dye test is the most reliable quick check for seal leaks because it directly confirms tank-to-bowl leakage, while auditory and slack-chain observations reveal mechanical misadjustments. If the
DIY Sink Unclogging Techniques
How to Unclog a Sink: Effective DIY Sink Unclogging Techniques for Homeowners A sink clog happens when solids, grease, hair, soap scum, or foreign objects restrict water flow in the drain line, leading to slow drainage, gurgling, or a full blockage. Understanding why clogs form and which method will unblock them is the key benefit of this guide: you’ll learn safe, effective DIY approaches such as boiling water, baking soda and vinegar, plunger technique, drain snake use, and P-trap cleaning, plus clear criteria for when to escalate to a professional. This article covers common causes in kitchens versus bathrooms, step-by-step natural and mechanical methods to clear clogs, the risks of chemical cleaners and eco-friendly alternatives, and preventative maintenance routines to reduce recurrence. You’ll also find practical triage guidance—try specific DIY steps twice, then call a pro if certain red flags appear—so you can resolve most minor stoppages quickly while avoiding damage to pipes. Keywords like unclog sink, drain cleaner, plunger for sink, drain snake for sink, P-trap, hydro jetting, and sewer camera inspection are woven through the instructions to help homeowners in Macomb, Oakland, and Wayne counties make the right choice. Read on for structured how-to steps, comparison tables, and local professional options when DIY isn’t enough. What Are the Common Causes of Sink Clogs in Kitchens and Bathrooms? A sink clog results from material accumulation in locations such as the drain flange, tailpiece, P-trap, or trap arm, where flow slows and deposits build up over time. In kitchens, grease and food particles typically adhere to pipe walls and gradually narrow the flow path, while in bathrooms hair and soap scum form mats that trap additional debris and restrict drainage. Recognizing the likely cause based on symptoms—slow draining, gurgling noises, or foul odors—lets you choose the most effective DIY method, whether a hot-water flush for grease or a mechanical pull for hair. Understanding the anatomy of a sink drain helps you target the right spot and avoid unnecessary force that can damage fittings. The next sections break down kitchen and bathroom-specific clog types and immediate troubleshooting steps you can take safely. What Types of Clogs Affect Kitchen Sinks? Kitchen sink clogs most often stem from grease congealing inside the drain, trapped food particles like coffee grounds or fibrous peels, and foreign objects stuck near the drain flange or in the garbage disposal. Grease begins liquid but cools and coats PVC or metal surfaces, progressively narrowing the pipe and causing slow drainage that worsens with repeated use. Immediate DIY checks include removing the stopper, flushing with hot water if grease is suspected, and inspecting the P-trap for caught solids; avoid pouring harsh chemicals if you plan to remove the trap. Small disposals issues often respond to mechanical methods, while compacted food or grease may require a drain snake or professional hydro-jetting if DIY attempts fail. These kitchen scenarios naturally lead into safe, effective household methods you can try first. How Do Hair and Soap Scum Cause Bathroom Sink Clogs? In bathroom sinks, hair strands entwine with sticky soap scum to form dense bundles that lodge at the stopper or within the P-trap, reducing flow and eventually causing backups. Soap scum is a mineral-rich residue that adheres to pipe surfaces and binds hair, creating a mat that resists simple flushing; over time this mat traps more debris and reduces pipe diameter significantly. Early signs include slow drainage after shaving or washing hair, intermittent gurgling, and water pooling around the basin; catching clogs early makes mechanical removal far easier. Knowing that hair and soap scum typically sit near the drain or trap informs your choice of tools—a handheld drain snake, a small auger, or P-trap removal—before considering chemical options that can be harmful. What Are the Best Natural and DIY Methods to Unclog a Kitchen Sink? Natural and mechanical methods clear most kitchen clogs by breaking up, dissolving, or physically extracting the material without corrosive chemicals. Boiling water softens and carries away fresh grease when used carefully on compatible pipes, while a baking soda and vinegar reaction can loosen organic debris and deodorize drains. Mechanical approaches—proper plunger technique and a hand or closet auger (drain snake)—physically dislodge compacted food, and P-trap removal allows direct access to inspect and clear trapped solids. Choosing the right method depends on the clog type and pipe material, and applying the wrong remedy (for example, very hot water on older PVC or pouring chemical cleaners before mechanical clearing) can worsen damage. The table below compares common DIY methods to help you pick an appropriate approach for your kitchen clog. Different DIY methods suit different clog types and user skill levels. The table summarizes tools, supplies, and expected effectiveness to guide selection. Method Tools / Supplies Expected Effectiveness / Best For Boiling water flush Kettle, heat-safe pitcher Effective for light grease clogs and recent buildup; quick and low-cost Baking soda + vinegar 1/2 cup baking soda, 1/2 cup vinegar, hot water Good for organic residue and odors; moderate effectiveness for light clogs Plunger technique Cup plunger, wet rag High effectiveness for partial blockages and near-drain obstructions Drain snake (auger) Handheld auger or snake Effective for compacted food and deeper obstructions; best for reachable clogs P-trap cleaning Bucket, wrench, gloves Direct removal of trapped solids; effective when clog is in trap This comparison helps prioritize safe, eco-friendly steps before escalating to stronger options or professional services. Next, each method is described with step-by-step directions and safety notes. How to Use Baking Soda and Vinegar to Clear Kitchen Sink Clogs? Baking soda and vinegar work through a fizzy chemical reaction that loosens soft organic buildup and neutralizes odors, offering a non-corrosive alternative to harsh drain chemicals. To use this method, remove standing water first, pour about 1/2 cup baking soda down the drain, follow with 1/2 cup white vinegar, cover the drain to confine the reaction, and wait 15–30 minutes before flushing with hot (not boiling) water to carry loosened debris. Repeat once more if drainage improves but remains slow;
DIY Showerhead Replacement Guide
How To Replace A Shower Head: Complete DIY Showerhead Replacement Guide for Homeowners Replacing a showerhead is a common, low-cost DIY upgrade that can boost water pressure, improve spray patterns, and save water when you choose a WaterSense-labeled model. This guide teaches homeowners how to prepare for showerhead installation, remove a worn fixture, apply proper sealing techniques like Teflon (plumber’s) tape, and test the connection to prevent leaks. Many DIYers finish a standard replacement in 20–45 minutes with basic tools, but some problems—stuck heads, stripped threads, or hidden valve issues—require professional attention. This article covers tools and materials, step-by-step installation, troubleshooting for leaks and low pressure, decision points for when to call a plumber, how to choose the right showerhead, and common DIY mistakes to avoid. After a practical how-to section, we explain advanced troubleshooting steps and when escalation to a licensed technician makes sense, including local service options in Macomb, Oakland, and Wayne counties for homeowners who need expert help. Many homeowners can replace a showerhead themselves, but if you encounter stripped threads, a spinning shower arm, or signs of concealed leaks, professional assistance is available from Frost and Kretsch Plumbing. Frost and Kretsch Plumbing provides residential plumbing services in Macomb, Oakland, and Wayne counties and offers 24/7 Emergency Service, experienced and licensed technicians, transparent pricing, and a 100 percent Satisfaction Guaranteed policy. If your DIY attempt uncovers a bigger problem, call (586) 675-0097 for prompt local help. Now let’s begin by assembling the right tools and materials for a successful showerhead installation. What Tools and Materials Do You Need for DIY Showerhead Replacement? A successful showerhead installation starts with the right tools and materials, which reduce the risk of damage and ensure a leak-free seal. Essential items include an adjustable wrench for tightening, pliers for gripping stubborn fittings, plumber’s (Teflon) tape for sealing threaded connections, replacement washers or O-rings for pressure integrity, and a soft cloth to protect finishes during wrenching. Having penetrating oil ready helps free mineral-fouled or rusted fixtures, and a small brush or toothpick lets you clear the inlet screen or flow restrictor without causing damage. These items let you complete a standard showerhead replacement quickly while minimizing the chance of cross-threading or over-tightening that can lead to leaks or stripped threads. Below is a quick-reference table explaining the tools, their purpose, and practical tips for using each tool safely and effectively. Tool Purpose Tips Adjustable wrench Remove and tighten showerhead and shower arm Wrap jaws with cloth to protect finish and use steady, controlled force Pliers Grip stubborn fittings and remove stuck escutcheons Place cloth between pliers and metal to avoid scratches Plumber’s (Teflon) tape Seal threaded connections to prevent leaks Wrap clockwise 2–3 times following the thread direction Replacement washers/O-rings Replace worn seals inside new showerhead Keep spare washers on hand to avoid delays during install Penetrating oil Free corroded or mineral-stuck connections Apply, wait several minutes, then attempt removal slowly This table clarifies why each tool matters and helps you prepare before touching the fixture. With tools assembled, the next section explains which of these tools you’ll use for removal and installation and how to protect finishes while you work. Which Tools Are Required for Removing and Installing a Shower Head? The adjustable wrench is the primary removal and tightening tool because it offers controlled torque for metal fittings. Use pliers for extra grip only when the wrench can’t get purchase, and always cushion metal-to-metal contact with a cloth to preserve plated or brushed finishes. A screwdriver may be necessary to remove an escutcheon plate or trim that covers the shower arm base, while a small brush and cleaning cloth help remove mineral deposits on the threads before reinstalling. These same tools let you diagnose early problems: if the shower arm turns when you apply wrench force, stop and reassess because that indicates a loosened connection behind the wall or stripped threads. To protect finishes and avoid damage, begin by hand-loosening the fixture and only apply tools after you’ve confirmed the fit and direction. If the head refuses to budge, use penetrating oil and allow it time to work; forceful twisting risks bending the shower arm or damaging the valve connection, which slows progress and may require a professional repair. What Materials Should You Have on Hand? Plumber’s (Teflon) tape is the key consumable for a reliable seal; wrap the shower arm threads clockwise two to three times to create a tight, even layer that conforms as you screw on the new head. Replacement washers or O-rings are commonly included with new heads, but keeping spare sizes avoids a second trip to the store. For low-flow or WaterSense showerheads, consider models that include removable flow restrictors for cleaning; have a pin or thin tool available to extract and clean those parts. Finally, keep a bucket or towel handy to catch drips during removal and installation to protect floors and finishes. Having these materials within arm’s reach speeds installation, reduces mistakes, and makes troubleshooting simpler if you encounter leaks or poor spray performance after the swap. With tools and materials prepped, move on to the step-by-step installation process. What Are the Step-by-Step DIY Shower Head Installation Steps? A clear sequence—prepare, remove, clean, seal, install, test—keeps the job safe and predictable and increases the chance of first-time success. Preparation includes turning off water if your shower has a shutoff or placing a towel beneath the work area to catch drips; removal follows by hand-turning then wrenching counter-clockwise to avoid bending the shower arm. Clean the exposed threads thoroughly to remove mineral deposit and old tape so the new seal seats properly. Apply plumber’s tape clockwise across the threads, hand-thread the new showerhead, and finish with a careful wrench snug; over-tightening can damage threads or finishes. Finally, test at full pressure and inspect for leaks, adjusting as needed; if leaks persist, re-check tape, washer seating, or internal threads. Prepare the area and tools: Protect surfaces and gather tools before starting. Remove the old showerhead:
Share Your Plumbing Experience
Share Your Plumbing Experience with Frost and Kretsch Plumbing: How to Leave Reviews and Feedback Sharing your plumbing experience helps neighbors, informs the business, and improves the quality of future service. This article explains exactly how to make that feedback useful. You will learn step-by-step instructions for posting a Google review for Frost and Kretsch Plumbing, alternative places to share your experience, what to include in a helpful plumbing review, and how to update feedback later. Many homeowners and business owners in Macomb County, Oakland County, and Wayne County want clear, mobile-friendly guidance on review submission and editing; this page gives practical, mobile-first steps and examples to make leaving feedback fast and effective. We also describe why your feedback matters to the company and your community, highlight commonly praised technician attributes, and provide templates and structured guidance so reviews are both constructive and search-friendly. Finally, you’ll find directions for private feedback and how Frost and Kretsch Plumbing uses reviews to improve training and service quality, plus clear prompts for next actions if you want to leave a public review or contact the company directly. How Do I Leave a Review for Frost and Kretsch Plumbing? Leaving a review for Frost and Kretsch Plumbing begins with locating the business on a review platform, selecting a star rating, and writing a clear summary of the service received; this process is straightforward on mobile and desktop when you follow a few reliable steps. The goal is to make your review discoverable and useful: include the service type, date or timeframe, technician name if known, and a concise outcome so other homeowners and businesses can assess fit. Below you will find a mobile-first walkthrough for Google reviews, troubleshooting tips if your review does not appear immediately, and alternatives to post your feedback on other reputable platforms. Clear reviews not only help neighbors, they help the company refine scheduling, pricing transparency, and technician training, so a few minutes writing the right details has outsized impact. Next, the Google-specific how-to steps break this process down into numbered actions that work on phones and desktops. What Are the Step-by-Step Instructions to Submit a Google Review? To post a Google review for Frost and Kretsch Plumbing, first sign in to your Google account, search for the company’s name on the Google Business Profile interface, and choose the option labeled “Write a review” or the equivalent button on mobile. After selecting a star rating, write a concise account of the service—include the service type (for example, water heater replacement or drain cleaning), the date or month, and the technician name if you wish to recognize a specific team member. If you want to add photos of the completed work or the problem, attach them before submitting to make the review more valuable to future customers. If your review doesn’t appear immediately, wait a short time and refresh; sometimes platform moderation or account verification causes a delay. This short, numbered table summarizes the mobile steps with descriptive alt text for each visual action to help mobile-first users follow the flow. Step Number Action Visual Aid (screenshot alt text) 1 Sign in to your Google account and search for the business name “Search results showing business listing and Write a review button” 2 Tap “Write a review” and choose a star rating “Review dialog with stars and text field” 3 Add text, optional photos, and submit “Photo upload thumbnails and Submit button” The table above distills the core actions for mobile users so you can complete a Google review in a single session and ensure important details are included. Where Else Can I Share My Plumbing Experience Online? Beyond Google, several other platforms reach different audiences and can amplify your feedback for specific use cases, such as local community groups, industry directories, and social pages that neighbors consult when hiring. Posting on multiple platforms increases visibility: community social networks reach local homeowners quickly, directories target people searching by service type, and the company’s testimonials page archives long-form experiences that prospective commercial clients often review. When cross-posting, keep the core details consistent—service type, outcome, technician name—and tailor any platform-specific fields such as response to a private message or photo galleries for visual platforms. Facebook reviews reach a local social audience and are useful when you want to show work to friends and neighbors. Yelp and industry directories offer detailed fields and are frequently consulted by commercial buyers and property managers. The company’s testimonials or reviews page aggregates longer case studies and helps the business showcase technician outcomes. Cross-posting on two or three of these platforms helps different searchers find relevant feedback and provides redundancy if one platform delays publication, and the next section explains why this feedback matters to both the company and your community. Why Is Your Plumbing Feedback Important to Frost and Kretsch Plumbing? Customer feedback acts as both a quality signal and an operational mirror that helps Frost and Kretsch Plumbing understand where processes succeed and where they can improve, delivering better outcomes for future customers. Reviews provide concrete examples that inform technician training, scheduling changes, and transparency in estimates; when customers note pricing clarity or punctuality, the company can reinforce those strengths, while negative reports prompt remediation under the company’s quality goals. Reviews also influence local search visibility because search engines weigh recent, diverse, and substantive reviews when ranking local providers for searches in Macomb County, Oakland County, and Wayne County. Finally, feedback publicly recognizes technicians for strong performance, which supports morale and strengthens community trust—those recognition moments are valuable to both employees and potential customers. Service improvement: Reviews identify repeating issues and guide process updates. Help other customers: Detailed experiences provide social proof for neighbors choosing a plumber. Recognize technicians: Public praise highlights individuals who exemplify the company’s standards. Integrating these review insights into ongoing technician education and scheduling helps Frost and Kretsch Plumbing maintain consistent service quality across residential jobs and commercial jobs, and the next subsection shows how those operational changes are implemented in
DIY Faucet Repair Guide
How To Fix A Leaky Faucet: Complete DIY Faucet Repair Guide for Homeowners A leaky faucet is a persistent household problem where water escapes from a fixture due to worn seals, damaged cartridges, or mineral buildup, and it can waste thousands of gallons per year while raising your water bill. This guide teaches homeowners how to diagnose common faucet leak causes, identify faucet types, gather essential tools and replacement parts, and follow safe step-by-step repair procedures so you can stop drips and prevent future leaks. You will learn practical troubleshooting for specific scenarios like drips at the spout, handle leaks, and base leaks, plus maintenance tips that reduce recurrence and save water. If you prefer a professional to handle repairs or need emergency service in Macomb, Oakland, or Wayne counties, Frost & Kretsch Plumbing offers licensed technicians and 24/7 emergency response to assist. The article is organized into clear sections: causes, identification, tools and parts (with a quick reference table), step-by-step instructions (with time and cost estimates), scenario-based troubleshooting (with guidance when to call a pro), prevention, and FAQs optimized for quick answers. Read on to get hands-on repair confidence or to decide when to call for licensed help. What Are the Most Common Causes of a Leaky Faucet? A leaky faucet most often results from worn internal components, deteriorated seals, or mineral deposits that interfere with valve seating. These mechanical failures allow water to bypass the valve or drip past seals, producing steady drips or intermittent leaks that worsen over time. Understanding the root cause helps you choose the right repair approach—whether replacing a washer, swapping a cartridge, or descaling valve seats—and prevents unnecessary part replacements. The next paragraphs break down the parts that commonly fail and explain how mineral buildup and valve seat wear contribute to persistent drips. Which Faucet Parts Usually Cause Leaks: Washers, O-rings, and Cartridges? Washers, O-rings, and cartridges are the meronym parts of a faucet that commonly fail and lead to leaks when they wear or deform. A compression faucet relies on a rubber washer that seals the valve seat; when that washer hardens or tears it lets water drip from the spout, while O-rings around stems fail and allow leaks at handles. Cartridges control flow and mixing; a cracked or corroded cartridge can cause continuous drips or difficulty shutting off water, and cartridge replacement is often a straightforward fix. Inspecting these parts during disassembly identifies the failing component and informs whether a simple part swap or a more comprehensive repair is required. How Does Mineral Buildup and Valve Seat Wear Lead to Faucet Drips? Hard water mineral deposits accumulate on valve seats and moving parts, creating uneven surfaces that prevent watertight seals and gradually erode metal components. Over time, valve seat pitting from abrasive mineral buildup causes sealing failure even when seals appear intact, and descaling with vinegar or a mild acid can restore function in early stages. When valve seat erosion is advanced, resurfacing or replacement is necessary because deposits alone are not the root problem; the seat geometry has changed. Recognizing discoloration, roughness on mating surfaces, or flaky residue during inspection signals when cleaning might help versus when a professional repair or replacement is warranted. How Do You Identify Your Faucet Type for Effective DIY Repair? Identifying your faucet type is the first diagnostic step because different faucet classes require different repair parts and techniques. The main faucet hypernyms—compression, cartridge, ball, and ceramic disc—differ in their internal mechanisms and common failure modes, so correct identification shortens repair time and avoids buying incompatible parts. A quick visual check combined with simple movement tests usually reveals the type: separate hot/cold handles typically indicate compression, single-handle cartridges move smoothly for mixing, a ball faucet has a rounded cap and cam assembly, and ceramic disc faucets have a low-resistance, precise motion. Proper identification also helps you find the correct replacement cartridge or kit, which reduces the risk of repeated repairs. What Are the Differences Between Compression, Cartridge, Ball, and Ceramic Disc Faucets? Compression faucets use rising/stem valves with washers that seal against a valve seat, making washer replacement the common repair; they typically have separate hot and cold handles. Cartridge faucets use a replaceable cartridge inside a sleeve to control flow; these are common in single-handle designs and require cartridge swaps when leaking. Ball faucets contain a ball-and-socket assembly that mixes water; they often need special rebuild kits because multiple internal parts wear together. Ceramic disc faucets use two flat ceramic discs to regulate flow and generally last longer, but when they fail they usually require disc replacement or whole-assembly swaps. Identifying these types guides tool selection and parts ordering. How Can You Recognize Your Faucet Model to Choose the Right Repair Steps? Finding a faucet model or brand marking helps you order compatible cartridges and parts and simplifies repair by ensuring part fitment. Look under the spout, behind the escutcheon plate, or beneath the handle for stamped names, model numbers, or logos; take clear photos of the assembly and key dimensions before removing components to aid parts matching. If markings are absent, measure key features—the distance between handles, screw types, and spout shape—and compare with manufacturer guides or parts kits at hardware stores. Documenting the model or capturing photos prevents trial-and-error purchases and speeds up the repair process. What Essential Tools and Replacement Parts Do You Need for Faucet Leak Repair? A compact set of adjustable hand tools and common replacement parts covers most faucet repairs and enables safe, efficient work at the sink. Essential tools include an adjustable wrench, basin wrench for hard-to-reach nuts, screwdrivers, hex keys, and needle-nose pliers, while parts to have on hand include replacement washers, O-rings, cartridge kits, valve seat replacement components, and aerators. Using plumber’s grease on moving seals and protecting finished surfaces with cloth prevents damage during disassembly and reassembly. The following EAV table compares tools and parts, their purpose or compatibility, and typical cost or example brands to guide pre-repair shopping. Tools and parts comparison