
How to Hire a Plumber: Tips for Choosing the Right Professional
How to Hire a Plumber: Practical Tips for Choosing a Licensed, Reliable Professional Hiring a plumber is more than scheduling a service call — it’s about matching the right credentials, experience, and communication style to your home or business need. This guide walks you through what to check when hiring a plumber, why license and insurance matter, and how to compare estimates so you avoid surprises and costly mistakes. You’ll learn the key questions to ask, how to read an estimate, ways to verify references and online reviews, and which jobs require specialized skills like video inspection or sewer excavation. We also cover local vetting tips for Grosse Pointe and the surrounding counties, emergency-response considerations, and practical red flags that often signal scams. By the end you’ll have a short checklist, clear comparison points, and next steps to choose a licensed plumber who follows code, stands behind their work, and reduces your liability. Start by understanding the core qualifications that separate professional plumbers from risky hires. What Qualifications Should You Look for in a Good Plumber? A dependable plumber shows four main credentials: the right license, solid insurance, relevant experience, and a clear workmanship guarantee. A license means they understand local and state plumbing codes and inspections. Insurance protects you from liability for damage or worker injuries. Experience shows they’ve solved problems like yours before. A written guarantee signals confidence in their work. Use these four points as your first filter before asking for an estimate — they tell you whether a contractor is legally compliant and financially safe. The table below breaks those attributes into an easy reference you can use while vetting contractors. Compare common credential attributes to prioritize during contractor screening. Credential What to Check Why it Matters License type State or local plumbing license; scope of allowed work Shows code knowledge and legal authority to perform the job Insurance General liability and workers’ compensation coverage Protects the homeowner from damage claims and on-site injuries Experience Years and types of projects (residential, commercial, specialty) Indicates ability to handle the scope and complexity reliably Specialties & tools Video inspection, trenchless repair, water main work Shows capacity for accurate diagnostics and less-invasive repairs Guarantees & policies Written workmanship warranty, transparent pricing policy Reduces the chance of unresolved follow-up issues and surprise costs This table helps you prioritize checks during first contact and sets you up to ask targeted questions about experience and estimates. A short checklist makes on-the-spot qualification easy when you call potential plumbers. Before asking for a quote, remember that licensed and insured professionals lower financial and legal risk — which leads into the practical questions to ask during initial contact. Verify license and insurance: Ask for a license number and proof of insurance before scheduling work. Confirm relevant experience: Request examples of similar projects and the diagnostic tools used. Check warranty and pricing policy: Ask what the guarantee covers and whether estimates are itemized. These three checks reveal immediate red flags and help you decide which candidates deserve a written estimate. Next, consider a local example of best practice to model expectations. Frost & Kretsch Plumbing Inc. is a local example that follows these practices: licensed and insured technicians, transparent pricing, advanced diagnostic tools like video inspection and trenchless methods, and a satisfaction guarantee. Use local references like this as a benchmark — but always verify the same proofs directly with any contractor you consider before asking for detailed estimates. Why Is Hiring a Licensed and Insured Plumber Important? Hiring a licensed, insured plumber protects you from regulatory and financial exposure tied to complex plumbing work. A license shows the tradesperson understands plumbing codes, permit requirements, and inspection standards — which lowers the risk of failed inspections or code violations that can complicate a future sale or an insurance claim. Insurance (general liability and workers’ compensation) shifts responsibility for on-site accidents and accidental damage away from you, the homeowner. Together, license and insurance form the baseline safety net for major repairs and signal a contractor’s commitment to accountability. Confirm these protections before accepting any verbal quote. What Are the Differences Between Master and Journeyman Plumbers? Master plumbers hold a higher licensure level, showing deeper technical knowledge, code mastery, and the ability to pull permits or supervise complex projects. Journeyman plumbers typically perform routine installations and repairs, often under broader supervision. For large commercial jobs, permit-signing, or system design you’ll usually want a master plumber; for regular residential work — fixture replacements, drain cleaning, water heater service — a qualified journeyman is often appropriate. Match the job’s complexity to the worker’s credential level to make the right hire. Which Questions Should You Ask Before Hiring a Plumber? Asking focused questions reveals whether a plumber can meet your technical needs, timeline, and budget while offering clear follow-up terms. Start by confirming license and insurance, then ask for references or photos of past work, request an itemized written estimate, clarify warranty coverage and response times for follow-ups, and confirm emergency availability and typical crew size. These questions test transparency and set expectations for communication and accountability. Below is a checklist you can use on the phone or in email, with what a satisfactory answer should look like. Use this checklist during first contact; the expected answers help you judge credibility. Question Why it matters What to expect in an answer Are you licensed for this work? Confirms legal authority and code knowledge Provides license number and issuing authority Do you carry liability and workers’ comp insurance? Protects homeowner from claims Names insurer and coverage types; offers to show certificate Can you provide references or photos of similar jobs? Verifies real-world experience Recent project examples or references with contactable clients Will you provide a written, itemized estimate? Prevents vague pricing and surprises Line-item quote listing parts, labor, permits, contingencies What warranty do you offer on parts and labor? Ensures post-job accountability Specific duration and what repairs or replacements are covered This table clarifies how to interpret contractor responses and
Understanding Plumbing Warranties: What’s Covered?
Understanding Plumbing Warranties: Coverage, Guarantees, and How to Use Them A plumbing warranty is a formal promise that certain parts, labor, or services will be repaired or replaced if they fail within a set time. It protects homeowners and businesses from surprise repair bills and gives you confidence that work meets a clear standard. This guide explains what a plumbing warranty covers, how manufacturer warranties differ from contractor workmanship guarantees, and why it matters to review coverage before hiring or installing equipment. You’ll get a straightforward breakdown of the main coverage types—manufacturer parts warranties, contractor labor warranties, and extended or service-plan protections—how those protections overlap for common jobs like water heater installs and sewer repairs, and practical steps to preserve coverage and make a claim. We also cover common exclusions, maintenance actions that keep warranties valid, and the paperwork you should keep for faster service. Finally, the article walks through filing a claim and shows how contractor guarantees can complement manufacturer protections so you can verify coverage and act with confidence when issues come up. What Is a Plumbing Warranty and Why Does It Matter? A plumbing warranty is a written promise to repair or replace covered components if they fail within an agreed period. It matters because it shifts certain financial and performance risks away from the property owner to either the manufacturer or the contractor. That shift reduces unexpected out-of-pocket costs, raises the bar for workmanship, and gives you a formal path to resolution when systems don’t perform. Knowing whether a warranty covers parts, labor, or both makes it easier to compare bids and avoid costly surprises. Reading warranty terms before you sign protects you from misunderstandings and helps you plan for long-term upkeep of your plumbing systems. Clear warranty knowledge is the baseline for smarter decisions about installations and service contracts. Defining Plumbing Warranty and Service Guarantees A manufacturer warranty typically covers defective parts and manufacturing faults for a specified time, while a contractor service guarantee (also called a workmanship warranty) promises that installation and labor meet agreed standards and will be fixed if they don’t. Manufacturer warranties often require registration, proof of proper installation, and adherence to maintenance schedules; they usually don’t include labor for replacements unless explicitly stated. Contractor workmanship warranties generally cover corrective labor for installation errors and can range from a few months to several years depending on the company. Knowing which protection applies helps you decide whom to contact first and which documents to present when a problem occurs—practical steps that protect homeowners and businesses. How Plumbing Warranties Protect Homeowners and Businesses Warranties reduce your financial exposure to defective parts or faulty installations, ensure a responsible party addresses repairs, and set measurable standards for service quality. That protection can mean replacing failed components, reimbursing covered repairs, or providing corrective labor at no extra charge within the warranty period. Warranties also offer a practical path for resolution—either through the manufacturer’s claim process or the contractor’s remediation—which saves time and stress. Knowing your protections ahead of time encourages regular maintenance and smarter hiring choices, which helps preserve coverage and lowers the chance of disputes over responsibility. Three practical benefits of plumbing warranties: Financial protection: Warranties limit surprise repair costs by covering defective parts or corrective labor.Quality assurance: Workmanship guarantees motivate contractors to meet proper installation standards.Clear recourse: Warranty terms spell out how to get repairs or replacements, making dispute resolution simpler. Those benefits show why you should review warranty language before scheduling work and why keeping the right documents matters for future claims. What Types of Plumbing Warranties Should You Know About? Plumbing warranties generally fall into three categories: manufacturer warranties, contractor labor/workmanship guarantees, and extended service agreements. Each addresses different risks and timeframes. Manufacturer warranties usually cover parts and material defects. Contractor warranties cover installation and labor. Extended plans or third‑party service agreements add ongoing maintenance or extra coverage beyond the standard terms. Understanding terms like fixture warranty, labor warranty, and extended warranty helps you see what’s included in a purchase or service plan. Comparing these options clarifies responsibility, duration, and any actions—like registration or maintenance—required to keep coverage valid. That comparison guides practical choices about registering equipment and documenting installations to preserve eligibility. Different warranty types summarized for quick comparison: Manufacturer warranties focus on parts and defects, often requiring registration and proof of installation. Labor/workmanship guarantees from contractors address installation errors and corrective labor. Extended warranties or service plans lengthen protection or add scheduled maintenance beyond the standard terms. Different warranty types compared for homeowners and businesses. Warranty Type Typical Coverage Typical Duration Responsible Party Manufacturer warranty Parts replacement for defects 1–10 years (varies by product) Manufacturer Labor/workmanship guarantee Corrective labor for installation issues 30 days–several years Contractor Extended/service agreement Additional parts/labor and scheduled maintenance 1–5 years Service provider or third party Manufacturer Warranties: Coverage for Fixtures and Appliances Manufacturer warranties typically cover defects in materials and workmanship for fixtures and appliances and usually pay for parts replacement—not labor—unless labor coverage is spelled out. Warranty lengths vary by product; some faucet parts carry multi‑year guarantees while tanks and certain components may have longer terms. Registering products and keeping sales records helps speed claims. Manufacturers often require regular maintenance—like flushing a water heater or descaling parts—as a condition of coverage; skipping those steps is a common reason claims get denied. Knowing the manufacturer’s requirements and whether registration or maintenance is needed helps you decide who to contact first when something goes wrong. Labor and Workmanship Guarantees from Plumbing Contractors Contractor labor warranties cover installation quality and corrective work when installations are done incorrectly. They complement manufacturer coverage by addressing the labor component manufacturers usually exclude. Contractor guarantees often have shorter terms than parts warranties but can provide quick fixes like reinstallation, leak repair, or adjustments at no extra labor cost. Common exclusions include misuse, unauthorized DIY changes, or failure to follow routine maintenance—actions that can void workmanship coverage. Reviewing contractor warranty terms before hiring and keeping service records creates a clear path
24/7 Emergency Burst Pipe Repair Services
24/7 Emergency Burst Pipe Repair — Fast Help for Macomb, Oakland & Wayne Counties A burst pipe can flood a home or business within minutes. Emergency burst pipe repair stops the leak, restores water where possible, and starts mitigation to limit structural damage and mold. This guide walks you through what to do the moment a pipe fails, how a 24/7 emergency crew diagnoses and fixes the problem, common causes in Michigan’s climate, and smart prevention steps to lower future risk. You’ll get clear, step‑by‑step emergency actions, the tools technicians use for safe thawing and leak detection, and what to expect for repairs, cleanup, and insurance documentation. It’s practical, vendor‑neutral advice for homeowners and businesses across Macomb, Oakland, and Wayne counties. What to Do First When a Pipe Bursts A burst pipe is a time‑critical situation. Your priority is to stop the water, reduce electrical risk, and limit damage to belongings and structure so repairs are smaller and faster. Below is a short, action‑first checklist you can follow immediately — do each step in order, document conditions for insurance, and call for professional help if you can’t safely control the leak. Find and shut off the main water valve to stop the flow from the burst section. Turn off power to affected rooms if water is near outlets, appliances, or the breaker box. Contain and remove standing water with buckets, towels, or a wet/dry vacuum to slow spread. Photograph damage, note affected areas, then call an emergency plumber and your insurer. Those four steps stabilize the scene quickly. The table below summarizes each action with the right tools and what you can expect as an outcome. Action Tool / Resource Purpose / Outcome Shut off main water Main shut‑off valve; water meter access Stops incoming water, reduces flooding and pressure at the break Ensure electrical safety Circuit breaker panel; insulated gloves if available Reduces risk of shock and eliminates electrical ignition near standing water Contain water Buckets, towels, wet/dry vacuum Limits spread, protects furnishings, lowers mold risk Document damage Smartphone camera; written notes Creates evidence for insurance and helps technicians scope repairs Next we cover where to find your main shut‑off and how to operate it safely. How to Shut Off Your Main Water Supply Quickly Shutting off the main water is the most effective first move. The valve is usually by the water meter, near where the line enters the house, or in a basement, crawlspace, or utility closet. Know whether you have a quarter‑turn ball valve (turn the lever 90°) or a multi‑turn gate valve (turn clockwise until tight). Use steady pressure and avoid forcing a corroded valve. If the valve won’t move or you can’t find it, shut off water at the street meter or call an emergency plumber right away. Note the valve’s condition — that helps our technicians plan any necessary replacement. How to Reduce Water Damage While You Wait While help is on the way, targeted mitigation preserves salvageable items and makes restoration easier. Move valuables and electronics to dry areas, prop wet furniture on blocks or plastic, and use towels, buckets, or a wet/dry vacuum to remove pooled water. Open interior doors to improve air circulation if it’s safe to do so. Don’t use ceiling fixtures or electrical devices in wet areas until power is off. Keep a list of moved items and their condition for your insurance claim — small steps now save time and money later. After stabilizing the scene, call for emergency dispatch so trained technicians can diagnose and repair the break. If you can’t control the leak or locate a working shut‑off, call Frost and Kretsch Plumbing for 24/7 emergency dispatch. We respond around the clock across Macomb, Oakland, and Wayne counties and can coach you through safety steps while a technician is en route. For the fastest response, have your address, a short damage description, and any recent plumbing work ready — we’ll communicate next steps clearly so you know what to expect. How Frost and Kretsch Handles 24/7 Burst Pipe Emergencies We follow a clear emergency workflow that moves from rapid intake to on‑site diagnosis, controlled repair, and coordinated cleanup — all with safety and open communication up front. Our intake team captures location, visible damage, and safety concerns so we dispatch the right tech and equipment. On arrival, the technician conducts safety checks, isolates the leak, and uses leak detection and controlled thawing tools when frozen pipes are involved to keep repairs as small as possible. Work can range from spot fixes to coordinated replacements, then immediate mitigation and documentation for insurance. Our goal is to limit disruption and get properties back to normal quickly while protecting finishes and structure. We use acoustic leak detectors, camera inspection, and safe thawing equipment to find and address hidden breaks without unnecessary demolition. You’ll receive a clear estimate before work starts, and we document repairs and cleanup so you have records for insurers and future maintenance. Our Rapid Response and Repair Process When you call, our intake staff triage the situation and dispatch a licensed technician with the tools that match the problem. On arrival the tech runs safety checks for electrical and gas hazards, isolates the leak, and contains water to prevent further damage. Diagnostics include visual inspection, leak detection scanning, and targeted camera inspection when lines are hidden. We evaluate repair options and give a transparent estimate before starting. After repairs we test the system, restore water where safe, and coordinate drying or restoration partners when needed — we also leave written documentation and prevention recommendations. Technologies We Use: Safe Thawing & Leak Detection Modern repairs depend on specialized tools that speed diagnosis and reduce destructive work. Acoustic leak detectors help us pinpoint running water behind walls. Safe thawing machines warm frozen sections gradually to avoid further rupture and allow repairs without full replacement. Video camera inspection shows corrosion or cracks inside lines so we can do spot repairs instead of wholesale repiping when appropriate. The
How to Winterize Outdoor Faucets & Hose Bibs
Michigan Homeowners’ Guide: Winterize Outdoor Faucets & Hose Bibs Winterizing outdoor faucets and hose bibs means removing standing water from exterior lines, insulating exposed parts, and closing valves so freezing temperatures don’t crack pipes. In Michigan — including Macomb, Oakland, and Wayne counties — repeated freeze-thaw cycles make spigots and the pipes behind them vulnerable to ice buildup and ruptures that lead to costly water damage. This guide walks homeowners through finding shut-offs, draining and insulating spigots, checking frost-free hose bibs, and deciding when to call a licensed plumber. You’ll get simple, step-by-step DIY instructions, clear signs of frozen or damaged hose bibs, and a practical winter-plumbing checklist for your whole house. We also cover when professional winterization or emergency thawing is the smart choice and how local plumbing pros can help when DIY isn’t enough. Why winterize outdoor faucets to avoid frozen pipes? Winterizing outdoor faucets removes water that would otherwise freeze inside spigots and connected pipes, preventing expansion-related breaks and downstream flooding. When water freezes it expands, putting stress on joints and faucet stems and often creating hidden cracks that only show up once the ice thaws. Protecting hose bibs lowers the chance of structural water damage, mold, and emergency repairs that disrupt your routine. Michigan homeowners should act before the first hard freeze — it’s usually cheaper and less stressful than dealing with repairs after the fact. The next section explains the specific risks frozen outdoor faucets create so you know exactly what you’re preventing. What risks do frozen outdoor faucets and hose bibs create? Frozen outdoor faucets and hose bibs can cause hidden pipe cracks, interior flooding, and expensive restoration if ignored. A frozen spigot can split the faucet stem or the pipe just inside the wall, allowing water to enter walls, floors, and insulation when temperatures rise. That can lead to mold, ruined drywall or flooring, and wider structural repairs. Winterizing ahead of steady freeze-thaw cycles is a cost-effective, proactive step that prevents this cascade of damage and the disruption it causes to daily life. How does Michigan’s climate change winterization timing? Michigan sees early cold snaps and frequent freeze-thaw swings, so plan to winterize outdoor faucets before temperatures regularly dip below freezing. For Macomb, Oakland, and Wayne counties that commonly means late September through October, though the practical rule is simple: winterize once nighttime lows start hitting 32°F. Warm stretches followed by sudden freezes stress pipes, so early preparation gives you time to find shut-offs, drain lines, and install insulation before sustained cold sets in. Step-by-step DIY methods to winterize outdoor spigots Winterizing a spigot is straightforward: shut off the water feed, drain the line, remove hoses, and insulate the fixture to keep cold air out. These steps eliminate water that would freeze and reduce heat loss so any remaining moisture is less likely to ice over. The instructions work for standard hose bibs and most frost-free models, though some frost-free designs still benefit from added insulation and correct draining. Below is a clear, numbered how-to that’s homeowner-friendly. Find and close the indoor shut-off: Locate the dedicated shut-off for the exterior faucet in the basement, crawlspace, or utility area and turn it fully off. Open the outdoor faucet: With the indoor valve closed, open the spigot so any trapped water can drain out. Remove hoses and drain: Disconnect garden hoses and store them inside; drain water from both the hose and the spigot. Use drain valves if present: If there’s a drain port or petcock on the line, open it to make sure the branch empties completely. Insulate and cover: Put on a foam faucet cover or wrap the spigot with outdoor-rated pipe insulation and fasten with weatherproof tape or ties. Test and check: After insulating, open the spigot slightly to confirm the indoor shut-off is holding with no flow; re-check covers during cold snaps. Those steps will stop most outdoor freeze issues, but some homes have hidden or hard-to-reach shut-offs or piping layouts that prevent complete drainage. If shut-offs are inaccessible, piping runs through unheated spaces, or spigots keep freezing despite proper winterizing, call a local professional. Frost and Kretsch Plumbing serves Macomb, Oakland, and Wayne counties and can inspect difficult systems or perform full winterization when a DIY fix won’t do. Before we get into drain-valve troubleshooting, the table below helps you identify common shut-off types and the actions each requires. Introductory note: This table compares typical shut-off setups homeowners encounter and gives practical steps to drain and winterize each one. Shut-off Type Ease of Use Action Steps Individual exterior shut-off (serves one spigot) Easy Turn the valve off, open the spigot, drain using the drain port or by leaving the spigot open to empty the line. Interior individual shut-off (basement/crawlspace) Moderate Find and close the valve, open the outdoor faucet, and open any interior drain valve to clear the line. Main house shut-off (feeds multiple fixtures) Difficult Close main only when necessary; drain the affected branch by opening multiple fixtures and basement/attic drains. No dedicated shut-off Challenging Disconnect hoses, open the spigot and insulate it; consider adding a shut-off or calling a pro to prevent future issues. How to locate and use shut-off and drain valves for winterizing Start looking for shut-off valves where the exterior line enters the house — typically in the basement, crawlspace, or utility room — and sometimes at a foundation valve box. Trace the pipe from the outdoor spigot back inside; shut-offs are often inline ball valves or gate valves and may need a quarter- or full-turn to close. After you close the valve, open the outdoor faucet to relieve pressure and let the line empty; if a drain valve exists, open it to ensure the branch is clear. If you can’t find a dedicated shut-off, open interior faucets and any drain cocks to reduce system pressure, then insulate the outdoor spigot. When in doubt, call a pro — partial drainage can leave you vulnerable to freeze damage. Best practices for insulating and covering outdoor
Tips for Preventing Frozen Pipes Inside Your Home
Practical Michigan Tips to Keep Your Pipes from Freezing When water in a pipe freezes it expands, which can crack pipes and lead to expensive water damage. This guide walks Michigan homeowners through clear, practical steps to keep plumbing warm, insulate the most vulnerable runs, spot early signs of freezing, and act safely if a freeze happens. You’ll get why pipes freeze here, the best insulation choices, indoor prevention tips, how to protect outdoor or vacant systems, plus quick-recognition and emergency response steps. Along the way you’ll find checklists, comparison tables, and hands-on tips — everything from foam pipe insulation and heat tape to simple habits like dripping faucets. If you’d rather hire a pro, the guide points to local services for emergency thawing and winterization without replacing the homeowner steps shown here. Why Pipes Freeze and How It Can Affect Your Home Pipes freeze when cold air chills exposed or poorly insulated plumbing below 32°F, turning water to ice and creating internal pressure. That pressure can crack seams, split fittings, or rupture pipe walls, causing leaks that lead to flooding, mold, and structural damage. Knowing the main causes and likely consequences helps you focus prevention where it matters and avoid slow, hidden leaks. The lists below summarize common causes and typical outcomes so you can protect the riskiest systems first. Common causes of indoor pipe freezing include: Pipes located in unheated spaces — crawl spaces, detached garages, or plumbing inside exterior walls. Cold drafts and air leaks that let outside air reach plumbing runs near the building envelope. Insulation gaps or missing insulation around pipes and where pipes pass through floors or walls. Consequences of frozen pipes often include: Sudden loss of water at faucets and appliances, plus pressure-related damage to adjacent sections. Wet insulation, ruined drywall or flooring, and hidden leaks inside walls or ceilings. Follow-on problems like mold, electrical hazards, and expensive repairs. Tackling the causes above lowers both the chance of freezing and the severity of any damage; the next section explains temperature thresholds and the physics behind ice in pipes. What Temperature Causes Pipes to Freeze? Pipes commonly start freezing around 20°F, but the exact point varies with exposure, insulation, and pipe material. Wind, drafts, and long cold snaps can cause pipes to freeze even when outdoor air is warmer, while well-insulated or interior plumbing can stay safe below that range. In Michigan, both brief deep freezes and extended subzero stretches are risky — watch vulnerable runs during prolonged cold and treat exterior-adjacent plumbing as a priority for insulation or heat. How Pipe Freezing Leads to Bursts and Water Damage Ice narrows or blocks flow and can form a plug that traps liquid between the ice and closed fixtures. As that trapped water freezes or pressure builds, forces can exceed a pipe’s strength, and failure usually happens at joints, seams, or corroded spots. A rupture can release a lot of water quickly, soaking building materials and leading to mold and structural problems if not dried fast. Because failures often start inside walls or ceilings, quick detection and professional mitigation are crucial to limit long-term costs. Best Ways to Insulate Pipes for Winter Good pipe insulation uses the right materials, full coverage of exposed runs, and sealing of nearby air leaks to keep temperatures up around plumbing. Options vary by location and pipe type: foam sleeves are simple for straight, accessible runs; fiberglass wrap suits irregular shapes or higher-temperature lines; and heat tape or trace cable adds active heat where pipes face severe cold. Choose based on required R-value, safety needs, and whether the job is a safe DIY or should be handled by a pro. The table below compares common choices to help you pick the best fit for each area of your home. Insulation Type Characteristic Best Use DIY vs Professional Foam pipe sleeves Closed-cell foam — simple to install Straight, accessible runs in basements and utility rooms Good for DIY Fiberglass wrap Flexible, handles higher temperatures Odd shapes, hot-water lines, tight spots DIY with care; pro for tricky areas Heat tape / heat trace Electrical heating for active freeze protection Exposed or exterior-adjacent pipes in severe cold Often safer with professional installation Picking the right material and making sure coverage is continuous cuts cold spots and lowers freeze risk; read on for installation tips for basements, crawl spaces, and garages. Which Insulation Materials Work Best Against Freezing? Foam sleeves are affordable and effective for most indoor exposed runs and come in common pipe diameters. Fiberglass wrap with a vapor barrier fits odd shapes and handles hotter pipes while slowing heat loss. Heat tape or trace cable gives direct heat to pipe surfaces and is ideal for very exposed lines, but it has safety and control considerations — especially for long runs — so professional installation is often worth it. Match the material to exposure, pipe temperature, and access to get the best mix of safety, performance, and cost. How to Insulate Pipes in Basements, Crawl Spaces, and Garages Start by locating every exposed run in basements, crawl spaces, and garages, measure lengths, and note tight bends or runs close to exterior walls. In basements, slide foam sleeves over straight sections and tape seams; seal wall and floor penetrations to block drafts. In crawl spaces, insulate both pipes and joist bays and consider a vapor barrier to control moisture. Garages often need a combo of foam sleeves and heat tape when lines run along cold exterior walls — any electrical heating product should follow manufacturer instructions or be installed by a pro. When access is limited or pipe runs are complex, schedule an inspection or professional install to ensure continuous, safe coverage. How to Stop Pipes from Freezing Indoors Preventing indoor freezes mixes passive steps — insulation and sealing — with active management like steady heat and targeted warming of vulnerable runs. Simple daily actions help: open cabinet doors under sinks so warm room air reaches plumbing, keep thermostats steady during cold snaps,
Tips for Preventing Frozen Pipes in Winter
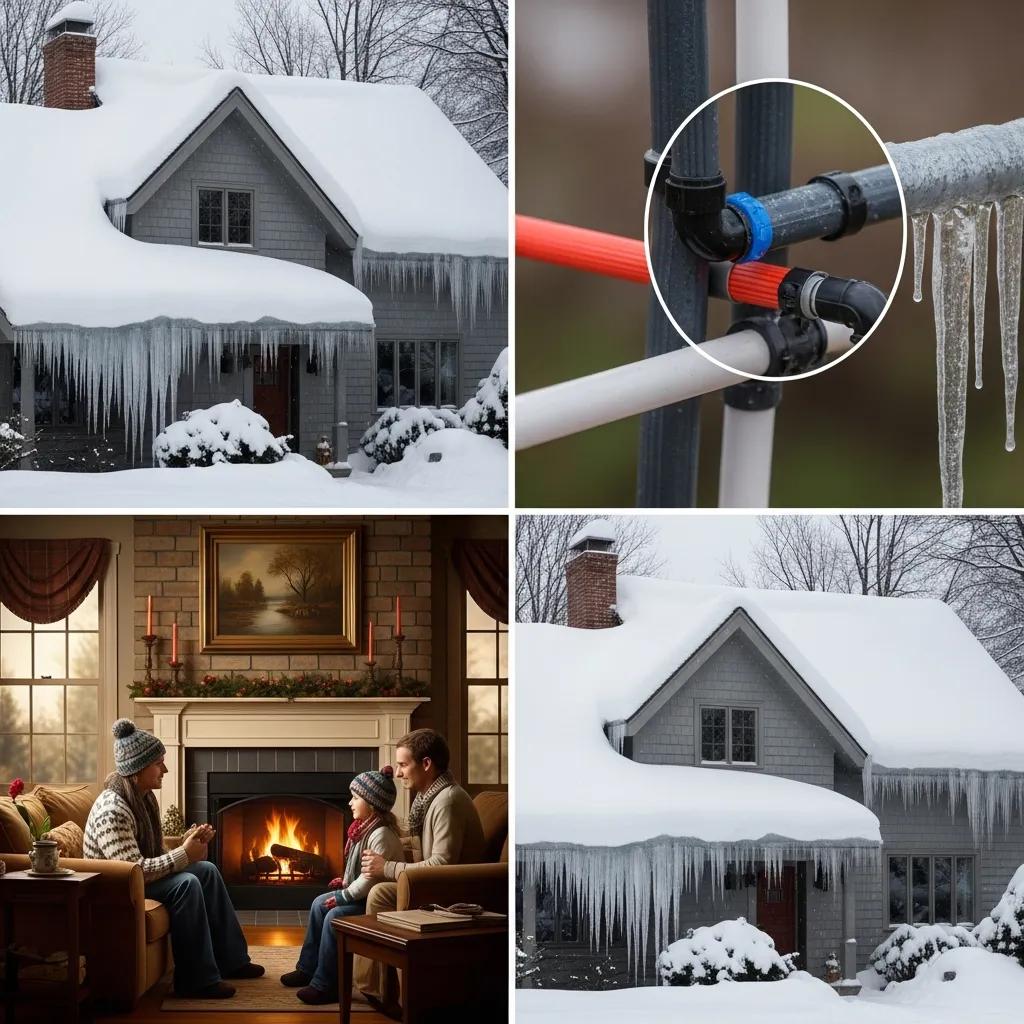
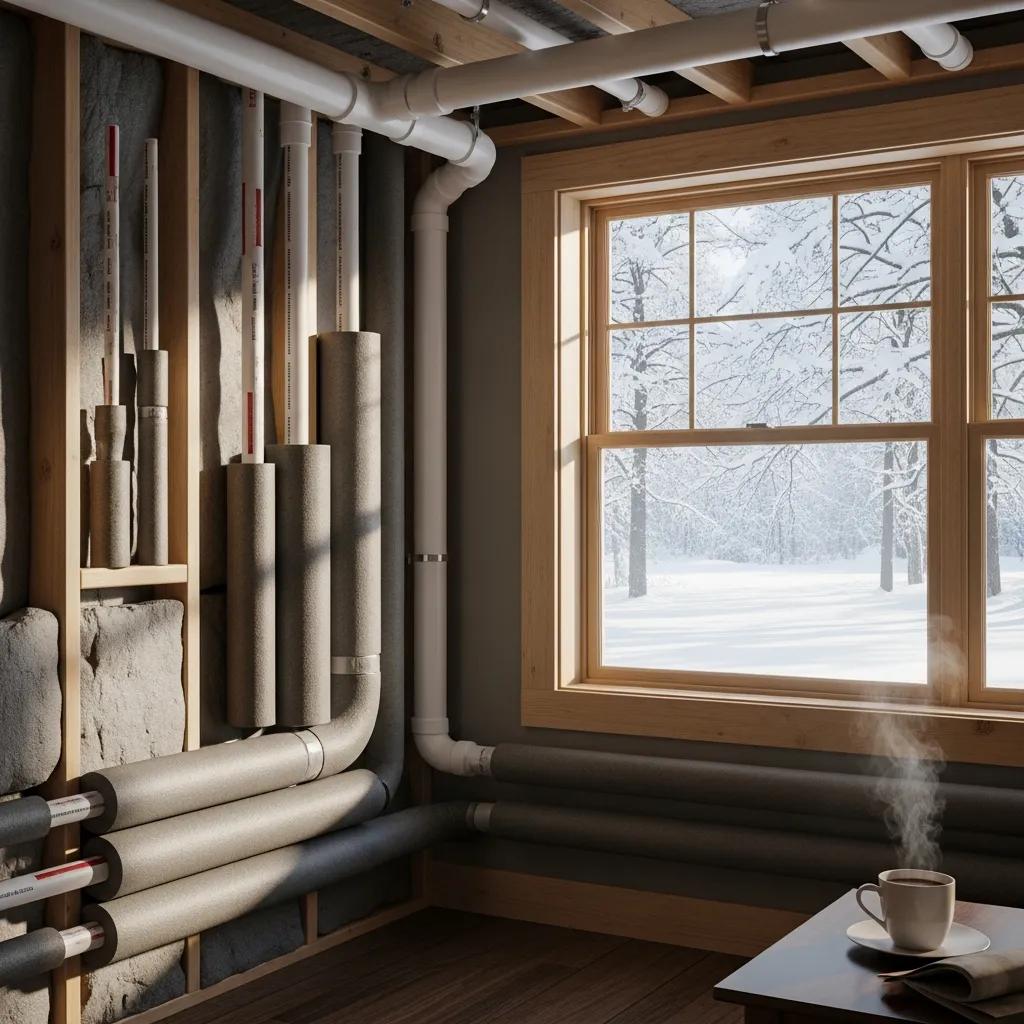
How to Prevent Frozen Pipes This Winter: Practical Tips for Michigan Homeowners and Businesses Frozen pipes can cut off your water and lead to expensive repairs and water damage when Michigan turns cold. Ice forms when standing water inside a pipe freezes and expands, putting pressure on the pipe that can crack or split it. The best reason to prevent freezing is simple: avoid damage, downtime, and a costly cleanup. This guide explains why pipes freeze here, where they’re most at risk, and clear, actionable steps you can take — from insulation and outdoor winterization to indoor heating tips and safe thawing. It also explains when a DIY fix is enough and when it’s time to call a licensed emergency plumber. Frost and Kretsch Plumbing offers 24/7 emergency response, transparent pricing, and a satisfaction guarantee; we inspect, winterize, and perform emergency thawing or burst-pipe repairs for homeowners and businesses across Macomb, Oakland, Wayne counties, and nearby communities. Read on for step-by-step tips, material recommendations, quick checklists, and next steps to protect your plumbing before the deep freeze hits. Why Do Pipes Freeze in Michigan Winters? Pipes freeze when the water inside loses heat faster than it’s replaced. As water turns to ice it expands and can crack pipe walls or fittings. Heat loss speeds up when pipes are uninsulated, cold air gets in, or outdoor temperatures stay low for long stretches. Wind and shallow bury depths make the problem worse in Michigan’s swingy winter weather. Knowing how freezing happens helps you choose the right fixes: insulate exposed runs, seal drafts, and keep warm air near plumbing that runs beside exterior walls. The checklist below shows the most common vulnerable spots so you can quickly assess risk around your property. Exposed supply lines in unheated basements, attics, or crawl spaces. Pipes that run along exterior walls or through poorly insulated wall cavities. Outdoor spigots, hose bibs, and irrigation lines that can trap standing water. Long or narrow pipe runs with little heat exposure from the building envelope. These are the places to check first during a cold snap and where to add insulation or local heat to lower freeze risk. What Temperature Causes Pipes to Freeze? Pipes often start to freeze when air temperatures drop toward 20°F (−6°C), but the exact point depends on exposure, insulation, and pipe material. Wind chilling unprotected pipe surfaces speeds heat loss, and pipes inside exterior walls can freeze even when outdoor lines do not because framing conducts cold. Materials matter: PEX tolerates expansion better than rigid copper and is less likely to burst immediately, but any water-filled pipe can freeze if conditions persist. Watch outdoor lows and check for indoor cold spots — an infrared thermometer or simply feeling exposed pipes during a cold spell will tell you when to add insulation or local heating. Which Areas in Homes and Businesses Are Most Vulnerable? Some locations combine low heat, poor airflow, and exposure — making them the most likely to freeze. Focus inspections on peripheral and transitional spaces where building heat can’t reach easily. In commercial buildings, check service risers, rooftop mechanical closets, and exterior-facing restrooms. In homes, pay attention to basements, crawl spaces, attics, garages, and unheated utility closets. Documenting these vulnerable runs before winter helps you prioritize insulation, heat tape, or rerouting where practical. What Are the Best Pipe Insulation Methods for Winter? Good insulation slows conductive heat loss and increases the time it takes a pipe to freeze. The most practical methods are foam pipe sleeves for exposed supply lines, fiberglass for larger or irregular pipes, and thermostat-controlled heat tape when active heating is required in especially cold spots. Choose an approach that balances R-value, ease of installation, durability in cold weather, and safety — especially with heat tape, which must be installed to manufacturer specs. The table below compares common insulation choices to help you pick what’s right for Michigan winters. Insulation types differ in R-value, best uses, benefits, and how well they hold up in cold-weather plumbing. Insulation Type Characteristic Best Use Case Foam pipe sleeve Closed-cell foam; easy to cut and fit Exposed indoor copper or PEX lines in basements and garages Fiberglass wrap Higher temperature tolerance; good for larger pipes Commercial runs, recirculation lines, and long exterior wall runs Heat tape (electric) Active heating; often thermostat-controlled Pipes in very cold or hard-to-reach spots where passive insulation isn’t enough Use this comparison to balance cost and performance: foam is the fastest DIY fix, fiberglass is more permanent, and heat tape gives active protection where needed. Which Pipe Insulation Materials Work Best in Cold Climates? For most Michigan homes, closed-cell foam sleeves offer a good balance of R-value and simple installation — they’re the top DIY choice for exposed supply lines in basements, garages, and utility rooms. Fiberglass with a vapor-barrier jacket works better on larger-diameter pipes or where higher temperature tolerance is required, though it needs more careful fitting and protection from moisture. Heat tape is a reliable active option when insulation alone won’t cut it; choose thermostat-controlled models and follow safe installation practices to avoid electrical hazards. Pick materials based on pipe type, access, and whether the run sits next to an exterior wall or in an unheated cavity. How and Where Should You Apply Pipe Insulation? Start by inspecting exposed runs and measuring lengths and diameters. Cut insulation so it fits snugly over straight sections and use the right fittings or wrap for elbows and valves. Seal seams with appropriate tape and close joints at fittings to create continuous coverage. Use removable insulation around shut-off valves and service connections so future access is easy. Don’t crush the insulation when fastening it, and leave room for maintenance. For heat tape, follow the manufacturer’s instructions and keep it clear of combustible materials. Prioritize insulation along exterior walls, runs beside garages, and pipes in crawl spaces or attics for the biggest freeze-prevention benefit. How Can You Winterize Outdoor Plumbing to Prevent Freezing? Winterizing outdoor plumbing removes standing water from