
What is Good Water Pressure? Home Plumbing Guide

What Is Good Water Pressure? A Homeowner’s Guide to Ideal PSI and Practical Solutions Good water pressure means your plumbing delivers the right force (PSI) and flow (GPM) so faucets and showers work well, appliances run reliably, and pipes and fittings aren’t put under unnecessary stress. This guide breaks down what “good” pressure looks like in measurable terms, explains the difference between pressure and flow, and shows why a balanced system matters for showers, washing machines, and water heaters. You’ll find recommended PSI ranges for common fixtures, steps to diagnose low or high pressure, practical DIY checks, and clear guidance on when to call a pro. We walk through common causes—mineral buildup, leaks, or faulty valves—show how to test with a pressure gauge, and outline preventive options like pressure reducing valves (PRVs), expansion tanks, and booster pumps. Everything here is focused on straightforward, actionable advice homeowners can use to measure, interpret, and fix pressure problems while avoiding unnecessary repairs. What Is Ideal Home Water Pressure and Why It Matters Ideal home water pressure balances force (PSI) with usable flow (GPM) so fixtures perform without adding wear to the system. Pressure is what pushes water through pipes; flow is the volume you get at the tap. Together they determine shower strength, appliance fill times, and how long seals and valves last. Keeping pressure in the recommended residential range reduces leaks, lowers the chance of water hammer, and extends appliance life. Below you’ll find practical PSI ranges for typical fixtures and a quick list of why it’s worth checking your pressure. Fixture Recommended PSI Effect on Performance Shower 45–70 PSI Consistent spray, stable temperature, comfortable flow Kitchen Faucet 45–70 PSI Fills pots and dishwashers efficiently with less splashing Washing Machine 40–60 PSI Valves work properly, cycles run reliably, less wear Water Heater (incoming) 40–60 PSI Smoother burner cycles and reduced thermal stress Hose Bib / Exterior 40–75 PSI Good irrigation pressure for hoses and sprinklers Most fixtures perform best near the 50–70 PSI sweet spot; pressures well below or above that range can cause usability problems or shorten component life. Keeping your system near that window makes appliances more reliable and reduces plumbing wear—good reasons to measure and, if necessary, correct system pressure. Quick takeaways on why ideal pressure matters and when to test: Comfort: Proper pressure gives a steady shower and predictable faucet flow. Appliance life: Correct pressure reduces stress on valves and seals in dishwashers and water heaters. Leak risk: Excessive pressure speeds up joint and seal failure, which leads to leaks. Next we define the units used to measure pressure and flow, and explain how to interpret gauge readings. What Is Water Pressure and How Is It Measured (PSI and GPM)? Water pressure measures the force pushing water through the plumbing and is shown in pounds per square inch (PSI). Flow rate measures how much water comes out over time, usually in gallons per minute (GPM). PSI tells you how hard the water is pushed; GPM tells you how much water arrives. Think of a garden hose: PSI is the force, while the nozzle size affects GPM—narrow the nozzle and pressure feels higher while flow drops. Check PSI when you’re concerned about stress on pipes or appliances; check GPM when fill times or shower volume seem slow. Together, these measurements help pinpoint whether an issue is pressure-related, a flow restriction, or a fixture problem. Recommended PSI Range for Residential Plumbing Homes generally operate safely between 40 and 80 PSI, with a comfortable household target around 50–70 PSI—many pros aim for about 60 PSI. Below about 40 PSI, showers and appliances can feel weak; sustained pressure above 80 PSI raises the chance of leaks, burst fixtures, and faster wear. Municipal supply, elevation, and private wells affect where your home sits in that range, so test regularly. If a simple gauge test shows readings outside the recommended window, the next steps are minor regulator adjustments or professional diagnostics to check for leaks or corroded piping. What Causes Low Water Pressure and How to Fix It Low pressure can come from a single fixture problem or a whole-house supply issue—diagnosing which is the first step. Localized issues, like a clogged aerator, affect one tap; whole-house drops point to the main shut-off, PRV failure, leaks, or changes in municipal supply. The table below helps you triage low pressure with causes, signs, DIY checks, and guidance on when to bring in a pro. Cause Diagnostic Sign DIY Check When to Call a Pro Clogged aerator or cartridge Low flow at one fixture only Remove and clean the aerator or cartridge If cleaning doesn’t restore flow Partially closed shut-off valve Low flow throughout house Make sure main and meter valves are fully open If the valve is stuck or leaking Faulty PRV Whole-house pressure drift or fluctuating PSI Test pressure at a hose bib with a gauge If PRV replacement is likely Hidden leak or pipe corrosion Sudden drop, wet spots, higher bills Inspect visible lines and joints If you see signs of a leak or excavation is needed Municipal supply issue Low pressure at multiple homes Check with neighbors or the local supply If the supply stays low and isn’t resolved This troubleshooting table gives a clear path from basic DIY checks to situations that need professional inspection. If simple fixes don’t help, or you spot signs of a hidden leak or corroded main, a licensed plumber can run targeted diagnostics and repairs. Common causes of low pressure include mineral buildup, aging or corroded pipes, partially closed valves, failing PRVs, and municipal maintenance events. Mineral scale often affects a single fixture and improves after cleaning an aerator or showerhead. Corrosion or pipe damage usually causes persistent, whole-house pressure loss and may come with discolored water or wet spots. Knowing whether the issue is localized or systemic helps decide whether to try maintenance first or call for leak detection and pipe repair. For many DIY fixes, follow a safe sequence: check faucets and aerators,
Showerhead Descaling: Remove Limescale for Better Spray
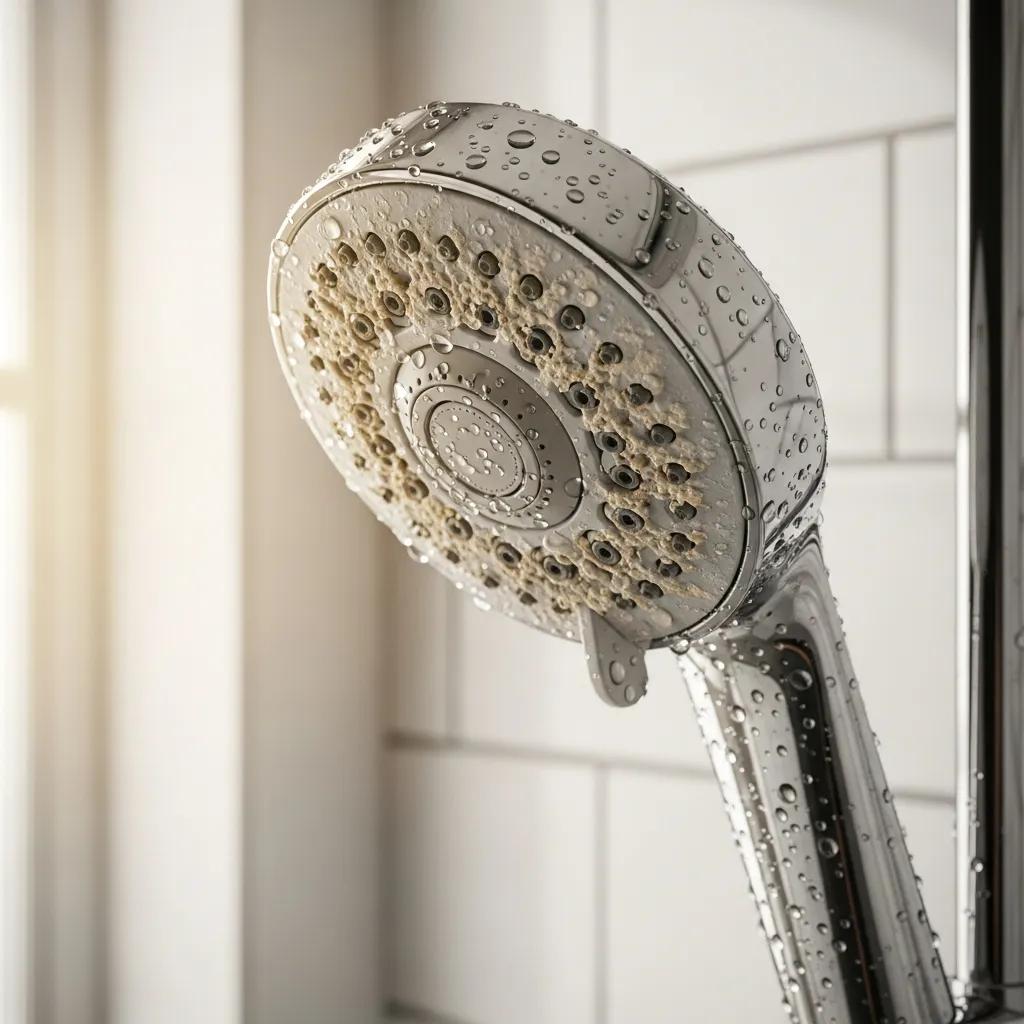
Showerhead Descaling: Remove Limescale to Restore Even Spray and Peak Performance Limescale on a showerhead is a common result of hard water — dissolved minerals like calcium and magnesium that build up as chalky deposits on nozzles and surfaces. Removing that buildup brings back full spray coverage, improves flow, and helps fixtures last longer. This guide covers what limescale is, why hard water leaves stubborn deposits, and how those deposits change spray patterns and the way your shower feels. You’ll find practical, step‑by‑step DIY methods—vinegar soaks, baking‑soda scrubs—and safety tips for when to move to commercial descalers. We also walk through when to call a pro, simple maintenance routines, and longer‑term water treatment options to reduce recurrence. Read on for easy materials lists, direct comparisons of common methods, and local service options so you can pick the right next step to get an even, consistent spray again. What causes limescale on showerheads — and how does it change spray quality? Limescale is the hard, chalky residue that forms when calcium and magnesium in hard water precipitate as calcium carbonate on surfaces where water flows or evaporates. The basic process is simple: water carrying dissolved minerals loses carbon dioxide or evaporates near warm surfaces and nozzles, concentrating minerals until they crystallize and stick. That chemistry explains why acidic cleaners and gentle mechanical action are effective — they break or loosen those mineral bonds. You’ll see white crusts, rough patches, and clogged nozzle holes; functionally, deposits cause uneven spray, narrow jets, and a shower that feels low‑pressure even when supply pressure hasn’t changed. Knowing how deposits form makes it easier to remove them and prevent future buildup, restoring full spray coverage and reducing wear on the fixture. What is limescale, and how does hard water create it? Limescale is mostly calcium carbonate that shows up when hard water loses dissolved carbon dioxide or evaporates. The mineral salts collect where flow slows or water splashes repeatedly — at nozzle openings, filter screens, and the base of the shower arm. Chemically, calcium ions meet carbonate or bicarbonate ions; when temperature or pressure shifts, calcium carbonate drops out of solution and forms solid deposits. Homeowners often notice white, flaky crusts on chrome or plastic; a gentle scrape will reveal brittle mineral layers. Knowing the formation process helps you match the treatment: acids dissolve the minerals, while abrasives remove loose deposits. How does limescale affect shower performance and perceived water pressure? Limescale narrows and blocks nozzle holes, forcing water through fewer outlets and creating uneven spray and hard, high‑speed jets instead of a smooth, full pattern. That produces the feeling of low pressure even though system pressure may be unchanged. Flow restrictors and aerators can become clogged, further cutting throughput. Over time, mineral deposits can seize multi‑function heads, wear seals, and accelerate leaks or premature replacement. Clearing nozzle passages restores balanced distribution, reduces wasted water from inefficient jets, and improves comfort — which is why descaling is both a performance and maintenance priority. How can you effectively descale a showerhead at home? Start with a materials list and pick a method that matches the deposit severity and your showerhead’s finish: light buildup usually responds to a vinegar soak, while heavy encrustation may need a diluted commercial descaler or professional help. Follow a stepwise routine — inspect, remove if possible, soak, scrub, rinse, then test — to protect finishes and restore performance. Doing this can avoid unnecessary replacements and extend fixture life. If DIY methods don’t clear the problem after careful attempts, professional descaling is the next step for stubborn mineralization or delicate finishes; Frost & Kretsch Plumbing offers local professional options. Below is a quick comparison of common DIY and commercial methods to help you choose. Home descaling methods differ in materials, time, and safety considerations: Method Materials Time Effectiveness Safety Notes Vinegar soak method White vinegar, container, toothbrush 30 min–6 hours High for light–moderate deposits Safe for most finishes; avoid prolonged contact with natural stone Baking‑soda paste method Baking soda, water, brush 15–45 minutes Moderate, best after vinegar Abrasive—test on a small area for plated finishes Diluted commercial descaler (e.g., acid‑based) Descaler, gloves, eye protection 5–30 minutes High for heavy deposits Follow label, rinse well; can damage some finishes This table shows why a vinegar soak is a good first choice for most homes, while commercial descalers are for tougher jobs and require extra caution. The next section gives step‑by‑step DIY instructions you can follow safely. Best DIY methods using vinegar and natural products The simplest home fix is a vinegar soak. Use white vinegar at full strength or mix 1:1 with water for sensitive finishes. Remove the showerhead when possible, submerge it in a container, and soak 30 minutes to several hours depending on buildup. After soaking, use a soft toothbrush or a toothpick to clear nozzle holes, then rinse and run water to flush internal channels. For non‑removable heads, fill a plastic bag with vinegar, secure it around the head with a rubber band, and soak the same way. Finish by wiping seals and exterior parts dry to prevent new deposits. This approach pairs chemical dissolution with gentle mechanical removal for safe, effective descaling. Which commercial descaling products work well and are safe? Many commercial descalers use acids like diluted hydrochloric or sulfamic acid to dissolve calcium carbonate faster than vinegar. Use these products diluted per the instructions, with gloves, eye protection, and good ventilation — and rinse thoroughly afterward to avoid residue or corrosion. Not all finishes tolerate strong acids; test a small, hidden spot first and avoid long contact on plated or decorative surfaces. When unsure, choose a milder product or consult a professional to prevent damage; proper neutralization and rinsing will protect seals and plastics. When should you seek professional showerhead descaling in Grosse Pointe? Call a pro when deposits are extensive, parts show corrosion or damage, internal valves are affected, or repeated DIY attempts don’t restore an even spray. Professionals have tools and techniques — ultrasonic cleaning, controlled
Water Heater Repair in Oakland County, MI
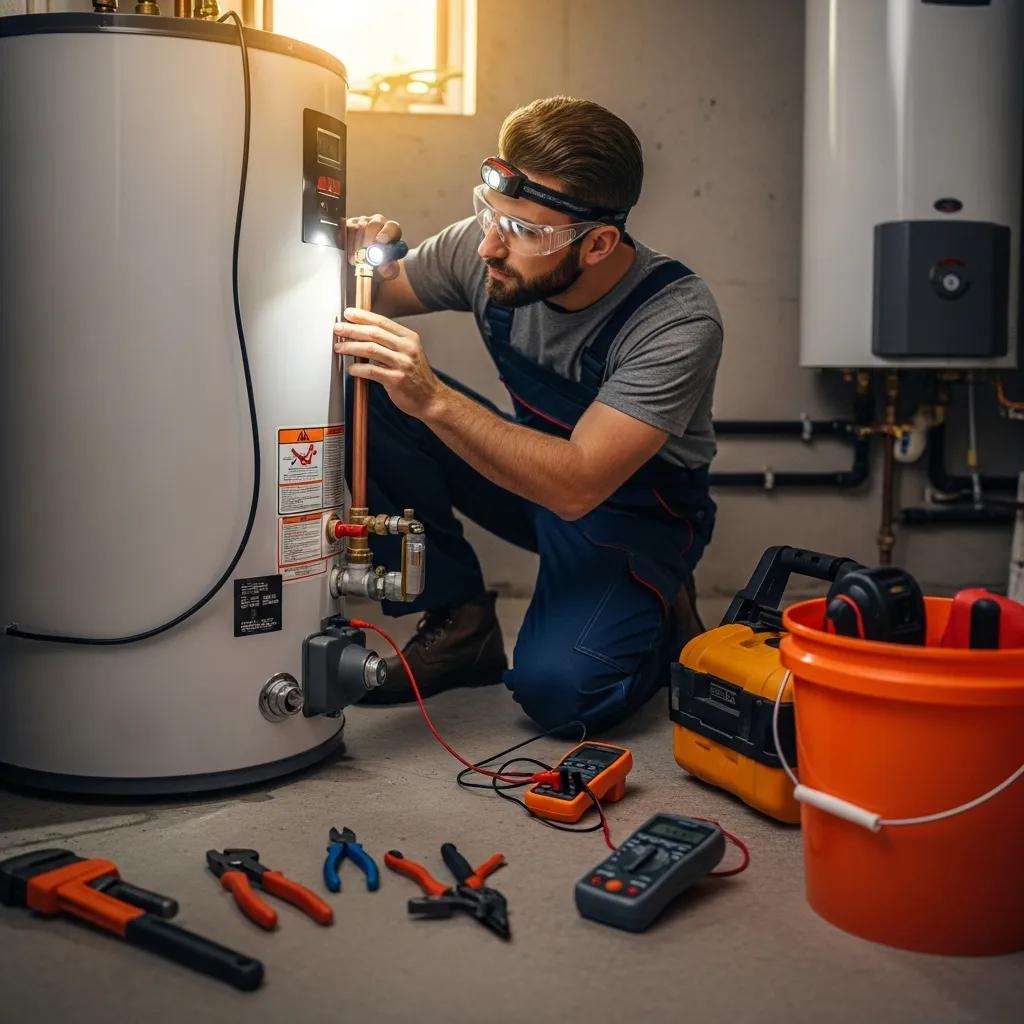
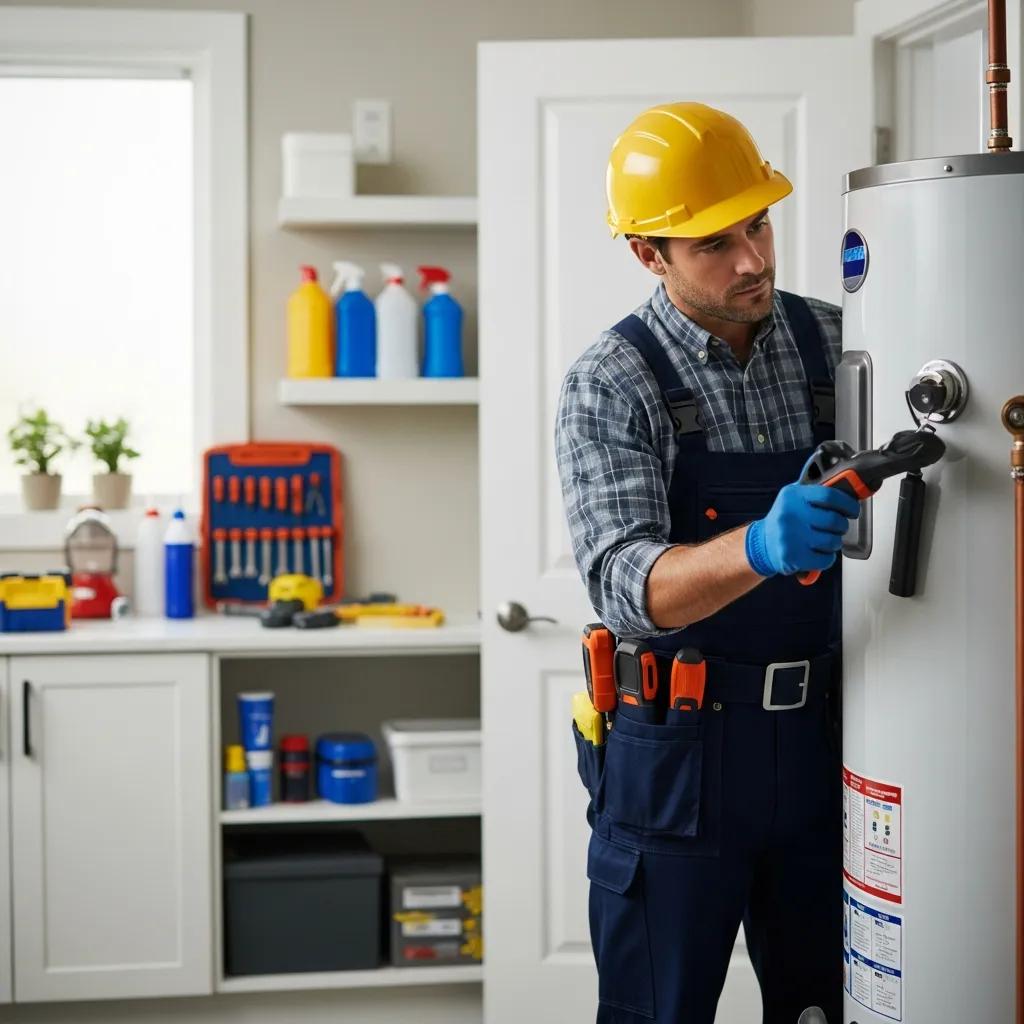
Water Heater Repair & Installation — Oakland County, MI | Expert Service & 24/7 Emergency Response A working water heater keeps your home comfortable and protects your property. In Oakland County, quick, knowledgeable service reduces downtime and avoids bigger bills later. This guide walks homeowners through the most common water heater problems, how technicians diagnose them, and practical repair, replacement, and emergency options that fit local homes and weather. You’ll learn how to spot leaks, decode noises and rusty water, compare tank, tankless, gas, and electric systems, and know when to repair versus replace. We also outline typical service steps, emergency procedures, and cost factors so you can make faster, more confident decisions and get reliable results. Next, we review frequent failure modes and simple homeowner checks that lead naturally into professional diagnostics and repairs. What Are the Most Common Water Heater Problems in Oakland County? In Oakland County we see many failures caused by aging parts, sediment from local water, and extra stress during cold spells. Those issues cut efficiency and raise the chance of leaks or breakdowns. Knowing the usual problems helps you prioritize basic inspections and DIY checks that either fix small issues or point to the need for a pro. In older homes, corroded anode rods, failing temperature-pressure relief (T&P) valves, and worn thermostats commonly reduce hot-water performance and create safety concerns. Distinguishing cosmetic rust from active leaks helps you decide between routine service and an emergency call and prepares you for the diagnostic steps a licensed technician will take next. This table summarizes common problems, typical causes, and quick homeowner checks to guide immediate action and prepare for a service visit. Problem Usual Cause Homeowner DIY Check Leak Corrosion, loose fittings, failed drain valve Look around the tank base and pipe connections; gently tighten the drain valve if loose No hot water Failed element, pilot outage, thermostat issue Try hot water at several taps; check the pilot light or circuit breaker Strange noises Sediment buildup creating rumbling Drain a few gallons to see if sediment comes out; listen while the heater heats Rusty or discolored water Corroded anode rod or tank lining failure Run hot water and note color; compare to cold tap to isolate the heater Pressure relief valve drip Faulty valve or high tank pressure Put a bucket under the valve and watch during a heating cycle Pilot light or ignition failures Gas supply or thermocouple problems Smell for gas and check pilot status; leave gas work to a professional Those quick checks get you ready for a professional diagnosis, which usually starts with the symptom you found and moves to component-level testing. After your triage, schedule a full diagnostic so a technician can confirm the root cause and scope of repairs — local providers handle this efficiently. If you prefer a professional inspection, Frost and Kretsch Plumbing offers focused diagnostics and repairs by licensed technicians who assess tank condition, replace parts as needed, and recommend safe next steps. Their process helps you go from symptom to a clear repair plan and estimate without guesswork. How to Identify Signs of Water Heater Leaks and Malfunctions Visible leaks, corrosion streaks, and sudden drops in hot water are clear signs a heater needs attention. Check the tank base, inlet/outlet fittings, drain valve, and nearby pipes for wet spots or rust stains. To tell condensation apart from a real leak, inspect after a dry period. Higher-severity signs — a damp floor, peeling paint on nearby walls, or a pressure relief valve that constantly runs — mean you should shut off the water and call a technician. Note when the problem started and any recent changes; that history helps the tech determine whether it’s a local fitting failure or internal tank corrosion that may require replacement. Spotting these cues leads directly to mechanical diagnostics like pressure tests and element checks, which confirm whether repair or replacement is the right fix. What Causes No Hot Water and Strange Noises in Water Heaters? No hot water or odd sounds usually come from failed heating elements, sediment buildup, thermostat problems, or pilot/ignition issues in gas units — each needs a different diagnostic approach. For electric heaters, a technician will test element resistance and thermostat function; for gas units, they’ll inspect the pilot, thermocouple, and burner. Sediment settles at the bottom, causing rumbling or popping during heating and reducing heat transfer; flushing the tank often restores efficiency if the tank itself is still sound. If elements or ignition components keep failing, or sediment returns quickly, a tech may recommend replacement to restore reliability and efficiency. Those mechanical causes and tests frame service options from targeted parts replacement to full-unit swap-outs, which we cover next. Which Comprehensive Water Heater Services Does Frost and Kretsch Plumbing Offer? Complete water heater service covers diagnostic testing, targeted repairs and part replacement, tank flushing, maintenance plans, new installations, and emergency response — all aimed at minimizing downtime and protecting your home. Work usually starts with a documented inspection and a review of any homeowner triage, then moves to component testing to find the failed part. We provide a clear repair recommendation that lists parts and labor. Preventive steps — like flushing the tank, swapping the anode rod, and testing the T&P valve — lower emergency risk and extend service life. When replacement is the best long-term choice, technicians evaluate sizing, venting, and electrical or gas needs before offering installation options. Frost and Kretsch highlights core service promises: 24/7 Emergency Service, Transparent Pricing, a 100% Satisfaction Guarantee, Licensed & Insured Technicians, and Local Expertise. Their workflow focuses on safety checks, clear estimates, and follow-up verification so your system meets code and performance expectations. Service needs vary — from same-day fixes for a thermostat to a multi-day install for a tankless unit. The section below explains the hands-on repair process you can expect from Frost and Kretsch technicians. The following outlines common services included in professional water heater care: Diagnostic inspection: Thorough testing to pinpoint the root
24/7 Emergency Plumbing in Macomb County, MI
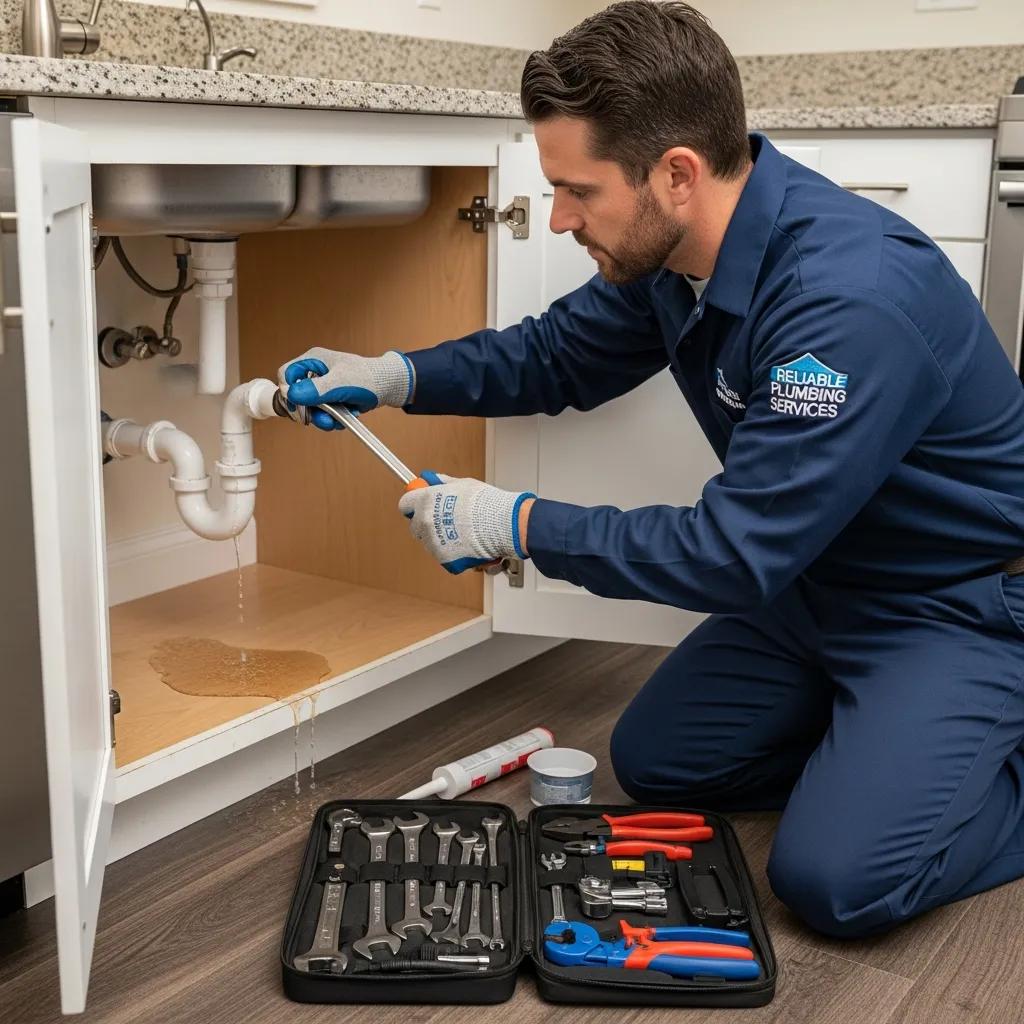
24/7 Emergency Plumbing — Macomb County, MI: Fast, Reliable Service for Homes & Businesses When plumbing disasters hit in Macomb County, fast, competent help matters. Frost and Kretsch Plumbing provides licensed 24/7 emergency plumbing for both homes and businesses. This guide shows how to spot urgent plumbing problems, what to do immediately to limit damage, and how our emergency crews restore service and protect your property. You’ll find the most common local emergencies, how we diagnose and fix water heater crises, seasonal risks like frozen pipes and sump pump failures, plus a clear step-by-step on getting quick, safe repairs. Practical mitigation tips, the diagnostic tools our techs use, and decision points for repair versus replacement are included so homeowners and property managers can act fast. Keywords such as 24 hour plumbing Macomb, emergency plumbing Macomb County, and emergency drain cleaning Macomb are integrated into actionable advice to help resolve urgent plumbing issues efficiently. Why Choose Frost and Kretsch Plumbing for Emergency Plumbing in Macomb County? Emergency plumbing in Macomb County requires a rapid response, straightforward communication, and technicians who secure the problem on arrival. Our licensed, insured crews run mobile service vans stocked with diagnostic gear and follow tested response procedures to reduce uncertainty during stressful situations. Knowing how a true 24/7 emergency plumbing service operates helps property owners pick the right team and minimize water damage, contamination, and business downtime. Frost and Kretsch Plumbing focuses on clear, consistent service tailored to urgent residential and commercial needs. Below are the practical benefits you can expect during an emergency call and why steady, predictable response matters when a burst pipe or sewer backup threatens your property. Callers also get transparent updates and a satisfaction-focused follow-up that favor safe restoration over quick, temporary fixes. 24/7 availability without surprise after-hours price hikes so you won’t be blindsided by premiums during emergencies. Prompt response times — often within an hour depending on location — to reduce water exposure and secondary damage. Licensed, insured technicians who perform on-site diagnostics, present clear quotes before work starts, and back repairs with a satisfaction guarantee. These value points signal dependable service during urgent events and give the reassurance needed to choose an emergency provider quickly. For immediate assistance in Macomb County, call (586) 675-0097 or check our Google Business Profile to confirm service details and availability. What Makes Our 24 Hour Plumbing Service in Macomb MI Stand Out? Being a true 24 hour plumbing service means more than an overnight phone number — it requires on-call dispatch, stocked vans, and technicians trained for emergency containment and repairs. Rapid containment steps — shutting off water, isolating affected fixtures, and applying temporary clamps — limit damage until permanent fixes are possible. On-site crews run pressure checks, visual inspections, and focused leak detection before recommending next steps, which shortens repair timelines and clarifies costs. These practices help homeowners and businesses prioritize safety, speed restoration, and preserve documentation for insurance claims. Operational readiness also includes the right equipment and methods: video sewer scopes, hydro jetting for severe clogs, portable pumps for basement water removal, and commonly used parts for emergency pipe patches. Together, these tools let technicians stabilize systems and, when possible, complete permanent repairs in the same visit. The next section explains how our licensed and insured plumbers deliver quality with oversight and guarantees that protect property owners. How Do Our Licensed and Insured Plumbers Ensure Quality Repairs? Licensed and insured technicians give homeowners a baseline of protection through verified credentials and liability coverage in case work causes unintended damage. Licensing shows compliance with local codes and required training; insurance covers accidents or property impacts during emergency services. Our techs follow quality-control steps: documented diagnostics, photographic records, and transparent estimates presented before work begins — creating a clear chain of responsibility for the repair. Continuous training keeps crews current with techniques like trenchless sewer repair, hydro jetting, and advanced leak detection that reduce invasive work. Post-service follow-ups and a satisfaction guarantee add another layer of assurance that repairs meet safety and function expectations. These practices lower repeat visits and protect the long-term integrity of emergency plumbing work. What Are the Most Common Plumbing Emergencies in Macomb County? Plumbing emergencies in Macomb County are sudden failures that threaten property, hygiene, or building systems and usually need immediate professional attention. Typical emergencies include burst pipes, sewer backups, major leaks, clogged drains causing overflow, water heater failures leaving tenants without hot water, frozen pipes in winter, and sump pump failures during heavy rains. Quick recognition and immediate mitigation reduce water damage, mold risk, and operational downtime for businesses. Homeowners and facility managers should know which situations need an emergency plumber and which can wait for scheduled service. The list below summarizes common urgent events with short definitions to clarify when to act. Burst pipes: A ruptured supply line causing uncontrolled water flow that can flood spaces fast. Sewer backups: Wastewater coming back through fixtures, creating health hazards that need sanitation and repair. Major leaks: Ongoing, high-volume leaks from fixtures or connections that threaten structures. Water heater failure: Sudden loss of hot water or active tank leaks that risk flooding and scalding. All of these share the same priority: stop the flow if it’s safe to do so, remove electrical hazards, and call an emergency technician. The table below compares key emergencies, their usual causes, and immediate homeowner or business actions to limit damage. Emergency types and immediate actions in Macomb County — quick reference. Emergency Type Common Causes Immediate Actions Burst pipe Freezing, corrosion, pressure surge Shut off the main water, open taps to relieve pressure, move valuables away from water Sewer backup Blockage, collapsed line, root intrusion Stop using fixtures, block off drains, avoid contaminated areas Water heater failure Tank leak, element failure, sediment buildup Turn off power/gas and the water supply; contain leaks with towels or pans Frozen pipe Low temperatures, poor insulation Keep the area warm, open cabinets; do not use open flame — call a pro This comparison helps
Preventing Hair Clogs in Showers and Drains
How to Prevent Hair Clogs in Showers and Drains: Expert Guide for Grosse Pointe Residents Hair clogs start when loose hairs mingle with soap scum, oils and other bathroom debris to form fibrous tangles that slow or block water flow — and sometimes cause bad smells. This guide helps you spot early signs of hair buildup, pick the right drain protector, follow safe daily and weekly maintenance, and know when to step up to stronger DIY tools or call a pro. It’s written for homeowners and renters in Grosse Pointe and nearby communities who want practical, low-risk ways to stop hair from clogging shower drains and avoid unnecessary plumbing bills. You’ll find clear explanations of how hair behaves inside plumbing, comparisons of common hair catchers, step-by-step natural fixes like baking soda and vinegar, and safe use of plungers and drain snakes. We also explain professional options — camera inspections, motorized augers, and hydro-jetting — so you can decide when a plumber is the smarter choice. Keywords such as shower drain protector, hair catcher, hydro-jetting for hair clogs, and drain snake for hair clog are used naturally to match local search needs. What causes hair clogs and why they keep coming back Hair clogs form when individual hairs tangle into mats that trap soap scum, oils and mineral deposits. Those mats cut flow through the shower drain and often settle in the P-trap where water and debris pool. The basic process is physical: strands hook and bind to sticky residues and each other, creating a mesh that won’t flush away. Knowing this helps you focus on intercepting hair before it reaches the trap and reducing sticky build-up that speeds matting. With the right approach you can pick targeted catchers, tweak habits, and follow maintenance routines that stop repeat blockages. The most common early signs are slower drainage, gurgling when other fixtures run, occasional water backup, and faint drain odors. These symptoms show hair and residue are collecting near or inside the P-trap and that mechanical cleaning or prevention is needed. Catching issues early lowers the chance you’ll need invasive fixes later, like excavation or extensive disassembly. Below is a short list of the main contributors to hair clogs and a quick example of how everyday grooming can turn into a recurring plumbing problem if hair isn’t caught at the drain. Daily hair shedding combined with bathing products that leave sticky residues on strands and pipe walls. Soap scum and conditioner build-up that bind hairs together and cling to plumbing surfaces. Natural body oils and styling products that make hair more adhesive and likely to trap other debris. What are the main contributors to hair clogs in shower drains? Both long and short hair cause blockages, but long hair more easily forms looping fibers that tangle; short hair can pack into strainers and create dense mats. Studies and service reports show hair makes up roughly 40% of household drain blockages because it doesn’t dissolve and tends to entwine with other residues. Soap scum and conditioners wrap a sticky film around strands, while oils and styling products increase adhesion and speed mat formation. Older homes with narrower or rougher pipes make things worse since irregular surfaces provide anchor points where hair begins to grab hold. Households with several long-hair residents or heavy use of oily products should be proactive with quality catchers and regular weekly maintenance. Understanding these contributors helps you choose the right trap or screen and set a cleaning schedule that prevents escalation. How do hair clogs differ from other types of drain blockages? Hair clogs are fibrous and usually form woven masses that don’t dissolve easily — unlike grease, which forms slick layers, or mineral scale, which hardens on pipe walls. Chemical drain cleaners target organic and greasy residues but are often ineffective on large hair bundles and can damage older pipes or seals. Hair clogs also tend to return because leftover fibers act as a nucleus for new buildup, so prevention relies on physical interception (hair catchers) and regular manual removal rather than repeated chemical treatments. Because hair creates persistent mats, the safest long-term approach emphasizes physical removal, periodic hot-water flushing, and pipe-friendly enzyme cleaners instead of frequent use of caustic chemicals. That’s why chemical cleaners sometimes give temporary relief but won’t stop repeat clogs unless you remove the hair and use a catcher. Which shower drain hair catchers work best to prevent clogs? A hair catcher is a simple mechanical device that stops loose hair before it reaches the P-trap. The most effective designs balance high capture rate with easy cleaning and durable materials. Types range from in-drain traps that collect hair below the grate to over-drain strainers that sit on top, and pop-up compatible covers that replace the existing cover while staying low-profile. Choosing the right model means fewer clogs, less time spent on maintenance, and less need for chemicals or professional visits. Use the comparison below to help select the best option for your drain diameter, hair volume and maintenance preference. Hair Catcher Type Material & Installation Effectiveness Price Range Maintenance In-drain trap (e.g., tub-style) Silicone or plastic; drops into the drain High for long hair $ Simple — remove and empty Over-drain strainer (mesh or metal) Stainless steel or silicone; sits over the grate Moderate–high $–$$ Moderate — rinse or wipe clean Pop-up compatible cover Stainless steel; replaces the drain cover High and visually neat $$ Moderate — lift and clean periodically Adhesive mesh peel-on Thin adhesive mesh; sticks to the grate Low–moderate $ Low — replace often In-drain traps and pop-up-compatible covers tend to capture the most hair for homes with heavy shedding, while over-drain strainers are a simple, budget-friendly option. Next we explain how each type works and offer installation tips. What types of hair catchers are available and how do they work? In-drain traps sit inside the drain opening and catch hair beneath the grate, stopping strands before they reach the P-trap. Over-drain strainers are baskets or mesh screens that rest
Walk-in Shower Benefits: Accessibility, Style, and Space
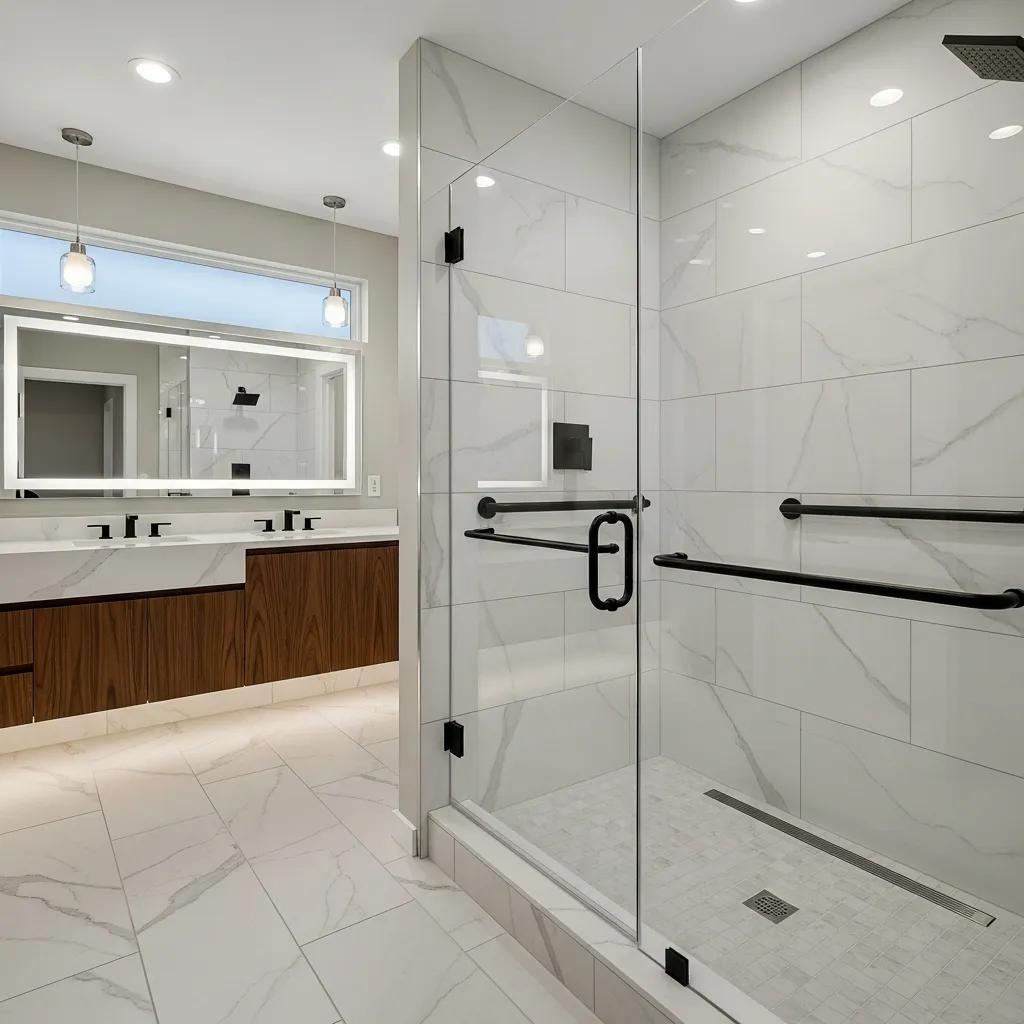
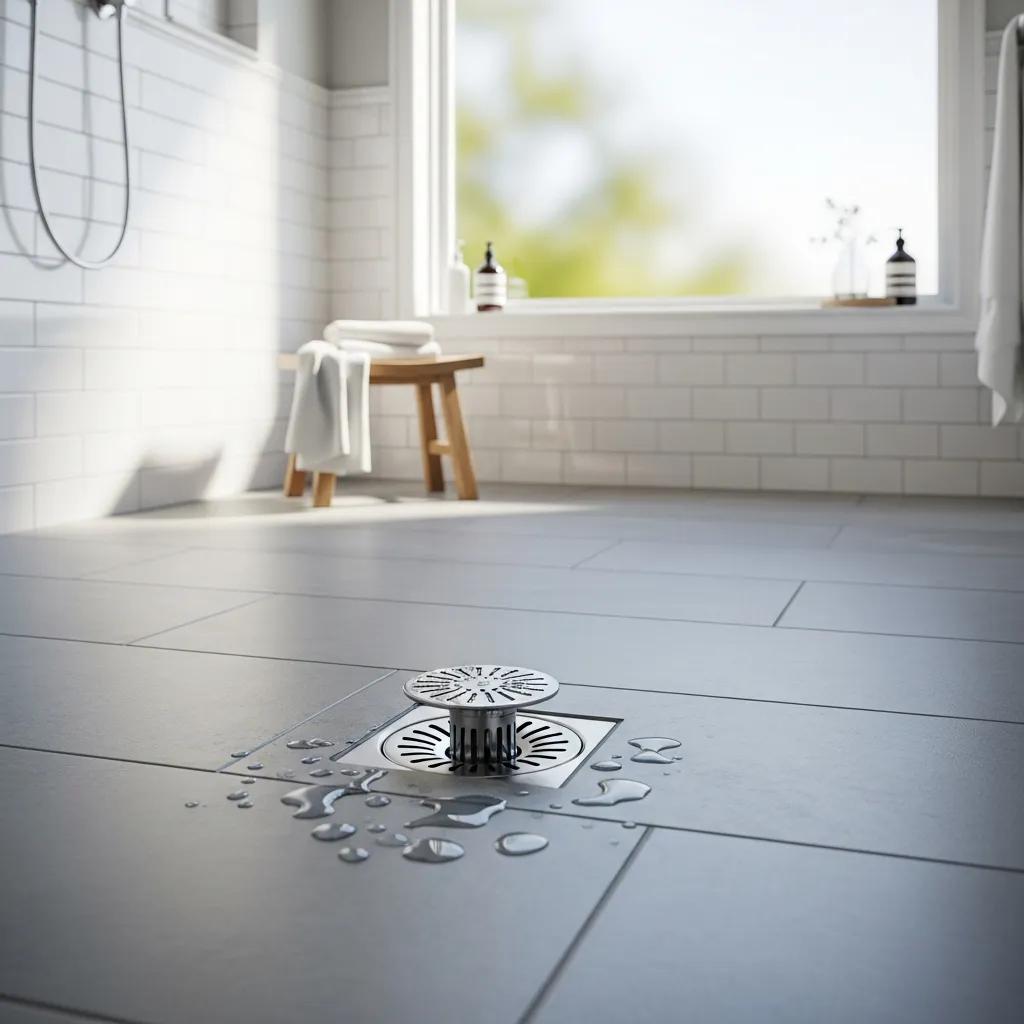
Walk-in Shower Benefits: Accessibility, Style, and Space for Grosse Pointe Homeowners Walk-in showers remove the usual barriers to bathing—making entry easier, improving safety, and creating a cleaner, more modern look while using less floor space. This guide shows how curbless and walk-in designs improve safety for seniors and people with limited mobility, highlights current glass and tile trends, and explains why these layouts are a practical choice for Grosse Pointe homes. Many families and homeowners planning to age in place want solutions that blend universal-design features with a high-end finish. Walk-in showers do just that: they pair grab bars, seating, and non-slip surfaces with frameless glass and simple hardware. Below we walk through the installation steps, local cost factors, design options, and layout tips so you can decide whether a walk-in shower fits your home and budget. Keep reading for safety features, design ideas, small-bathroom strategies, an installation roadmap, and answers to common questions about value and fit. How do walk-in showers enhance accessibility and safety? By removing raised thresholds and creating a continuous floor plane, walk-in showers cut down on trip hazards and make transfers easier for people using walkers or wheelchairs. The barrier-free layout pairs well with safety fixtures—grab bars, built-in seating, handheld showerheads, and textured floors—to lower fall risk and help users bathe with more independence and dignity. Curbless installs depend on exact floor slopes and good drains (linear drains are a common choice) so water drains properly without a curb. These upgrades tie into aging-in-place planning and ADA-informed design, giving you a safer bathroom that still looks modern. The sections that follow break down specific features, construction notes, and real-world examples to help homeowners weigh options for safety and comfort. Different accessibility elements provide distinct safety advantages and installation trade-offs. Curbless threshold: Eliminates a tripping edge and allows roll-in access for wheelchairs. Grab bars: Give stable handholds for standing, sitting, and transfers. Built-in seating: Lets users rest safely and reduces fatigue-related falls. Non-slip flooring: Improves traction on wet surfaces to prevent slips. Used together, these features create a more complete accessibility upgrade than any single change on its own—details that inform the feature choices discussed next. Feature Purpose Safety Benefit Curbless threshold Barrier-free entry Reduces tripping, allows roll-in access Grab bars Support during transfers Increases stability and confidence Non-slip flooring Traction under wet conditions Lowers slip-and-fall risk Bench or fold-down seat Seating during showering Reduces falls from fatigue This side-by-side view shows how combining features produces a safer, more usable shower environment—information that leads into the specific options for seniors and those with mobility needs. What features make walk-in showers senior- and mobility-friendly? Senior- and mobility-friendly walk-in showers focus on three areas: stable fixtures, easy-to-use hardware, and slip-resistant finishes. Supportive fixtures include well-placed grab bars—horizontal near seats and angled where transfers occur—and benches that can be built-in, cantilevered, or fold-down to save space. Adaptive hardware means thermostatic or pressure-balanced valves and handheld showerheads on adjustable slides so a seated user can reach controls easily and avoid scalding. Slip-resistant options include textured tiles, pebble pans, or treated surfaces paired with linear drains to keep water moving without needing a raised curb. For example, a fold-down seat beside a low-profile linear drain and a vertical grab bar simplifies transfers from a wheelchair to a seated shower position and supports independent hygiene for an aging household member. How does barrier-free, curbless design improve access? Removing the raised curb creates a continuous floor that accommodates walkers and wheelchairs and reduces trips for people who are steady on their feet. Achieving a reliable curbless shower means waterproofing the entire wet area and building the floor to slope—typically 1/4″ per foot (about 2%)—toward a properly sized drain. Linear drains are often used because they allow a single-direction slope and make tile transitions flatter. In retrofit work, curbless conversions can require substrate work or preformed slope systems to ensure drainage without major demolition; full remodels let you integrate drains and waterproof membranes from the framing stage. These structural choices affect cost and timeline, but the finished result expands usable floor area and delivers the seamless look that pairs accessibility with modern design—covered next in design trends. What are the modern design trends in walk-in shower styles? Today’s walk-in showers emphasize openness, clean lines, and material continuity to create a spa-like, low-clutter bathroom. Frameless glass panels or partial screens keep sightlines clear, while large-format tiles, neutral tones, and linear drains deliver a sleek, low-maintenance look. Designers often combine recessed niches and integrated benches with discreet hardware in matte black, brushed nickel, or warm brass for subtle contrast. Lighting matters too: layered lighting—recessed downlights, LED niches, and soft ambient sources—adds depth and helps small showers feel larger. The sections below dig into glass and tile choices and explain why minimalist design remains popular for walk-in showers. Material and layout choices affect both the appearance and the upkeep of a shower, so pick finishes that match your lifestyle and cleaning tolerance. Design Element Characteristic Practical Impact Frameless glass Minimal hardware, clear sightlines Expands visual space, requires regular glass care Large-format tile Fewer grout lines Easier cleaning, modern look Linear drain Discreet water channel Cleaner profile, allows single-direction slope Integrated bench Continuous material use Cohesive design, functional seating That table highlights trade-offs between visual continuity and maintenance needs, helping you select materials that fit your routine. How do glass enclosures and tile options elevate bathroom aesthetics? Glass enclosures—from full frameless panels to half-height screens—open sightlines and blur the boundary between shower and room, making the whole bathroom feel bigger. Clear glass maximizes the sense of space; frosted or textured glass adds privacy while still letting light through. Choose concealed hinges and minimal clips for a streamlined finish. Tile choices shape the overall feel: large-format porcelain or rectified-edge tiles reduce grout lines and pair well with in-floor heat and low thresholds. Keep maintenance in mind—light grout colors show dirt more, while rectified tiles and epoxy grout reduce upkeep. Pair your glass type and tile finish thoughtfully to
Troubleshoot Your No Hot Water Problem
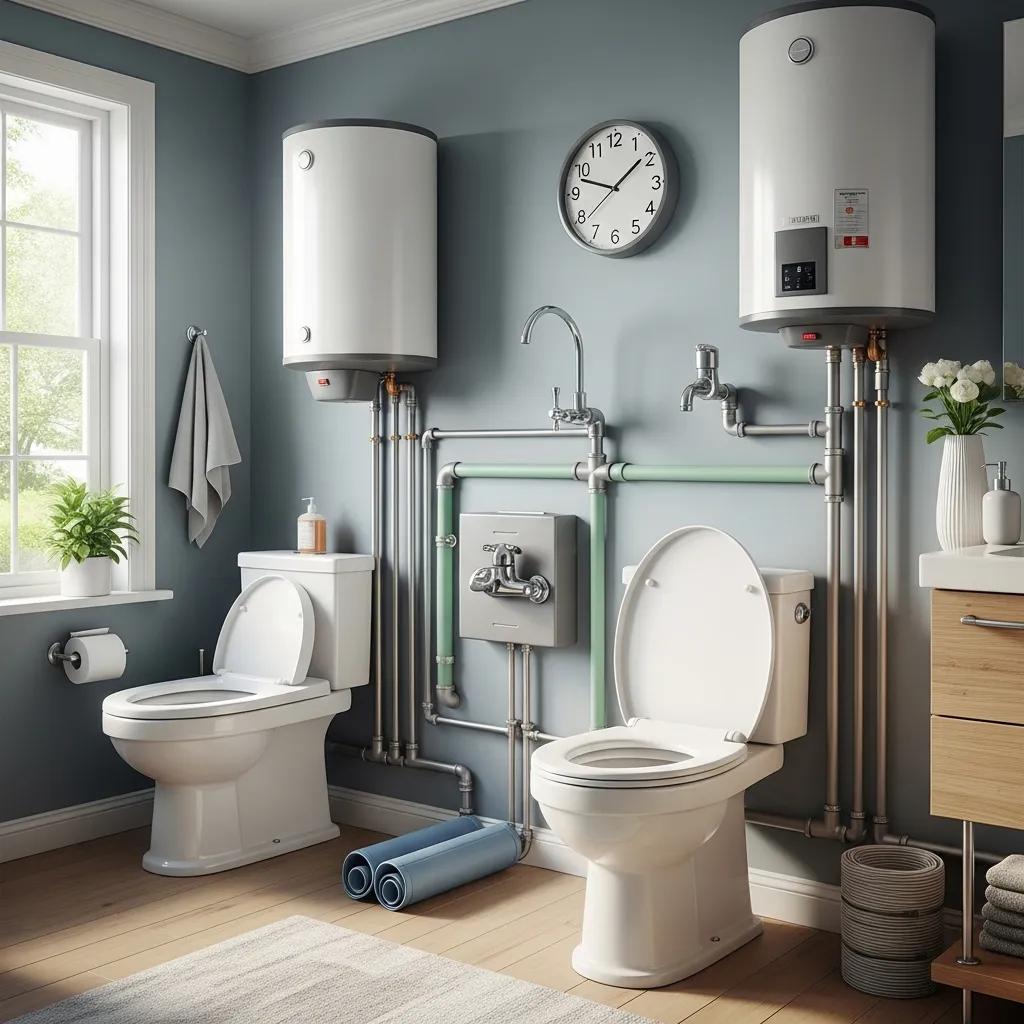
No Hot Water? Clear, Practical Troubleshooting and Trusted Repair Solutions Running out of hot water disrupts your routine and can mean anything from a simple tripped breaker to a worn component that needs professional service. This guide walks through what “no hot water” usually signals for gas, electric, and tankless systems, why it happens, and which safe, quick checks you can try before you call us. You’ll get step‑by‑step immediate diagnostics, safe pilot‑light and breaker checks, tankless troubleshooting for flow sensors and error codes, and clear signs that mean a licensed technician should handle the repair. We also match common causes to likely fixes and explain the repair and replacement services Frost and Kretsch Plumbing offers in Macomb, Oakland, and Wayne counties. Follow the prioritized checks to interpret symptoms and decide when it’s time to call a pro so you can get reliable hot water back fast and safely. Immediate Steps to Diagnose a No‑Hot‑Water Situation Start with power, fuel, and demand: confirm the heater has electricity or gas, make sure controls are set correctly, and check whether recent heavy use drained the tank. Most no‑hot‑water calls are caused by a supply or control interruption—not a total unit failure—so these first checks quickly narrow down the problem. Follow the prioritized steps below and stop right away if you encounter any safety risk—gas smell, active leak, or exposed wiring—and call a licensed technician. Do these five checks first: Look at recent household hot‑water use to rule out simple tank depletion after heavy demand. Check the home electrical panel for a tripped breaker or blown fuse labeled for the water heater. On gas units, verify the pilot light is on and listen for the burner firing when a hot tap is opened. Confirm the water‑heater thermostat and any mixing valves are set correctly and haven’t been changed. Scan for visible leaks, odd noises, or discolored water—these point to mechanical or sediment problems. These quick steps separate simple operator or supply problems from safety or mechanical issues. If you find a tripped breaker or an unlit pilot that won’t relight, follow the targeted checks below. If you smell gas, see an active leak, or feel unsure, stop DIY work and call a licensed pro immediately. Checking the Pilot Light on a Gas Water Heater The pilot light is the small flame that ignites the burner on older gas heaters—if it’s out, the burner won’t run and you’ll have no hot water. Turn the gas control to “off,” wait a few minutes for any gas to clear, then follow the relight instructions on the unit’s label (usually switch to “pilot,” press the control knob, and use the igniter or a match until the pilot stays lit). If the pilot won’t hold, the thermocouple—a safety sensor that detects the flame—may be bad and will need replacing. Never ignore the smell of gas while relighting: if you detect gas, leave the area immediately and call a licensed technician; do not try further relighting. Inspecting the Breaker and Power Supply on Electric Water Heaters Electric water heaters run on a dedicated circuit and heating elements. If the breaker has tripped, the heater loses power and you get no hot water. Find the electrical panel, locate the breaker for the water heater, and see if it’s in the tripped (middle) position; reset it by switching fully off, then on again while staying a safe distance from the unit as it recovers. If the breaker trips again or the heater shows no power, you may have a failed heating element or internal wiring fault—these require a professional electrician or plumber. For safety, don’t open electrical panels or handle live wiring unless you’re trained; call a licensed technician for element or thermostat testing. Common Causes of No Hot Water by Heater Type No‑hot‑water issues fall into supply/control problems and component failures, and likely causes differ by type: gas heaters often involve pilot, thermocouple, or gas‑valve issues; electric heaters usually point to tripped breakers, bad heating elements, or faulty thermostats; tankless systems commonly face flow‑sensor, ignition, or scale problems. Understanding these cause‑to‑symptom links helps you prioritize repairs and decide when a DIY fix is reasonable or when to call a technician. The table below links common causes to the typical heater type and the recommended urgency. Cause Typical Heater Type Likely Fix / Urgency Pilot light out Gas water heater Relight per instructions; high urgency if pilot won’t stay lit or you smell gas Thermocouple failure Gas water heater Thermocouple replacement; licensed tech recommended Tripped breaker Electric water heater Reset breaker; medium urgency if it keeps tripping—call an electrician/plumber Heating element failure Electric water heater Element replacement after testing; professional service required for safety Flow sensor or ignition fault Tankless water heater Sensor/igniter inspection and possible replacement; medium–high urgency Sediment buildup Tank or tankless units Flush or descale; routine maintenance helps prevent return issues Faulty thermostat Electric or gas units Calibration or replacement; professional diagnosis advised This mapping emphasizes safety and speed: start with supply interruptions like a tripped breaker or out pilot, and treat gas‑safety or component failures as matters for prompt professional attention to ensure safe, code‑compliant repairs. Gas Water Heater Issues: Pilot, Thermocouple, and Gas Valve Gas heaters rely on a chain of parts to light and control the burner. If the pilot or thermocouple fails, the burner won’t run and you’ll have no hot water. The pilot provides the flame; the thermocouple senses it and tells the gas valve to stay open. A weak thermocouple or a clogged pilot orifice can stop ignition or cause intermittent runs. Look for a pilot that won’t stay lit, a heater that shuts off shortly after starting, or any gas odor—gas odor is an emergency: evacuate and call a pro. Often replacing the thermocouple or pilot assembly fixes the issue, but gas‑valve faults or supply problems need licensed diagnosis and repair to stay safe and compliant with local codes. Electric Water Heater Failures: Heating Element and Thermostat Problems Electric heaters
Plumbing in Green Building & Eco-Friendly Homes
Eco-Friendly Plumbing for Green Homes and Buildings — Practical Solutions & Real Benefits Eco-friendly plumbing means designing and installing systems that cut water and energy use, lower environmental impact, and keep occupants healthy and comfortable. These savings come from pairing water-saving fixtures, energy-efficient water heaters, sustainable piping choices, and smart monitoring that stops leaks and waste. Homeowners and builders who adopt these strategies see smaller utility bills, better indoor water quality, and stronger alignment with green building programs like LEED. This article walks through the basics of sustainable plumbing, compares water-saving fixtures and efficient heaters, reviews low-impact materials, explains how plumbing contributes to certification, and outlines smart technologies that prevent leaks and optimize use. You’ll also find simple implementation steps, example savings estimates, and local options for Grosse Pointe and Michigan — plus guidance on when to call a licensed contractor for installation or design help. What Are Eco-Friendly Plumbing Systems and Their Role in Green Building? Eco-friendly plumbing is a set of design choices and components that focus on using less water, cutting energy for heating and delivery, choosing safe materials, and reusing water where appropriate. These systems reduce demand with low-flow fixtures, capture and reuse greywater or rainwater, and lower hot-water energy with tankless or heat pump heaters. Together, those choices cut household water use, shrink energy bills, and improve indoor environmental quality — all outcomes that support green building goals. Knowing how these pieces work makes it easier to choose fixtures and systems that both save money and help projects earn efficiency credits. At Frost & Kretsch Plumbing Inc., we install eco-friendly plumbing solutions across Grosse Pointe and nearby communities. We back our work with transparent pricing, free estimates, satisfaction guarantees, and 24/7 emergency service so issues are handled quickly and cleanly. Working with a contractor who knows sustainable product specs and local code requirements helps ensure systems perform as expected and qualify for available efficiency incentives. The next section breaks down the core principles of sustainable plumbing with real examples for homes and buildings. Defining Sustainable Plumbing Solutions and Key Principles Sustainable plumbing rests on four core ideas: conserve water, reuse appropriate water streams, reduce energy for heating and delivery, and choose low-impact materials that limit toxicity and waste. Conserving water is done with common fixtures like low-flow toilets, efficient showerheads, and WaterSense faucets that cut volume without sacrificing performance. Reuse strategies—greywater recycling and rainwater capture—redirect non-potable water for irrigation or toilet flushing, reducing demand on treated potable supplies. Choosing durable, recyclable piping such as PEX or recycled-content metals lowers embodied carbon and makes future recycling easier. Thinking about materials over a system’s full lifecycle is essential to true sustainability. These principles translate directly into building outcomes: lower measured water use and reduced energy intensity per square foot, which in turn support green building credits. The next section shows how these plumbing mechanisms produce verifiable water-efficiency results in projects. How Eco-Friendly Plumbing Supports Green Building Water Efficiency Eco-friendly plumbing helps meet water-efficiency targets through a mix of efficient fixtures, metering and monitoring, leak detection, and reuse systems that produce measurable reductions in potable demand. For example, WaterSense-labeled fixtures and modern low-flow fittings commonly cut household water use by 20–60%, depending on the starting point and occupant behavior; greywater reuse can offset a significant share of toilet and irrigation demand. Submetering and precise measurement support the documentation needed for certification, while smart leak detectors stop hidden losses that can skew usage numbers and cause damage. With proper documentation and verification, these strategies help projects earn credits under programs like LEED and Green Globes, which often require performance data and design evidence. Clear measurement and records are essential for certification. The next section focuses on the fixtures that deliver most day-to-day water savings for homeowners. Which Water-Saving Plumbing Fixtures Enhance Sustainability? Water-saving fixtures are the easiest, highest-impact way to reduce indoor potable water use because they lower flow where water is used most. Typical options include low-flow toilets, efficient showerheads, WaterSense-certified faucets and aerators, and updated washing-machine connections that cut per-load water. Choosing certified fixtures gives builders and homeowners confidence in tested performance and user comfort — a helpful factor when pursuing water-efficiency credits or utility rebates. The sections below outline benefits and include a compact comparison to guide fixture selection and planning. We install WaterSense and low-flow products and offer free estimates to help homeowners pick fixtures that balance savings and performance. Proper installation and commissioning from experienced technicians ensure fixtures meet certification requirements and work reliably for years. Regular maintenance keeps savings consistent — details we cover in the next subsection. Benefits and Types of Low-Flow Fixtures and WaterSense Certified Products Low-flow fixtures save water by limiting flow and refining internal geometry so pressure and cleaning performance stay strong. Modern low-flow toilets, for example, use 1.28 gallons per flush or less versus older models that used 3.5–7 gallons, which can translate to thousands of gallons saved per household each year. WaterSense certification from the EPA signals that a product meets performance standards for both flow and function, so you get dependable savings without surprises. Choosing certified products also simplifies documentation for incentive programs and reduces retrofit risk. Below is a short comparison to help weigh typical fixture options and what to expect at installation. Fixture Type Characteristic Typical Benefit Low-flow toilet 1.28 gpf or less; WaterSense possible Saves up to 13,000 gallons/year in a 4-person household Low-flow showerhead ≤2.0 gpm with pressure compensation Reduces shower water use by 20–40% vs older heads WaterSense faucet/aerator 1.5 gpm or lower; certified Cuts sink water use while preserving flow feel High-efficiency washing connection Reduced fill volumes Lowers laundry water per load and energy for heating This comparison shows how the right fixtures turn into measurable household savings and guide installation choices. The next section looks at cumulative impact and simple ROI for these upgrades. How Water-Saving Fixtures Contribute to Reduced Water Consumption When you combine efficient toilets, showerheads, faucets, and laundry connections, the savings add up quickly. Replacing
Emergency Steps for a Water Main Break
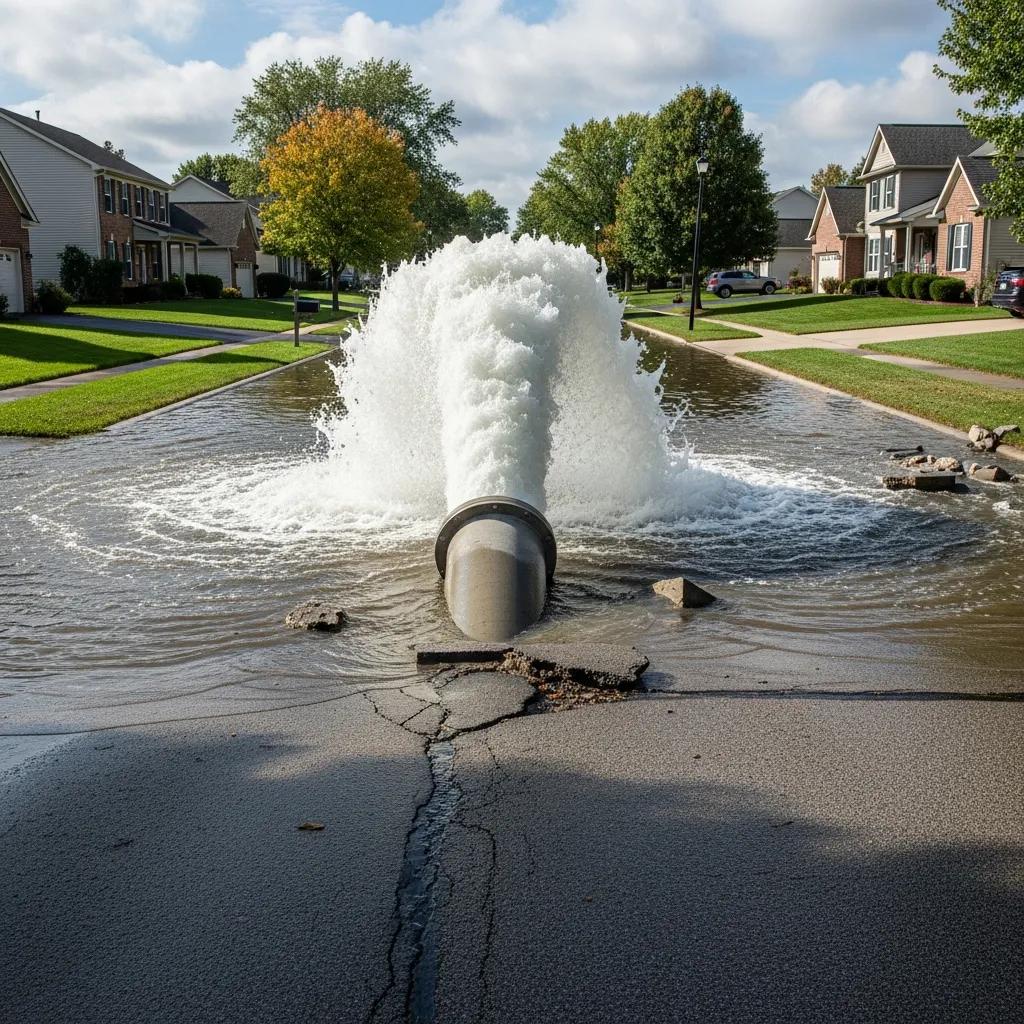
Emergency Steps for a Water Main Break — Immediate Actions for Michigan Homeowners & Businesses A water main break is a sudden failure of a primary water pipe that can release large amounts of water, damage property, and interrupt service. Acting quickly limits damage and speeds recovery. This guide walks you through what to watch for, how to isolate the problem, which safety steps to take, and the repair options available to Michigan homeowners and businesses. You’ll learn how to spot low pressure and discolored water, where to find and how to safely operate indoor and outdoor shut-off valves, and a clear checklist of mitigation steps to protect people and property. We also cover common repair paths — emergency stabilization, excavation and replacement, and trenchless fixes — plus regional cost ranges and what insurers typically look for. For fast local help, Frost and Kretsch Plumbing provides 24/7 emergency service for water main breaks across Macomb, Oakland, and Wayne counties. We respond quickly, send experienced technicians, show transparent pricing (no hidden fees), and stand behind our work with a 100% satisfaction guarantee. Read on for step-by-step actions and simple tables to help you decide what you can handle and when to call a professional. What Are the Common Signs of a Water Main Break? Water main breaks usually announce themselves with several obvious signs of underground pipe failure and rapid water loss. Look for low or fluctuating pressure, muddy or discolored water, visible flooding or new depressions in the yard, odd plumbing noises, and an unexpected jump in your water bill. Seeing more than one of these together makes it more likely the problem is in the public main rather than a single fixture. Check nearby properties and your water meter to help narrow the cause. Spotting a break early gives you more options — whether that’s shutting off indoor valves, calling your utility, or calling an emergency plumber to contain the damage. The most helpful next step is to confirm whether the issue is inside the building or outside in the yard or street — that determines whether to alert the utility or hire a contractor. After you identify the location, take photos and record meter readings to support repair planning and any insurance claim. Common signs to watch for include: Low or fluctuating water pressure: Sudden drops across multiple fixtures usually point to the main. Discolored or muddy water: Brown or reddish water means sediment or rust has been disturbed. Visible yard flooding or sinkholes: Saturated soil, standing water, or new depressions suggest an underground leak. Unusual plumbing noises: Gurgling, hammering, or continuous running sounds often show there’s a breach. Sudden spike in water bill: A meter that keeps running with no known use is a strong leak indicator. These clues help you prioritize safety and decide whether to contact the water utility, an emergency plumber, or both depending on where the break is located. How to Detect Low Water Pressure and Discolored Water Low pressure and discoloration are useful diagnostic clues that point to the break’s location and severity. Test pressure by running cold taps on different floors and a hose bib — if multiple fixtures show reduced flow, the problem is likely upstream at the main or service lateral. Brown or reddish water usually means rust and sediment were disturbed; cloudy water can come from air in the lines after a pressure event. Take photos of samples, note which fixtures are affected, and record the meter reading to document the issue for the utility or your insurer. If discoloration doesn’t clear after a short flush, stop using the water for drinking and follow any local boil-water guidance until testing or remediation is complete. From here, check exterior signs like yard saturation and how the meter behaves. Identifying Yard Flooding, Unusual Noises, and High Water Bills Exterior signs and meter behavior are strong evidence of an underground main break and help distinguish it from irrigation or surface drainage problems. Walk your property line looking for saturated soil, soggy patches, or sinkholes along the service line path. Check whether neighbors have the same issue — that usually points to a public main failure. Listen near the street or curb box for continuous flow or gurgling sounds, and watch the water meter for movement when no indoor fixtures are running. Compare recent bills to earlier ones — a sudden spike without extra use is a red flag. Photograph and timestamp these clues before you call the utility or an emergency plumber; good documentation helps establish responsibility and speeds repairs. How Do You Shut Off Your Main Water Valve During an Emergency? Turning off the main valve isolates your property from incoming water and prevents further interior flooding. Finding and operating the right valve safely is key. Indoor main shut-offs are usually where the service enters the building — basement walls, utility rooms, or crawlspaces — while outdoor shut-offs sit inside a curb box near the property line or next to the meter. Gate valves take multiple full turns (left/counterclockwise) to close; ball valves close with a quick quarter turn. Use the proper tools like a water meter key or adjustable wrench, apply steady pressure, and stop if a valve is stuck — forcing a corroded or frozen valve can cause more damage and will need professional replacement. After shutting the main, check fixtures to make sure flow stopped, then move on to safety steps such as turning off breakers for flooded areas — but only if it’s safe to access the panel. The table below shows common valve locations and the tools that help operate them safely. Valve Location Valve Type Tools Needed Quick Steps Indoor (basement/utility room) Gate or ball valve Adjustable wrench, flashlight Find where the service enters, turn gate valve fully or rotate ball valve a quarter turn to close Outdoor (curb box/property line) Curb stop/gate valve Water meter key, long handle Remove curb box lid, use meter key to rotate until flow stops Near water
Benefits of Pipe Insulation: Energy Savings & Freeze Protection

Why Pipe Insulation Pays: Energy Savings, Comfort, and Freeze Protection Pipe insulation is the simple barrier you wrap around plumbing to slow heat exchange between the water inside and the air outside. Its two biggest benefits are lower operating costs for hot-water systems and protection against frozen pipes in winter. This guide shows how insulation reduces conductive and convective heat loss, shortens water‑heater run times, and creates a thermal buffer in unheated spaces. You’ll get plain-language explanations of heat loss, realistic savings for Grosse Pointe homeowners, recommended materials (with R‑value and durability tradeoffs), and clear advice on when to DIY versus call a pro. We also cover cost drivers, payback examples, and extra perks like condensation control, noise reduction, and longer pipe life. Practical checklists and side‑by‑side comparisons make it easy to pick the right approach for your home, and we note when a local pro can help. How does pipe insulation save energy and lower utility bills? Insulation forms a thermal barrier around hot-water lines so less heat escapes into basements, crawlspaces, and wall cavities. That means your water heater doesn’t have to run as often to keep water at the set temperature, which reduces fuel or electricity use and delivers hotter water at the tap. Properly chosen and installed insulation cuts both conductive loss through metal pipes and convective loss to moving air, so you get steadier hot-water delivery and measurable savings. The short table below compares common pipe locations, the typical heat-loss issue, and conservative annual savings you can expect when insulation meets industry recommendations. Pipe Location Typical Heat Loss Issue Estimated Annual Energy Savings Interior hot-water (short runs) Moderate standby loss 3–16% reduction in heat loss from pipes Long hot-water runs (basement/crawlspace) Higher conductive loss 7–16% reduction in heat loss from pipes Exterior/uninsulated cold lines Freeze and thermal gain/loss Prevents freeze events; reduces freeze-related repairs Targeting long, exposed hot-water branches typically gives the biggest returns per foot insulated, while insulating exterior lines delivers both freeze protection and indirect energy benefits. Understanding those pipe-level heat losses is the next step toward choosing the right material and thickness for your house. What is heat loss in plumbing and how does insulation reduce it? Heat loss in plumbing happens when hot water transfers heat through the pipe wall into colder surrounding air via conduction and convection, so water cools before it reaches fixtures. Insulation adds material with low thermal conductivity (measured by R‑value) to slow that flow and limits convective exchange at the pipe surface. In everyday terms, insulating a long hot-water run can cut the temperature drop over the same distance by several degrees, which shortens recovery cycles on your heater. Industry guidance and recent studies show reduced runtime improves comfort and system efficiency, which lowers energy bills over time. How much can Grosse Pointe homeowners save with pipe insulation? Savings vary with home size, pipe length, and local fuel prices, but conservative estimates show meaningful annual returns in common residential setups. Using Department of Energy guidance as a baseline, insulating hot-water distribution can cut distribution-related losses roughly 3–16% depending on run length and insulation thickness. In dollars, longer runs often pay back materials and labor within a few years. Here are three typical scenarios for our climate: Small home with short hot-water runs: Modest energy savings and better comfort — roughly 3–10% reduction in distribution losses. Mid-size home with long basement-to-kitchen runs: Noticeable savings — roughly 7–15% cut in distribution losses. Large home with repeated long runs and exterior exposures: Up to 15–20% reduction in distribution losses plus strong freeze-risk mitigation. Those examples show why insulating long, exposed runs and exterior supply lines usually gives the best return before considering whole‑system upgrades like recirculation pumps. If you’d like exact numbers, a local contractor can run an on-site audit and estimate projected savings. Why is pipe insulation essential for preventing frozen pipes in winter? Insulation creates a thermal buffer that slows heat loss from water in the pipe to subfreezing air, helping keep the water above 32°F in vulnerable spots. Covering exposed runs in crawlspaces, garages, basements, and exterior walls delays how fast a cold snap can freeze the water column and lowers the chance of ice blockages that cause pressure and bursts. Pairing insulation with draft sealing and keeping a minimum heat level in adjacent spaces makes a big difference. Given the relatively low cost of insulation versus typical freeze repair bills, it’s a core winterization step for northern homes. Use this quick preventative checklist before and during cold weather to protect pipes: Insulate exposed pipes in unheated areas: Fit sleeves or wrap all visible runs. Seal drafts and gaps near plumbing: Close openings that let cold air hit pipes directly. Allow a slow trickle during extreme cold: Moving water is less likely to freeze. Disconnect and drain exterior hoses and shut off exterior valves: Remove outside sources of freeze risk. These steps reduce freeze exposure; next we explain the mechanics behind freezing and bursting so you see why prevention matters. What causes pipes to freeze and burst in cold climates? Pipes freeze and can burst when the water inside reaches 32°F and forms ice. Ice expands and creates pressure between the ice blockage and closed valves, often stressing fittings and joints until the pipe fails. Failures commonly occur at elbows, fittings, and joints where stress concentrates. In southeastern Michigan, vulnerable spots include exterior walls, crawlspaces, and unheated garages; freeze-related claims often run into the several‑thousand‑dollar range for cleanup and repair. Preventing freezes through insulation and related steps is almost always cheaper than repairing damage after a burst. How does insulation protect pipes from freezing and water damage? Insulation slows conductive and convective heat loss so water takes longer to reach freezing. Combined with draft sealing, minimal heating in problem areas, or heat tape where appropriate, insulation raises a run’s resilience and cuts the chance of ice forming. Best practices: fully cover elbows and fittings, avoid compressing insulation (which lowers R‑value), and have a professional inspect