
DIY Kitchen Faucet Installation Guide for Homeowners — How to Install and Replace Kitchen Faucets Safely and Efficiently
Replacing or installing a kitchen faucet is one of the most rewarding DIY jobs — it improves function, updates the look of your sink, and often saves on labor. This guide walks homeowners through every step: tools and supplies to have ready, how to remove an old faucet, correct installation and sealing, common mistakes to avoid, and when to call a professional. Safety is front and center: you’ll learn the correct shut-off and pressure-relief steps, how to secure gaskets and supply lines to prevent leaks, and how to test flow and seals after installation. We cover the full process — costs, faucet types that suit DIYers, and post-install testing and troubleshooting — and include practical search terms like how to install a kitchen faucet, kitchen faucet install, and faucet installation cost to help you find the right guidance quickly.
What tools and supplies should you have before starting a kitchen faucet install?
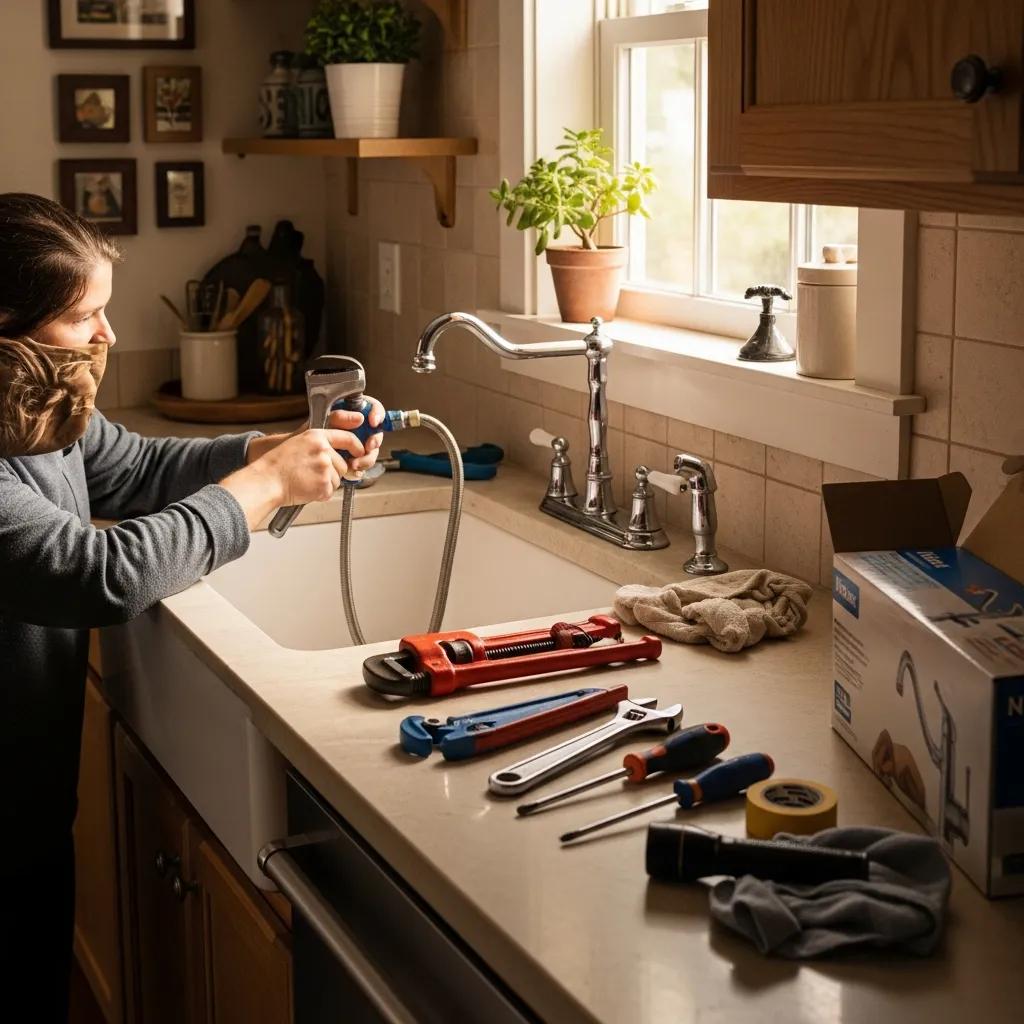
A smooth faucet install starts with preparation. Having the right hand tools and consumables on hand cuts down delays and lowers the chance of mistakes. The right wrenches, good lighting, and proper sealing materials help you remove old parts, secure the new faucet, and create reliable, leak-free connections. Getting these supplies together also tells you whether your project is a simple deck-mounted swap or something more complex that might need extra parts or professional help. Below is a compact, easy-to-follow list of what to gather before you begin.
- Basin wrench — Reach and loosen mounting nuts in tight under-sink spaces to remove or secure the faucet.
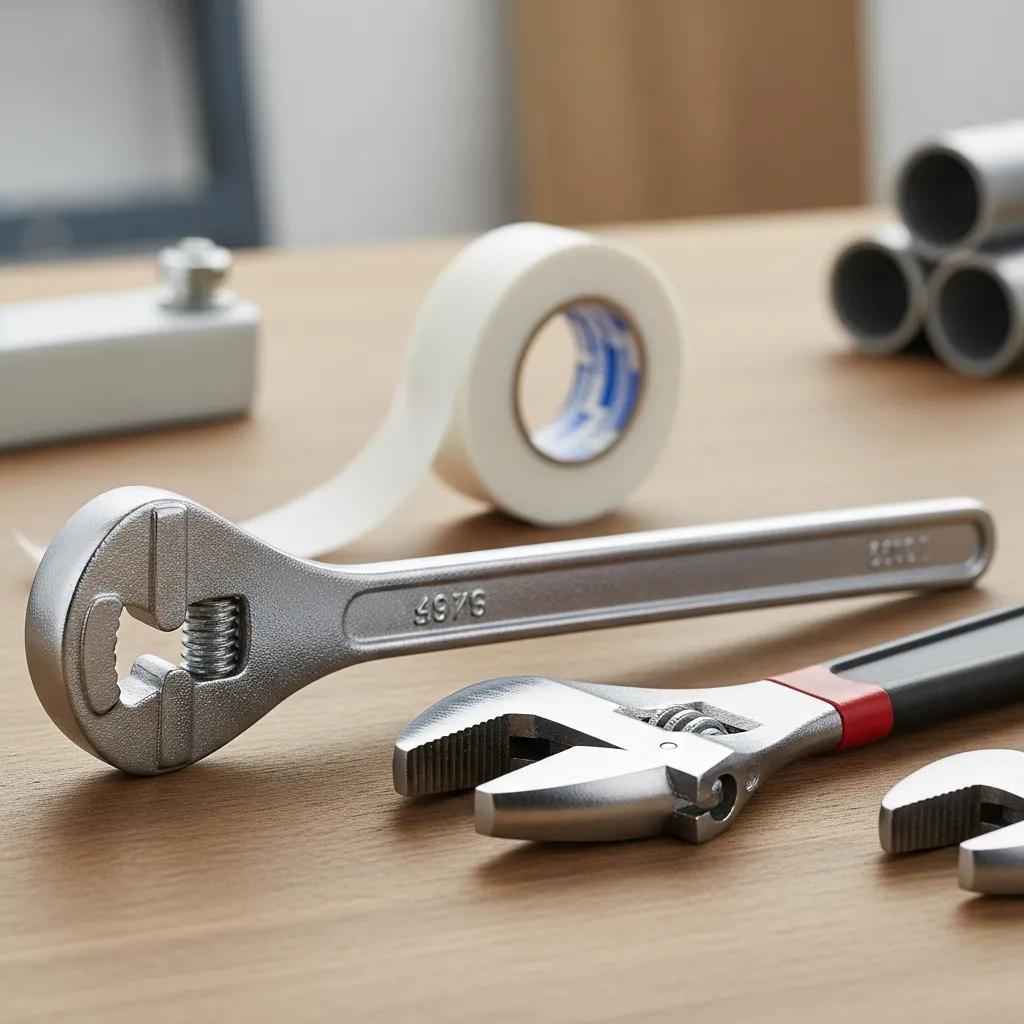
- Adjustable wrench — Turn fittings and supply line nuts without rounding edges.
- Slip-joint pliers — Grip stubborn parts or remove old hose clamps safely.
- Plumber’s tape (PTFE) — Seal threaded pipe connections to prevent slow leaks.
- Plumber’s putty or silicone caulk — Create a watertight seal between the faucet base and sink deck.
- Replacement supply lines and gaskets — Swap worn parts to prevent future leaks and ensure compatibility.
With these tools and supplies ready, you’ll move through removal, mounting, and final sealing much more efficiently. The sections that follow explain each tool’s practical use and rental options.
Which essential plumbing tools make faucet replacement easier?
Each tool has a clear job: a basin wrench reaches mounting nuts behind the sink, an adjustable wrench fits supply line nuts of various sizes, and slip-joint pliers give extra leverage on stuck fittings. A flashlight and small mirror help when access is tight. Specialty tools like a basin wrench are inexpensive to buy or easy to rent for a single project, so you don’t have to own a full toolbox to get the job done. Knowing which tools are optional and which are necessary helps you decide whether to borrow, rent, or buy.
Which consumable supplies should you prepare before starting?
Stock up on plumber’s tape, spare gaskets, and supply lines that match your shut-off valve threads. Bring plumber’s putty or silicone for sealing the faucet base — silicone is best for stone or composite sinks. Double-check thread sizes and valve compatibility before you shop to avoid extra trips. If your faucet uses replaceable cartridges or aerators, keep a spare on hand in case the originals are damaged during removal. Preparing these consumables in advance helps the project run without interruptions.
| Tool / Supply | Purpose | Estimated Cost / Tip |
|---|---|---|
| Basin wrench | Reach and remove mounting nuts under sink | $10–$25; rentable from tool-lenders |
| Plumber’s tape (PTFE) | Seal threaded pipe connections | $3–$8 per roll; wrap clockwise |
| Supply lines | Replace worn flexible lines | $10–$25 each; match valve thread size |
| Plumber’s putty / silicone | Seal faucet base to deck | $5–$12; use silicone for granite/composite sinks |
| Adjustable wrench | Tighten fittings without damage | $15–$40; choose the correct jaw size |
This table shows which items are budget-friendly essentials and which you might rent. Next, we’ll walk through the step-by-step installation process.
How to install a kitchen faucet — step-by-step DIY instructions
Follow a clear sequence to reduce mistakes: shut off water, relieve pressure, remove the old faucet, position and secure the new one, attach supply lines, and test for leaks. Make safety a priority — turn off the shut-off valves and place a bucket beneath connections. If you run into hard-to-reach mounting nuts, seized fittings, or uncertain hot/cold orientation, that’s a reasonable time to pause and consider professional help. Frost and Kretsch Plumbing offers licensed, insured technicians with upfront pricing, a 100 percent satisfaction guarantee, and 24/7 response often within an hour across Macomb, Oakland, and Wayne counties — a solid fallback when a job gets complicated.
- Turn off the supply valves and open the faucet to relieve pressure and drain remaining water.
- Disconnect supply lines, remove mounting nuts, and lift out the old faucet; clean the sink deck thoroughly.
- Install the new gasket or apply putty, position the faucet, secure mounting hardware, reconnect supply lines, and test for leaks.
That summary sets up the more detailed removal and installation steps that follow.
What are the key steps to remove an old kitchen faucet?
Start by shutting off both the hot and cold shut-off valves under the sink and opening the faucet to drain pressure. Disconnect supply lines with an adjustable wrench while holding the valve body with pliers to avoid twisting the plumbing. Use a basin wrench to loosen mounting nuts and lift the old fixture free, protecting the sink surface from scratches. If hardware is seized or corroded, penetrating oil and steady force can help; when corrosion is severe, a professional can remove the fixture without causing additional damage.
How do you properly install and connect a new kitchen faucet?
Clean the sink deck and inspect holes and seals before assembly. Follow the manufacturer’s instructions: place gaskets or putty where required and hand-thread mounting nuts from below, then tighten evenly with a basin wrench — avoid over-tightening that can crack composite sinks. Attach new supply lines to the faucet and shut-off valves, using plumber’s tape on threaded connections and routing lines so they are free of kinks. Open the supply valves slowly, watch every joint for leaks, confirm correct hot/cold orientation, and operate the faucet through all settings before finishing cleanup.
Common DIY faucet installation mistakes — and how to avoid them
Many DIY jobs hit snags from preventable errors: misaligned seals, loose connections, or over-tightened fittings that strip threads. Work methodically: prepare, remove, inspect, install, then test. Use the right tool for each connection, replace old supply lines, and test for slow drips with a dry paper towel under connections after a pressure test. The list below highlights frequent mistakes and quick fixes to keep your installation watertight.
- Over-tightening mounting nuts: Hand-tighten first, then finish with small, controlled wrench turns to avoid cracking sink materials.
- Skipping replacement of old supply lines: Replace aged flex lines to prevent hidden failures and future leaks.
- Forgetting plumber’s tape on threaded joints: Wrap PTFE tape clockwise so threads seal as they tighten.
Avoiding these common mistakes lowers the chance of leaks or water damage. The next section explains how to spot early signs of trouble.
Which installation errors most often cause leaks or water damage?
Leaks usually come from loose nuts, missing or misaligned gaskets, or poor sealing at the faucet base or threaded joints. These problems show up as drips under the sink or damp areas around the faucet base. After pressurizing the system, inspect for signs of weeping at every connection and tighten gradually rather than forcing fittings. Route supply lines with gentle curves to avoid kinks and confirm shut-off valves close completely. If you see water-damaged cabinetry, a softened subfloor, or corrosion that won’t seal, call a professional to evaluate the issue.
When should you stop DIY and call a professional plumber?
Call a licensed plumber if you find visible water damage, corroded or seized fittings that risk breaking, wall-mounted or integrated systems that need specialized parts, or when electrical components are part of a smart faucet. If your attempts to stop a leak don’t work, or if access is so limited you might damage counters or valves, hire a pro. Frost and Kretsch Plumbing provides licensed, insured technicians, 24/7 emergency response, transparent pricing with no hidden fees, and a 100 percent satisfaction guarantee across Macomb, Oakland, and Wayne counties — a reliable choice when a job moves beyond typical DIY scope.
How much does it cost to install a kitchen faucet yourself vs. hiring a plumber?
DIY installation typically includes the cost of the faucet, new supply lines and gaskets, and any tools you need to buy or rent. Professional installation adds labor and service fees but brings experience, troubleshooting, disposal of old fixtures, and often a workmanship warranty. Pro teams can quickly identify and fix hidden issues that would slow a DIYer. Use the table below to compare common cost elements and decide which option fits your budget and risk tolerance.
| Cost Item | DIY (Typical Range) | Professional (Typical Range) |
|---|---|---|
| Faucet unit | $70–$400+ | Often supplied by homeowner or included in estimate |
| Supply lines & gaskets | $10–$50 | Included or itemized in estimate |
| Tools / rentals | $0 (owned)–$50 (rental) | Usually included in labor cost |
| Labor / service fee | $0 (DIY) | Quoted upfront; includes troubleshooting & warranty |
This comparison shows where DIY savings come from and where professional warranties and troubleshooting add value. The next subsections break down DIY expenses and what pro pricing typically includes.
What are typical expenses for DIY faucet replacement?
Expect to pay for the faucet itself (from basic to premium), replacement supply lines and gaskets, plumber’s tape, and possibly a tool purchase or rental like a basin wrench. Smart or touchless faucets cost more because of sensors and power components. Don’t forget to value your time and the potential cost of fixing mistakes if the job goes wrong. For straightforward setups, DIY costs are usually modest.
What do professional faucet installation services include — and why pay for them?
Professional pricing typically bundles labor, troubleshooting for hidden problems, and replacement of neglected parts that could fail later, plus a workmanship warranty. Companies offering upfront estimates and transparent pricing reduce surprises and can remove seized fittings or replace corroded valves quickly and safely. Frost and Kretsch Plumbing focuses on licensed, insured technicians, 24/7 emergency response, prompt arrival often within an hour, and a 100 percent satisfaction guarantee — service features that can justify professional fees for complex projects or when homeowners want peace of mind.
Which faucet types are best suited for DIY installation?
The faucet style affects installation difficulty. Deck-mounted single-handle faucets are usually the simplest for DIYers. Multi-hole, widespread, wall-mounted, or smart sensor faucets may need extra adapters, drilling, or electrical work. Knowing the parts — cartridges, aerators, supply lines, mounting nuts — helps match the project to your comfort level. Water-efficient faucets often follow the same steps as standard units, but smart or touchless models add wiring and power routing that increase complexity. The table below compares common types and what to expect as a DIYer.
| Faucet Type | Installation Complexity | Tools / Notes |
|---|---|---|
| Single-handle deck-mounted | Low | Standard supply lines; basin wrench |
| Double-handle (center-set) | Moderate | Two valves to align; extra gaskets |
| Widespread faucet | Moderate–High | Precise hole spacing; longer mounting studs |
| Touchless / smart faucet | High | Sensor wiring or battery housing; consider pro |
Use this comparison to pick a faucet that matches your tools and confidence level. The following subsections explain differences between common styles and how smart faucets change the install.
What’s different about single-handle vs. double-handle faucets?
Single-handle faucets usually mount through one or three holes and use a single cartridge, so there are fewer supply connections and less alignment to worry about. Double-handle faucets require separate hot and cold connections and more precise alignment of the mounting holes — increasing points where small leaks can form if not seated correctly. Double-handle installs often need extra gaskets or escutcheons and careful routing of two supply lines. Choose based on style and your willingness to manage a bit more plumbing.
How do smart and water-efficient faucets change installation complexity?
Smart or touchless faucets add sensors, solenoids, or control boxes and sometimes require low-voltage wiring or a nearby power source — steps that can push the job beyond basic plumbing. Water-efficient faucets may include special aerators or flow restrictors that affect perceived flow and can require adapters for older valves. For sensor-equipped faucets, check compatibility with your sink openings and consider hiring a pro to handle electrical routing and ensure proper sealing.
| Faucet Type | Installation Complexity | Value for DIY |
|---|---|---|
| Single-handle | Low | High — ideal for most DIYers |
| Double-handle | Moderate | Good with basic tools |
| Touchless / smart | High | Low — recommend professional help |
This quick guide helps you prioritize DIY-friendly models and know when to call a pro. Next: testing and troubleshooting after installation.
How can homeowners test and troubleshoot a newly installed faucet?
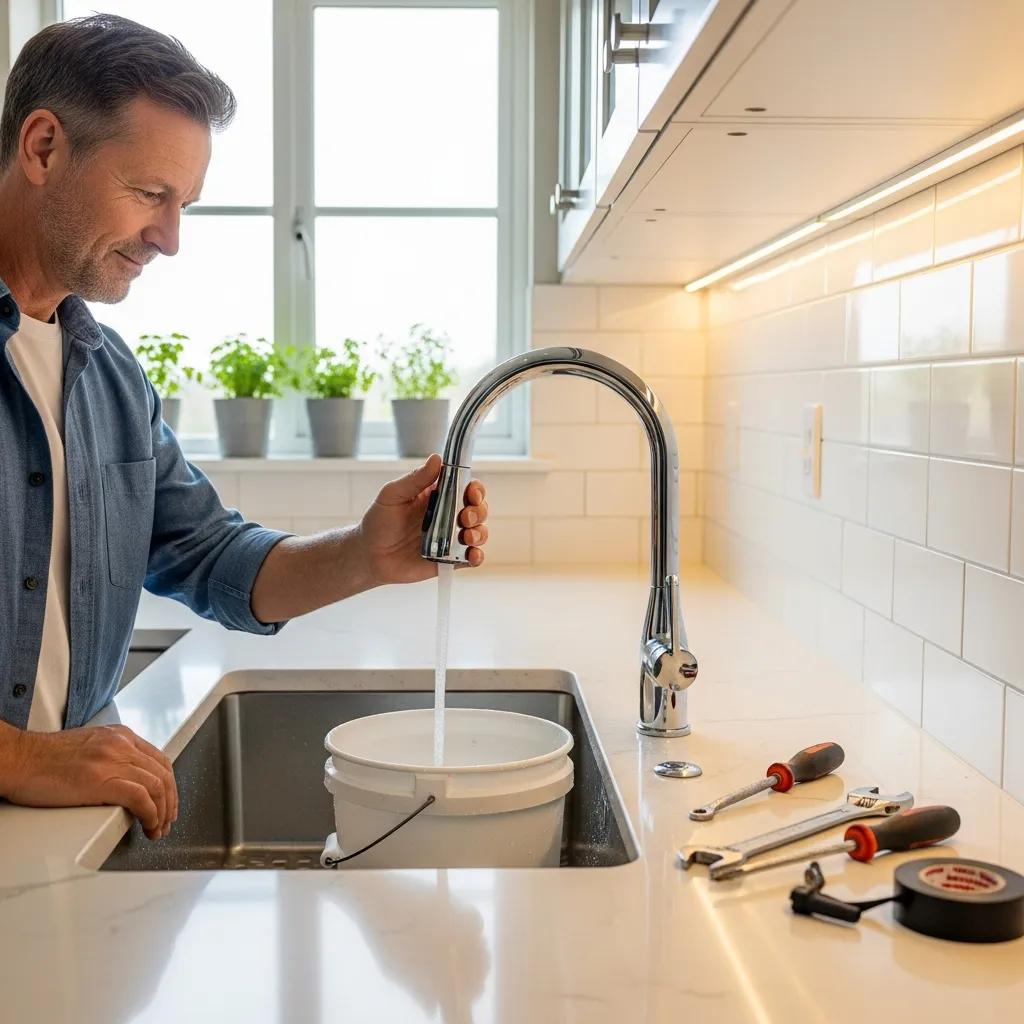
Testing right after installation confirms seals are sound, flow is correct, and shut-off valves work. A simple test sequence checks for drips under the sink, correct hot/cold flow, steady pressure, and mounting stability. Most small issues — a leaking connection, a clogged aerator, or a mis-seated gasket — can be fixed without special tools. Use the checklist below to validate your installation before wrapping up, and watch for signs that mean a professional inspection is needed.
- Open supply valves slowly and inspect all under-sink connections for leaks, using a dry paper towel to reveal small drips.
- Run the faucet through hot and cold settings and listen for flushes or sputters that could indicate trapped air or debris.
- Check the faucet base for water intrusion and confirm mounting nuts are snug; re-tighten slightly if there is movement.
Following this routine helps you catch small issues early. Next, we list diagnostic steps and tools to use if something goes wrong.
What steps verify there are no leaks and that flow is correct?
Have an assistant run the faucet while you inspect connection points for beads of water or dampness. Put a dry towel beneath connections and re-check after a few minutes to catch slow seepage. Use a bucket for isolation testing if needed and make sure shut-off valves close fully without weeping. If flow is weak, remove and clean the aerator, then retest. Persistent low pressure often points to a kinked supply line or a partly closed valve.
How do you fix common issues after installation?
For small leaks, tighten the affected connection a quarter-turn at a time and recheck. Replace damaged gaskets or aerators as needed, and use plumber’s tape on threaded joints that continue to weep after reseating. If you find stripped threads, ongoing leaks, corroded valves, electrical problems with smart faucets, or visible water damage, schedule a professional inspection to avoid larger repairs. Frost and Kretsch Plumbing offers emergency repairs and professional installations with upfront pricing, licensed and insured technicians, and a satisfaction guarantee for homeowners who want a reliable fix.
- Check connections: Tighten and reseal before replacing parts.
- Replace small parts: Aerators and gaskets solve most minor issues.
- Escalate when needed: Call a licensed plumber for corrosion, electrical elements, or water damage.
This troubleshooting checklist finishes the practical DIY path and points to professional help when appropriate.
Frequently Asked Questions
What safety precautions should I take before starting a faucet installation?
Turn off the water supply valves and open the faucet to drain pressure. Place a bucket or towel under the sink to catch any residual water. Wear safety goggles to protect your eyes and gloves to avoid cuts. Make sure the area is well-lit and keep tools and parts organized so nothing gets lost during the job.
How can I determine if my faucet is compatible with my sink?
Count the holes in your sink and measure spacing — most faucets need one to three holes. Check supply line sizes and connection types against the faucet specs. For smart faucets, confirm there’s room for the control box or power access. The faucet’s installation instructions and your sink manual are the best references for compatibility.
What should I do if I encounter a seized fitting during installation?
Avoid brute force. Apply penetrating oil, wait a few minutes, and try again with steady pressure. Gently tapping with a hammer can help break corrosion. If it won’t budge, try a pipe wrench for more leverage. If the fitting still won’t loosen, call a professional to prevent damaging pipes or fixtures.
How can I ensure my new faucet is water-efficient?
Look for faucets with the WaterSense label — they meet EPA criteria for efficiency and typically use about 20% less water than standard models. Install an aerator if one isn’t included and fix leaks promptly. Regular maintenance and choosing water-efficient models are the best ways to save water long term.
What are the signs that I need to replace my faucet?
Replace a faucet if you have persistent leaks, low or inconsistent water pressure, visible rust or corrosion at the base or on supply lines, or handles that are stiff or loose. Minor issues can often be repaired, but ongoing problems usually mean it’s time for a new unit.
Can I install a faucet without professional help?
Yes — many homeowners can complete a faucet installation successfully with the right tools and a careful process. If you run into corroded fittings, tight access, or electrical wiring for a smart faucet, consider calling a pro. For straightforward installs, take your time, follow safety steps, and test thoroughly.
Conclusion
Installing a kitchen faucet is a practical project that can improve your kitchen and save you money. With the right tools, a clear plan, and careful testing, most homeowners can complete a reliable, leak-free installation. If you hit a snag or prefer professional peace of mind, reach out to licensed technicians. Frost and Kretsch Plumbing is available to help with installations, repairs, and emergency service — so you can finish the job safely and confidently. Ready to get started? Gather your tools and follow the steps above to transform your sink.