

DIY Toilet Leak Repairs: A Practical, Step‑by‑Step Guide
Any toilet that loses water where it shouldn’t—inside the bowl, from the tank, at the base, or along the supply line—counts as a leak. Left unchecked, leaks waste water, ruin finishes, and raise your bills. Most household toilet leaks come from worn parts or failed seals: a flapper that won’t seat, a misadjusted fill valve, a failed wax ring at the closet flange, or a corroded supply fitting. This guide walks you through why toilets leak, how to pinpoint the source, and clear DIY fixes that stop the waste and save money. You’ll also learn when it’s time to call a licensed plumber, how to compare DIY part costs vs. professional repairs, and simple maintenance to reduce future problems. Topics include common causes, a diagnostic workflow, hands‑on repairs (flapper swaps, wax ring reseats), emergency signs, cost comparisons, and a seasonal maintenance checklist to protect your home.
What Are the Common Causes of a Leaking Toilet?
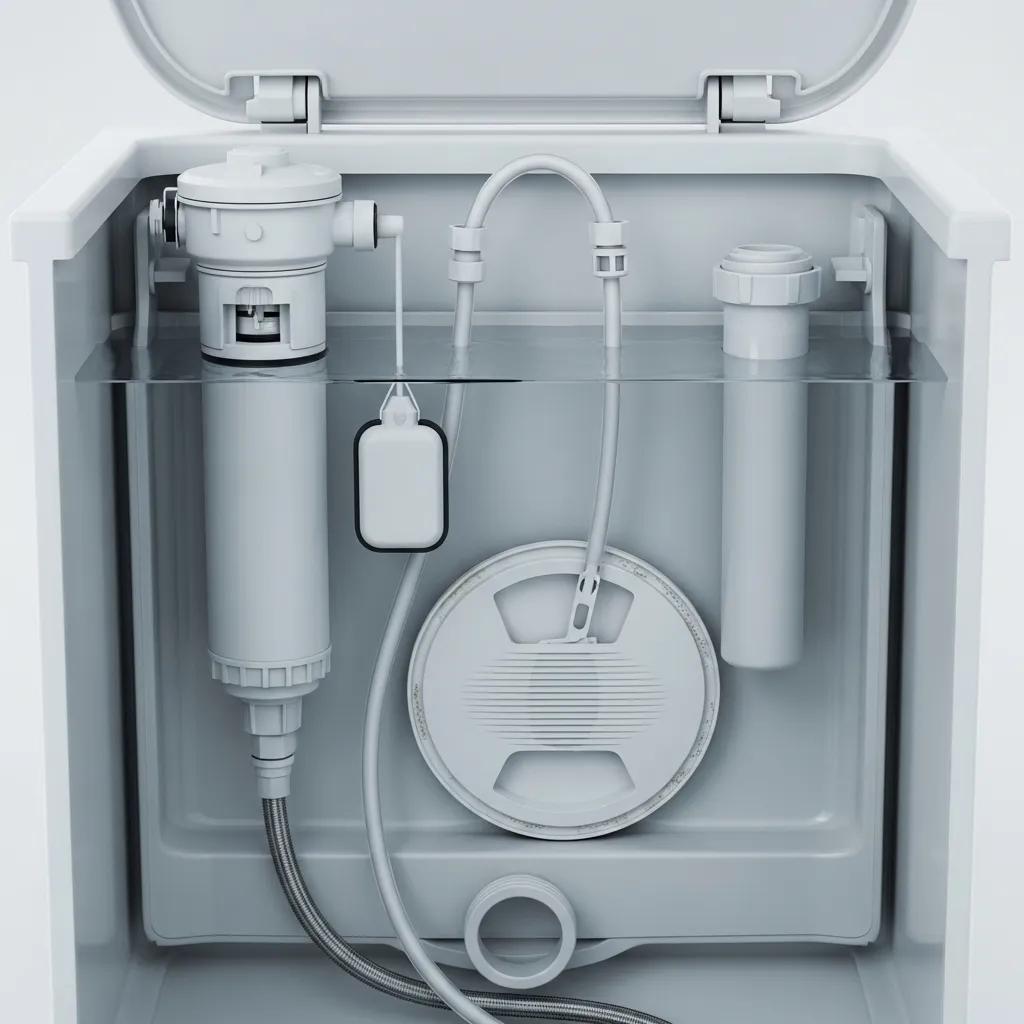
Leaks usually come from worn internal parts, degraded seals, or damaged structure that lets water escape. Inside the tank, a tired flapper, a failing fill valve, or a cracked overflow tube can cause constant flow into the bowl. Outside the tank, leaks often show at the tank‑to‑bowl gasket, around closet bolts, from the wax ring at the base, or where the supply line connects. Knowing how each part works helps you choose the right repair and prevent water damage from getting worse.
Typical mechanical and structural causes include:
- Worn flapper or a too‑short/too‑long chain that keeps the tank from sealing fully.
- A misadjusted or failing fill valve that overfills the tank or never shuts off.
- A failed wax ring or loose closet bolts letting water seep at the floor.
- Cracked porcelain in the tank or bowl, or corroded supply fittings that drip.
Those causes point to likely fixes: swap internal tank parts for running issues, tighten or reseat bolts and the wax ring for base leaks, or replace supply hoses and fittings when external connections fail. Identifying the failing component sets you up to diagnose the specific leak type next.
How Do Flapper Valve and Fill Valve Failures Cause Leaks?
The flapper and fill valve control the tank seal and refill. When either fails, water can run continually or intermittently into the bowl, wasting water and often producing a steady hiss or frequent refills. The flapper seals the tank outlet and can wear from mineral deposits, heat, or a broken chain. The fill valve uses a float to stop water but can stick, misadjust, or leak past its seals. A simple dye (food coloring) test and watching refill cycles will tell you whether water is bypassing the flapper or the fill valve is overfilling the tank. Replacing a flapper or adjusting/replacing the fill valve usually stops internal leaks quickly.
Start with these tests to isolate internal tank problems and avoid unnecessary disassembly. If replacing the flapper or adjusting the fill valve doesn’t fix the leak, the issue may be a cracked overflow tube, a tank crack, or multiple failures that need a deeper look.
What Signs Indicate a Toilet Leaking from the Base or Tank?
Leaks at the base or tank often show as water on the floor, discolored or soft flooring, or wetness directly beneath the tank after flushing—issues that call for quick containment and diagnosis. Remember: condensation can look like a leak, so check with dry paper towels under the toilet to confirm fresh water. A failed wax ring or loose closet bolts typically produce puddles near the base after a flush; a tank‑to‑bowl gasket leak will drip where the tank meets the bowl or under the tank.
Containing the water and finding the true source early will limit repair scope and cost. If the base leak is from a bad wax ring or loose bolts, reseating the toilet and replacing the seal usually fixes it. If the tank is cracked, you’ll need replacement or a professional assessment.
How Can You Diagnose Different Types of Toilet Leaks?
Diagnosing a toilet leak follows a simple, logical workflow: check for internal running, inspect external connections, then test seals and fittings to decide whether a DIY fix or pro referral is best. Start with easy observations—listen for running water, do a dye test, watch refill behavior, and inspect the supply line—then move to tank and base checks if symptoms continue. A step‑by‑step checklist saves time and prevents buying the wrong parts.
Use this quick diagnostic checklist to triage leaks:
- Dye test for internal leaks: Put food coloring in the tank and wait 10–15 minutes. If colored water shows in the bowl without a flush, the flapper is leaking.
- Visual inspection: Look for drips at the tank‑to‑bowl seam, around closet bolts, and at the supply line nut.
- Operate valves: Flush, watch refill cycles, listen for hissing, and gently tighten accessible fittings.
- Containment for base leaks: Place towels or a shallow tray under the base and observe after several flushes.
This checklist narrows whether you’re dealing with a running toilet, a base leak, or a supply‑connection issue and points to the next repair steps. If multiple parts fail or you see structural damage, call a professional for a safer, more reliable fix.
How to Identify a Running Toilet and Internal Leaks?
A running toilet wastes water constantly and usually stems from a flapper that won’t seal, a misadjusted fill valve, or a broken chain. Signs include steady water noise, frequent refilling, and rising water bills. The dye test—dropping food coloring into the tank and watching the bowl—quickly reveals if water is bypassing the flapper. If the tank overfills and spills into the overflow tube, adjust or replace the fill valve.
Fixes are straightforward: replace the flapper, adjust the chain, or install a new fill valve. After any repair, run several flush cycles to confirm the seal holds and the tank refills to the correct level. If issues persist, inspect for a warped tank seat or small cracks that stop the flapper from seating properly.
How to Detect Leaks from the Toilet Base and Water Supply Line?
Base and supply‑line leaks usually appear as puddles, periodic wetness after flushing, or a steady drip. It’s important to tell a wax ring failure from supply line seepage. Check the supply nut and flexible hose for moisture and gently tighten the nut with an adjustable wrench; if the hose or nut is corroded or cracked, replace the flexible supply line. To check the wax ring, look for water at the base after several flushes and feel for movement by gently wiggling the bowl.
If the toilet rocks or the floor feels soft, stop flushing and shut off the water to limit damage. Replacing the wax ring and torquing the closet bolts correctly usually restores a watertight seal. If the flange or subfloor is damaged, call a pro—temporary containment and an accurate diagnosis save time and materials.
What Are the Step-by-Step DIY Fixes for Leaking Toilets?
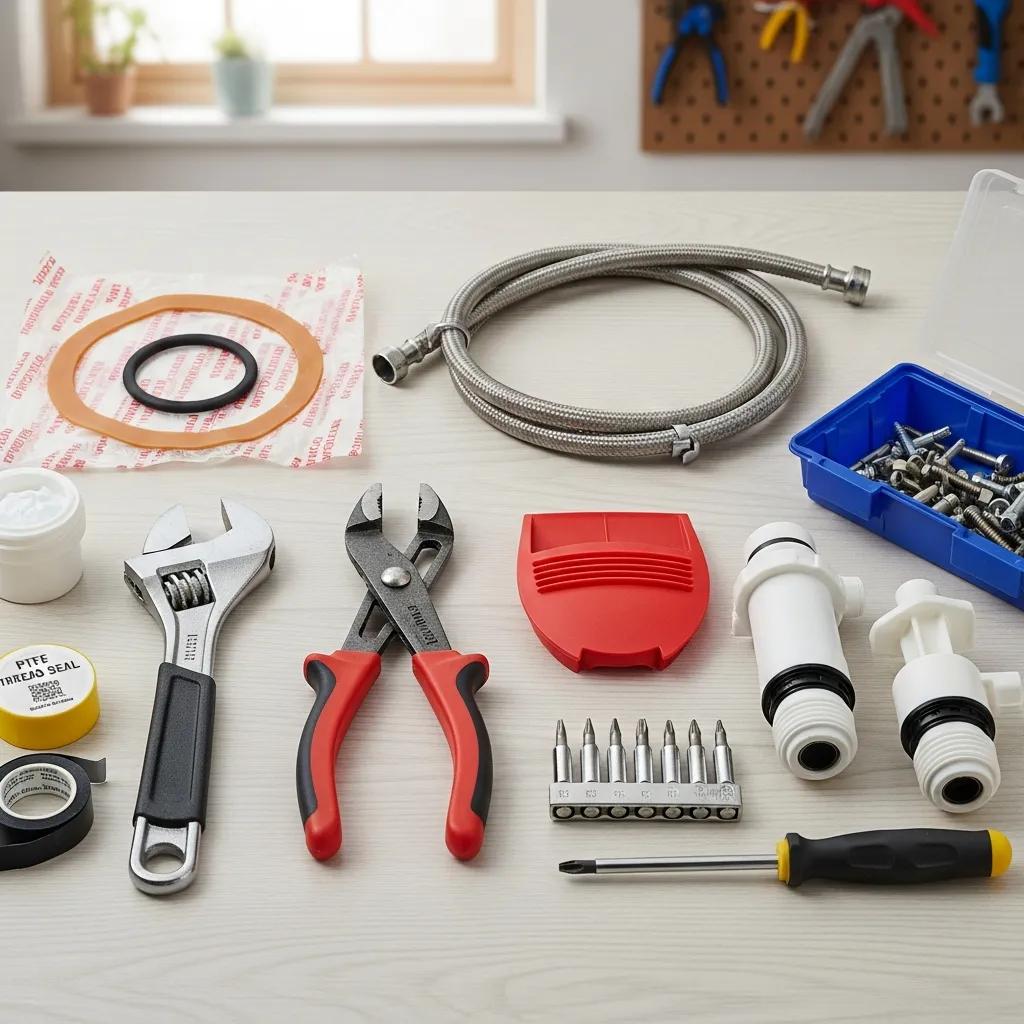
Common DIY fixes include replacing the flapper, adjusting or swapping the fill valve, tightening closet bolts, replacing the wax ring, and swapping a bad supply line. Each repair has a clear parts list, time estimate, and safety notes. Basic tools are an adjustable wrench, screwdriver, pliers, bucket, and towels. Typical parts include a universal flapper, a fill‑valve kit, a wax or waxless ring, and a flexible supply hose. Start with the least invasive (tank parts) and only move to the base or supply if the leak continues.
Tools and parts commonly required:
- Adjustable wrench and pliers: For supply nuts and hose fittings.
- Screwdriver and putty knife: To pry off old wax and remove bolts.
- Replacement parts: Flapper, fill valve assembly, wax ring (or waxless seal).
- Towels and bucket: For water containment while you work.
With these supplies, most homeowners can handle internal tank fixes in under an hour and base reseating in 1–2 hours, provided there’s no structural damage. If you find flange damage or a cracked tank, call a professional—those issues need special tools and experience.
After any repair, inspect your work, run several flush cycles, and confirm there’s no leaking or rocking. If the leak remains, the next section explains when to call a licensed plumber and what to expect from professional service.
Need help? Frost and Kretsch Plumbing can step in: Many repairs are straightforward, but if you’re uncomfortable with disassembly, find flange or subfloor damage, or have recurring leaks, professional help is available. Frost and Kretsch Plumbing serves Macomb, Oakland, and Wayne counties with 24/7 emergency support, licensed and insured technicians, transparent pricing, and a satisfaction guarantee. Call to request a quote or schedule service when you’d rather have a pro finish the job.
How to Replace a Toilet Flapper Valve and Adjust the Fill Valve?
Swapping a flapper and setting the fill valve gets the tank sealing and refilling properly. Turn off the shutoff valve and flush to drain most of the water, then sponge or towel out remaining water. Remove the old flapper by unhooking the chain and lifting the ears off the tank pegs. Install the new flapper so it sits snugly, and reconnect the chain with a little slack so the flapper can close fully.
Adjust the fill valve so the water level sits about an inch below the overflow tube—follow the manufacturer’s instructions or replace the whole fill‑valve assembly if it’s worn. Reassemble, run several flush cycles, and do a dye test to confirm the fix and proper refill level.
How to Tighten Toilet Bolts and Replace the Wax Ring?
Tightening closet bolts and replacing the wax ring involves lifting the bowl, inspecting the flange, and reseating the toilet with a new seal—take care to protect the floor and lift safely. Shut off the water, drain the tank and bowl, and disconnect the supply line. Remove the nuts on the closet bolts and lift the toilet straight up to avoid scraping the flange. Inspect the flange and the surrounding subfloor for corrosion or rot—if the flange is damaged, replace it before installing a new wax ring.
Scrape old wax from the base and flange with a putty knife, place the new wax ring (or a waxless alternative) on the flange, lower the toilet evenly, and tighten the closet bolts in small, even increments to avoid cracking the bowl. Reconnect the supply line, refill the tank, and check for leaks at the base and for any rocking. Proper reseating typically stops base leaks caused by failed seals or loose bolts.
When Should You Call a Professional Plumber for Toilet Leaks?
Call a licensed plumber when leaks involve structural damage, cracked porcelain, a damaged flange, persistent or multiple leaks, or sewage‑backup risk—those situations need professional diagnosis, the right tools, and insured work. Emergency signs include rapid flooding, inability to stop water flow, sewage odor or backup, and soft or buckled flooring that suggests subfloor failure. A licensed plumber can run thorough diagnostics, repair or replace the flange, and back work with a warranty to protect your home.
Frost and Kretsch Plumbing serves residential and commercial customers across Macomb, Oakland, and Wayne counties with 24/7 emergency repairs by licensed, insured technicians, transparent pricing, and a satisfaction guarantee. If you find structural damage, a persistent leak after DIY attempts, or an immediate emergency, call Frost and Kretsch Plumbing at (586) 675-0097 to request urgent help or to schedule an on‑site evaluation and estimate.
Professional help is the right choice when multiple systems fail or repairs risk further damage. A licensed technician lowers the chance of repeat failures and creates a repair record useful for insurance or resale.
What Complex Leak Issues Require Expert Repair?
Complex problems needing a plumber include cracked tanks or bowls that can’t be safely fixed, a broken or corroded flange that ruins the toilet’s seal, and rotted subflooring that threatens structure. These conditions often cause repeat leaks despite part swaps and can hide water damage or mold. Pros evaluate tank integrity, flange alignment, and subfloor condition, and can replace flange assemblies, repair subfloors, or recommend fixture replacement when necessary.
Expert technicians also identify multiple leak sources and resolve systemic issues—like a corroded supply line combined with a failed wax ring—that DIY fixes might miss. An insured pro reduces risk and delivers a durable, code‑compliant repair.
How to Recognize Emergency Plumbing Situations for Toilets?
Emergency toilet issues require immediate shutoff and professional response when flooding is fast, sewage is backing up, or you can’t stop water because the shutoff valve has failed. These situations threaten property and health. First steps: turn off the home’s water at the shutoff valve, contain water with towels or buckets, and avoid electrical hazards near wet areas. Document visible damage for insurance and note when the leak started and any DIY steps you tried for the responding technician.
If an emergency happens outside normal hours, use 24/7 emergency services for a fast temporary containment followed by a permanent repair. Frost and Kretsch Plumbing offers round‑the‑clock emergency service—having the contact info ready speeds response and limits damage.
How Much Does Toilet Leak Repair Cost: DIY vs. Professional Services?
Costs depend on the repair type, parts, labor rates, and whether the call is an emergency. DIY parts are inexpensive, but professional service covers diagnosis, labor, correct parts, and a warranty. Homeowners typically spend little on flappers, fill valves, wax rings, and supply lines; pros add onsite diagnosis, skilled labor, and guarantees. Use the table below to compare common DIY part costs with typical professional price ranges.
Common repairs and cost comparison:
| Repair Type | Typical DIY Parts/Tools Cost | Typical Professional Price Range |
|---|---|---|
| Flapper replacement | $5–$20 | $80–$200 |
| Fill valve replacement | $15–$50 | $150–$300 |
| Wax ring and closet bolt kit | $5–$25 | $150–$350 (includes removal/seating) |
| Supply line replacement | $10–$40 | $120–$250 |
The table shows DIY parts are cheap but don’t cover diagnosis, labor, or warranty. Pro pricing includes inspection, correct part selection, skilled installation, and guarantees that lower the chance of repeat leaks.
Below is a focused EAV‑style cost comparison to help you weigh DIY vs. professional approaches.
| Repair Category | Typical DIY Cost (Parts+Tools) | Typical Pro Cost (Labor+Parts+Warranty) |
|---|---|---|
| Internal tank repair | $10–$70 | $120–$300 |
| Base reseal (wax ring) | $5–$30 | $150–$400 |
| Supply line & valve | $10–$50 | $120–$250 |
Transparent pricing and satisfaction guarantees reduce uncertainty when hiring a pro. Frost and Kretsch Plumbing provides clear estimates and a satisfaction guarantee for toilet leak repairs and can give a phone or online estimate to help you compare options before scheduling.
What Are Typical Costs for DIY Parts and Tools?
DIY parts are affordable and easy to find: universal flappers run about $5–$20, fill valves $15–$50, wax rings $5–$25, and flexible supply lines $10–$40. A basic adjustable wrench or pliers is a one‑time buy if you don’t already have them. A putty knife and towels are inexpensive but essential. While parts cost is low, factor in your time, the chance of mistakes that require repeat repairs, and the risk of missing hidden damage a pro would catch.
Knowing part prices helps decide whether to DIY or call a pro. If you’re comfortable with basic plumbing and the issue is straightforward, DIY can save money. If flange damage, structural problems, or uncertainty appear, a professional often prevents added costs from incomplete repairs.
What Are Professional Repair Pricing and Service Guarantees?
Pro quotes usually include diagnosis, labor, parts, and a standard warranty on workmanship or parts; emergency call‑outs may be higher because of rapid response. Licensed plumbers provide transparent estimates, itemize parts and labor, and explain extra costs that might come up—like hidden flange damage or subfloor rot discovered during repair. A satisfaction guarantee and insured service protect homeowners and give recourse if problems recur after the initial repair.
When comparing bids, ask whether the estimate covers removal and disposal, replacement of degraded flange parts, and any follow‑up service. These inclusions help you judge overall value beyond the headline price. Hiring a licensed, insured provider with clear pricing and guarantees reduces repair risk and often saves money over time by preventing repeat visits.
| Repair Type | Parts Cost Estimate | Typical Pro Estimate |
|---|---|---|
| Flapper & minor tank seals | $10–$70 | $120–$300 |
| Wax ring reseat | $5–$30 | $150–$400 |
| Supply line replacement | $10–$50 | $120–$250 |
This EAV table shows typical ranges and reinforces that professional service bundles diagnosis, labor, and warranty—factors that often justify the higher upfront cost for complex or uncertain repairs.
What Preventative Maintenance Tips Help Avoid Future Toilet Leaks?
Preventative maintenance helps catch wear early, maintain water quality, and replace consumable components before they fail. Regular checks of the tank interior, closet bolts, supply line, and floor condition catch small problems before they become emergencies. Simple seasonal or quarterly checks, timely part replacements, and sensible usage will extend a toilet’s service life and reduce emergency calls.
Monthly and quarterly maintenance checklist:
- Look inside the tank for mineral buildup, flapper wear, and correct water level.
- Check visible supply fittings and the shutoff valve for corrosion or moisture.
- Feel for rocking or movement at the base and tighten closet bolts if needed.
- Replace the flapper and supply hose proactively if they show wear or after several years.
These routine steps prevent most common failures and save water and repair costs over time. Scheduling periodic inspections and replacing inexpensive consumables before they fail protects flooring and subfloors from hidden water damage.
How to Regularly Inspect and Maintain Toilet Components?
A simple maintenance routine: monthly visual checks of tank parts, quarterly tightening of accessible fittings, and annual replacement of high‑wear items like flappers or flexible supply lines when they show deterioration. During inspections, run a dye test to verify the flapper seal, check the refill level, and feel around fittings for moisture. Clean mineral buildup gently to avoid damaging rubber seals, and avoid harsh chemicals that shorten gasket life.
Record findings and small repairs to track component life; preemptive replacement of consumables cuts emergency calls and keeps your system reliable. If you spot flange movement or soft flooring, schedule a professional evaluation right away to prevent escalating damage.
What Are Best Practices to Extend Toilet Lifespan and Prevent Leaks?
Best practices include avoiding harsh drain cleaners that degrade seals, using gentle cleaners, maintaining appropriate water pressure and softener settings if applicable, and replacing worn parts before they fail. Proper installation—tightening bolts evenly, seating wax rings correctly, and using quality parts—prevents many leaks caused by installation errors. Periodic professional inspections give another set of eyes to catch flange misalignment or small cracks.
Following these practices reduces urgent repairs and improves long‑term fixture reliability. When in doubt about a persistent issue or suspected structural damage, consult a licensed plumber to protect your home and ensure repairs meet code and any warranty requirements.
Frost and Kretsch Plumbing: Your Local Toilet Repair Experts
Frost and Kretsch Plumbing provides residential and commercial plumbing across Macomb, Oakland, and Wayne counties. Our licensed, insured technicians handle leak detection and repair, toilet service, drain cleaning, water heaters, and 24/7 emergency response. We focus on clear pricing and a satisfaction guarantee so homeowners can compare DIY vs. pro work with confidence. For urgent leaks, structural concerns, or repeated problems after DIY attempts, a local licensed crew provides fast diagnosis, durable repairs, and peace of mind.
To request service, call Frost and Kretsch Plumbing at (586) 675-0097 to describe the issue and set up an on‑site evaluation or emergency dispatch. Our technicians will locate the leak source, offer a clear estimate, and perform licensed repairs backed by our satisfaction guarantee to protect your home and investment.
This section ties practical DIY guidance to a local, licensed option for complex or emergency repairs—keeping the article focused on empowering homeowners while offering a reliable path to professional help.
Frequently Asked Questions
What tools do I need for DIY toilet repairs?
Most DIY toilet jobs use basic tools: an adjustable wrench, pliers, a screwdriver, and a putty knife. Towels or a bucket help contain water. If you’re replacing parts, you’ll need the replacement items—flapper, fill valve, or wax ring. These tools and parts are affordable and let many homeowners complete repairs without calling a pro.
How can I prevent future toilet leaks?
Regular maintenance prevents many leaks. Inspect the tank for mineral buildup, check the flapper and supply line condition, and keep the water level correct. Tighten closet bolts periodically and replace worn parts like flappers and hoses before they fail. A simple routine inspection schedule goes a long way toward extending toilet life.
What should I do if my toilet is leaking but I can't find the source?
If the source isn’t obvious, do a thorough inspection: check the tank‑to‑bowl gasket, closet bolts, and supply connections for moisture. Run a dye test (food coloring in the tank) to find internal leaks. If you still can’t locate the leak, call a professional plumber for a deeper diagnosis.
Are there any signs that indicate I need to replace my toilet?
Signs you may need a new toilet include visible cracks in the porcelain, persistent leaks that can’t be fixed, frequent clogs despite maintenance, or an older fixture (around 25+ years) that’s inefficient. Upgrading to a newer model can save water and reduce future repair needs.
How often should I perform maintenance on my toilet?
Perform basic maintenance every three to six months: check for leaks, inspect tank components, and confirm the water level is correct. Replace high‑wear parts like flappers and supply lines every few years or sooner if they show wear. Regular upkeep catches problems early and extends the toilet’s lifespan.
What are the risks of ignoring a leaking toilet?
Ignoring a leaking toilet can cause water damage to floors and subfloors, higher utility bills, and mold growth from ongoing moisture. Over time, leaks can lead to structural repairs that are far more expensive than a timely fix. If the leak involves sewer connections, it can also create unsanitary conditions—address leaks quickly to protect your home.
Can I use chemical cleaners to maintain my toilet?
Use chemical cleaners with caution. Harsh chemicals can degrade rubber seals and gaskets, shortening their lifespan and leading to leaks. Opt for gentler cleaners or natural alternatives like vinegar and baking soda for routine cleaning to protect rubber components.
Conclusion
Fixing toilet leaks yourself can save money and give you confidence in basic plumbing skills. Knowing common causes and practical fixes helps you act fast and avoid bigger problems. For persistent, complex, or structural issues, a licensed plumber brings the tools and experience to deliver a lasting repair. If you’d like professional help, Frost and Kretsch Plumbing is ready to assist—call us to protect your home and stop leaks for good.