
How to Flush Your Water Heater Each Year — A Practical, Safety-First Guide
Flushing your water heater once a year means draining the tank to remove sediment that builds up over time. That sediment—mostly calcium and magnesium from hard water—acts like an insulating blanket, making the heater work harder, create rumbling noises, and corrode internal parts. This guide explains what flushing does, why it helps your energy bill and your heater’s lifespan, and how homeowners in Macomb, Oakland, and Wayne counties can perform a safe, effective maintenance flush. You’ll learn the common warning signs, follow an easy step‑by‑step DIY process for gas and electric tanks, spot when a problem needs a pro, and adjust schedules for Michigan’s hard water. At the end, we’ll explain Frost and Kretsch Plumbing’s local professional options if you’d rather leave this to a licensed technician.
Frost and Kretsch Plumbing serves homes and businesses across Macomb, Oakland, and Wayne counties. We offer maintenance, installation, and 24/7 emergency response backed by a 100 percent satisfaction guarantee. If you’d rather book a professional inspection or flushing service than DIY, call Frost and Kretsch Plumbing at (586) 675-0097 or visit our Google Business Profile to request service. This article focuses on clear, safety-first instructions and shows when calling a licensed technician is the smarter choice.
Why You Should Flush Your Water Heater Every Year
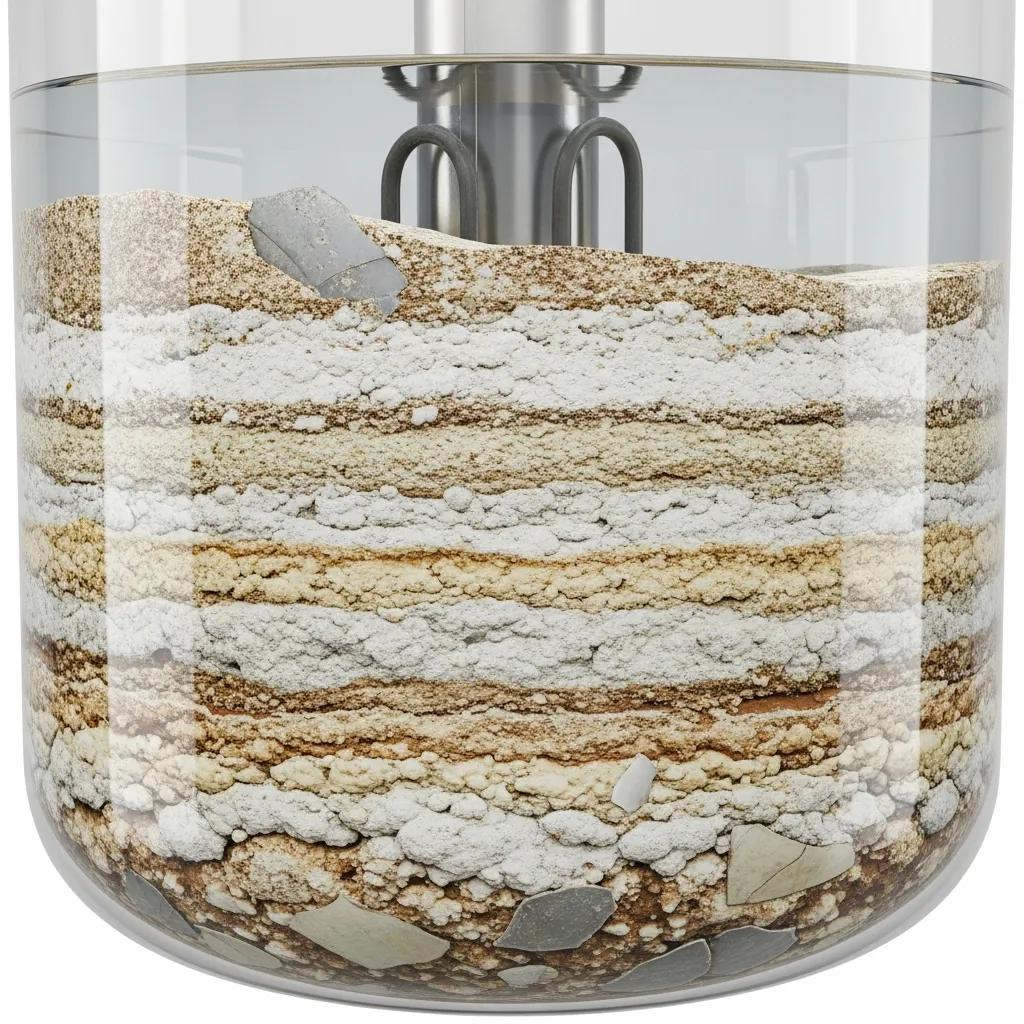
Annual flushing removes mineral and particulate buildup that blocks heat transfer and speeds corrosion, restoring efficiency and lowering the chance of tank failure. Sediment forms when dissolved minerals precipitate as water heats and cools, creating insulating layers on elements or along the tank bottom that force the heater to run longer and use more energy. Regular flushing reduces that insulating effect, cuts down on popping or rumbling noises, and helps preserve the anode rod and tank shell. Following a flushing schedule also aligns with manufacturer recommendations and energy‑efficiency guidance showing real savings and longer equipment life when tanks are kept free of heavy sediment.
Here’s a quick look at common sediment types and why they matter before you inspect your tank.
Common sediment types and how they affect tank performance and life.
| Component | Cause | Impact |
|---|---|---|
| Mineral Sediment (calcium/magnesium) | Hard water minerals that precipitate when heated | Poor heat transfer and higher energy use |
| Rust / Corrosion Particles | Corrosion of internal steel surfaces | Discolored water and shorter tank life |
| Organic or Sand Particles | Particles from source water or supply lines | Abrasive wear on drain valves and elements |
Removing these deposits improves efficiency, lowers operating costs, and slows component wear—making annual flushing a smart preventative step.
Understanding how sediment forms helps you diagnose causes tied to your supply and usage patterns.
What Causes Sediment to Build Up in Water Heaters?
Sediment builds up when dissolved minerals—mainly calcium and magnesium—precipitate out of hot water and settle on the tank bottom. In hard-water areas, repeated heating cycles concentrate those minerals. Household factors like heavy water use, no water softener, or well water with suspended solids speed the process. Sediment can also include tiny bits of corroded metal or sand that wear on drain valves and heating elements over time. Regular checks and flushing break up layered deposits, restore heat transfer, and slow corrosion—lowering the risk of early tank failure and reducing energy use.
Knowing these causes leads naturally into how flushing helps your heater work better and last longer.
How Flushing Boosts Efficiency and Extends Tank Life
Flushing removes the insulating sediment that slows heat transfer so burners and elements heat water with less runtime and lower energy use. Clearing deposits also prevents element overheating and reduces stress on the tank, which slows corrosion and lengthens component life. A well‑flushed tank provides steadier hot water, fewer on/off cycles, and less noisy operation. In short, regular flushing is a low-cost maintenance step that improves performance, reduces the chance of repairs, and helps you avoid an early replacement.
Signs Your Water Heater Needs a Flush
You don’t need special tools to spot a tank that’s overdue for flushing. Watch for shorter hot showers, rumbling or popping noises, rusty or discolored water, visible sediment when draining, and unexpected jumps in energy bills. Simple at-home checks—like running hot water into a clear bucket to check for particles or listening during a heating cycle—help you decide whether a DIY flush is likely to fix the issue or if it’s time to call a pro.
Here are the most common signs and what to look for.
- Reduced hot water capacity: Shorter showers or quick cool-downs mean usable volume is down from sediment taking up tank space.
- Noisy operation: Rumbles, pops, or knocking usually mean steam pockets are forming under sediment layers.
- Discolored or rusty water: Brown or red tint suggests rust or corrosion particles in the system.
If you see these signs repeatedly, schedule a flush or inspection soon to prevent further damage.
How to Spot Reduced Capacity and Noisy Operation
Sediment on the tank bottom displaces water and lowers your usable hot-water volume, which shortens shower times and appliance performance. Noise happens when trapped water beneath sediment flashes to steam and pops through the deposits. You can test capacity by timing a hot-water draw or filling a container to check temperature and volume. Note whether noises only occur during heating cycles or are constant. A successful flush usually improves these issues; persistent noise with leaks or corrosion means call a technician.
These simple checks lead into how to evaluate discolored water and what safety steps to take next.
When Rusty or Discolored Water Is a Red Flag
Brown or metallic‑tasting water can come from loose rust particles, a worn anode rod, or internal tank corrosion. Light discoloration after a period of inactivity may clear with a flush, but ongoing discoloration or metallic taste suggests internal corrosion and needs prompt attention to avoid contamination and leaks.
Stop using discolored hot water for drinking until you know the source. Drain a small amount into a clear container to inspect particulates. If discoloration remains after flushing or you find leaks, schedule a professional inspection to evaluate the anode rod and tank condition.
Knowing when discoloration is serious helps you decide between a safe DIY flush and calling a licensed plumber.
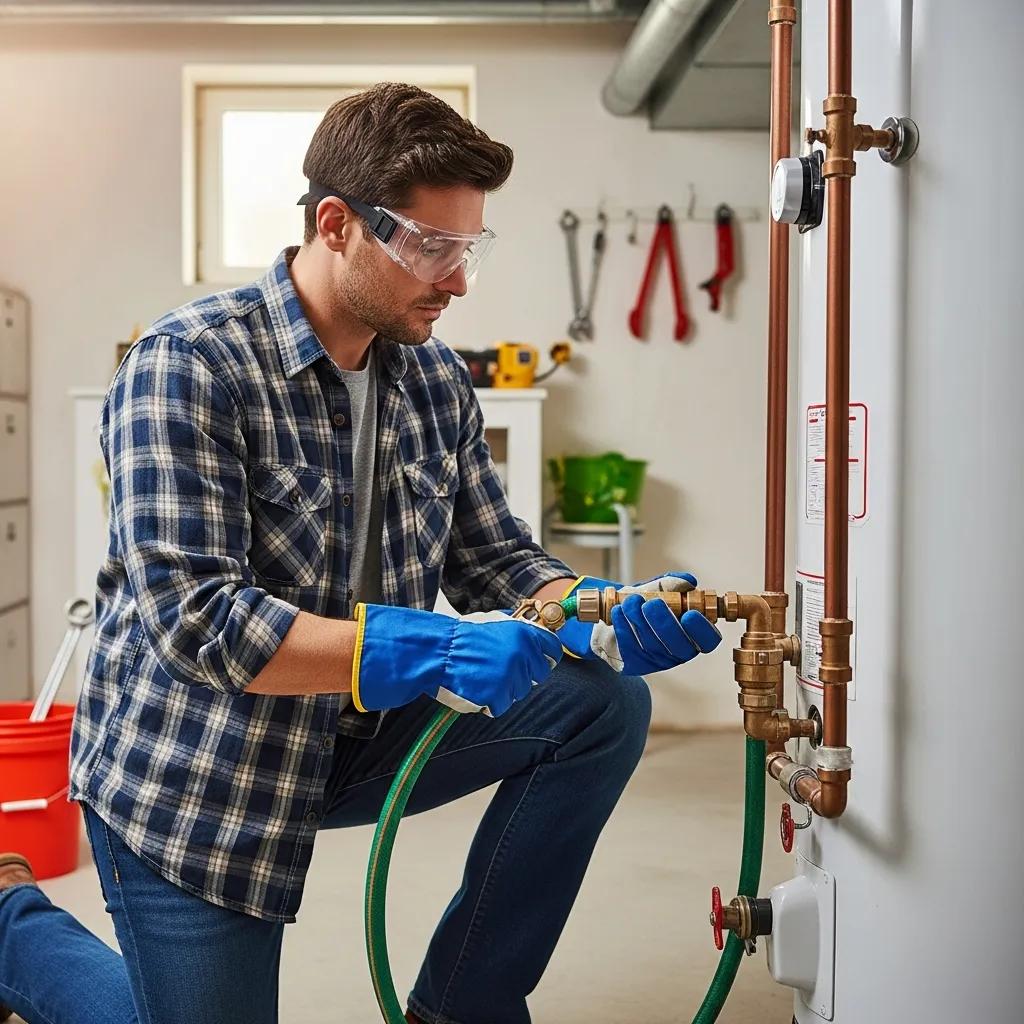
How to Flush Your Water Heater: Step‑by‑Step DIY
Flushing a tank-style water heater is straightforward when you follow a careful sequence: shut off power or gas, isolate the cold supply, attach a hose to the drain valve, and run the water until it clears. The job restores heat transfer and can cut energy waste. You’ll need basic tools—a garden hose, adjustable wrench, and a bucket—and to follow safety steps like switching off power and guarding against scalding. Most residential tanks take 30–60 minutes; heavy sediment can take longer. If you hit stuck valves, persistent leaks, or anything unclear, stop and call a professional.
Read the safety notes first, then follow the numbered sequence below.
- Turn off power or gas to the heater. Verify the circuit breaker is off for electric units or the gas pilot is out for gas models.
- Close the cold-water inlet valve and open a hot tap nearby to relieve pressure in the lines.
- Attach a garden hose to the drain valve and run the other end to a floor drain or outside; open the drain valve and let the tank empty.
- When mostly drained, briefly open the cold-water inlet to stir and flush remaining sediment; repeat until the discharge runs clear.
- Close the drain valve, remove the hose, and refill the tank by opening the cold inlet while keeping a hot tap open to bleed air.
- Restore power or relight the pilot following manufacturer instructions, then check fittings and the drain valve for leaks.
After the flush, confirm steady hot-water delivery and listen for quieter operation. If you’re uncomfortable doing any step—especially around gas components or seized hardware—call a licensed technician.
Safety Steps to Take Before You Start
Always shut off electrical power or gas and confirm the system is depressurized before beginning. Risks include scalding, electric shock, and gas hazards. Wear gloves and eye protection, protect floors with absorbent material or a pan, and ensure ventilation if you’re near gas components. Check the temperature & pressure (T&P) relief valve is working, but don’t disassemble gas lines or ignition systems—those need a pro. Use a hose rated for hot water and direct the discharge safely to avoid scalding or property damage.
These precautions reduce risk and clarify when to call in a professional.
How to Drain, Flush, and Refill the Right Way
Start by confirming power/gas shutoffs and open a hot faucet to relieve pressure. Attach a hose to the drain valve and drain the tank until flow slows—typically 10–20 minutes depending on size and sediment. To loosen stubborn sediment, briefly open the cold-water inlet while the drain remains open to agitate deposits; repeat until the water runs clear. Close the drain valve, remove the hose, and refill by opening the cold inlet while keeping the hot tap open to vent air. Once water flows steadily, restore power or relight the pilot per manufacturer instructions. Finish with a leak check on the drain valve and fittings and listen during the first heating cycle for normal operation.
If the drain valve continues to drip after you close it, it’s likely corroded—replace the valve or call a professional rather than relying on a temporary fix.
When You Should Call a Professional
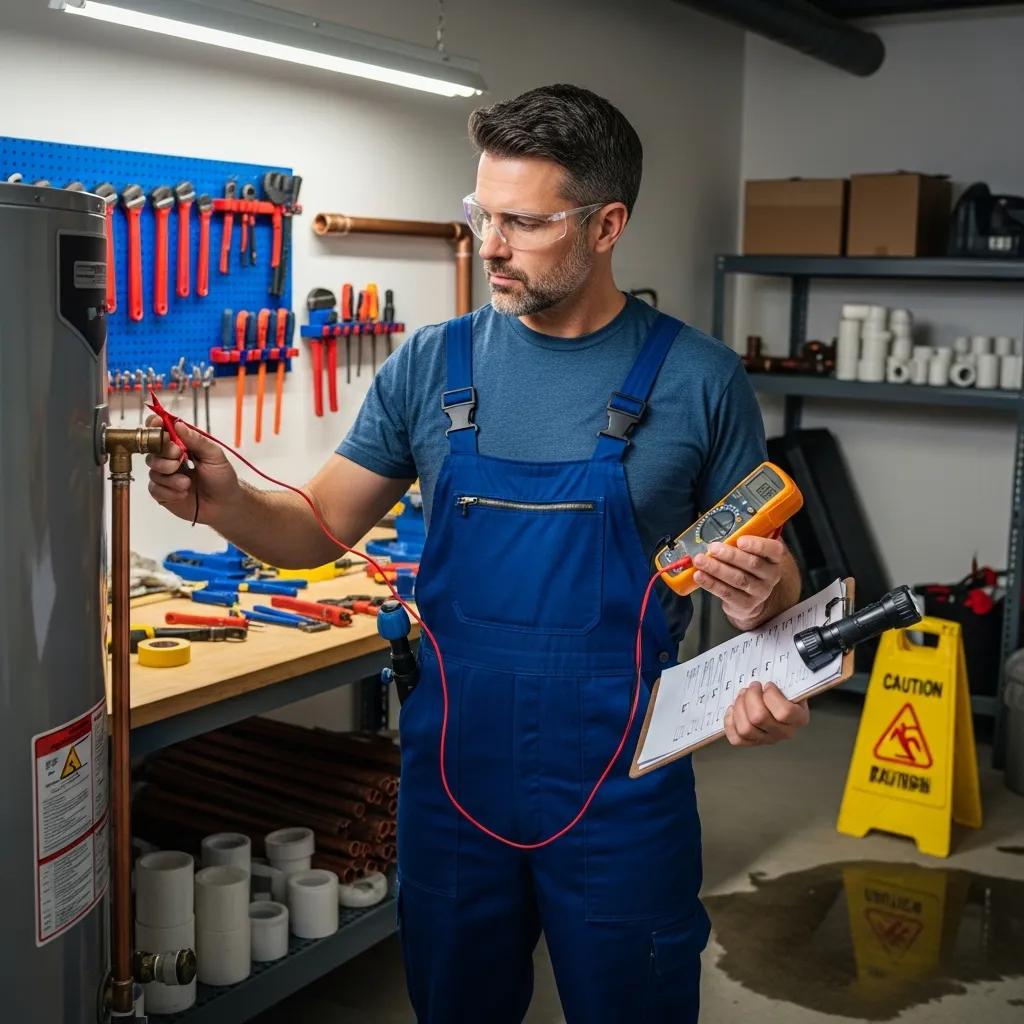
Call a licensed plumber when the job involves gas-line work, a tank that won’t drain, corroded drain valves, or signs of severe internal corrosion. Professionals have the tools and training to inspect tanks, replace worn parts, and meet code requirements safely. Technicians can also perform diagnostics—anode rod checks, combustion analysis for gas units, and tank integrity assessments—that go beyond a basic flush and help you decide whether repair or replacement is the best option. Hiring a licensed plumber reduces risk and is often the quickest way to restore reliable hot water.
The table below outlines common pro services, when to hire them, and what’s typically included during a visit.
| Service | When to Hire | What’s Included |
|---|---|---|
| Standard Flush & Inspection | Yearly maintenance or heavy sediment | Drain and flush, anode check, leak inspection |
| Valve Replacement & Repairs | Stuck or leaking drain / T&P valve | Valve replacement, pressure testing |
| Gas Appliance Service | Pilot problems or gas-line concerns | Combustion check, burner cleaning, safety inspection |
| Commercial Water Heater Service | Large tanks or persistent problems | Full system evaluation, descaling, parts replacement |
Complex Problems That Need a Pro
Call a licensed plumber for tanks that won’t drain because of heavy sludge, corroded or leaking drain valves, repeated discoloration after flushing, or any gas-system irregularities like pilot outages or suspected leaks. Trying to force a seized valve or work on burner assemblies without training can cause injury, create gas hazards, or lead to costly damage—issues plumbers are trained to handle safely.
Plumbers can also replace anode rods, assess tank structure, and perform electrical checks on electric units—services that require specialty tools and parts. If problems persist after a DIY flush or you don’t feel confident, calling a professional is the best next step.
Our Professional Water Heater Services
Frost and Kretsch Plumbing offers residential and commercial water heater services: maintenance flushes, installations, anode rod inspections and replacements, drain valve repairs, and service for gas, electric, and tankless systems. We send licensed technicians, provide transparent pricing, and back our work with a 100 percent satisfaction guarantee. For urgent leaks or heating failures, our 24/7 emergency service is available. Typical service visits include a system inspection, targeted flushing or descaling, safety checks on gas and electrical connections, and a clear summary of findings and recommendations. To schedule service, call (586) 675-0097 or check our Google Business Profile for local info—our teams know Macomb, Oakland, and Wayne counties and the regional water issues that affect your heater.
When safety, code compliance, or complex repairs are needed, professional service gives you peace of mind beyond DIY maintenance.
How Michigan’s Hard Water Affects Your Water Heater
Many areas in Michigan have moderate to high water hardness, which speeds mineral buildup inside water heaters and requires more frequent maintenance. Hard water causes calcium and magnesium to accumulate faster, producing thicker sediment layers, louder operation, and quicker anode rod wear. Mitigation steps include flushing more often—sometimes twice a year—installing a water softener or conditioner, and checking the anode rod during routine visits. Tailoring your maintenance schedule to local water quality and household demand helps preserve efficiency and extend the life of your system.
Understanding regional hardness patterns helps you pick the right maintenance interval and damage‑control measures.
Why Hard Water Is a Problem in Macomb, Oakland, and Wayne Counties
Local water reports show higher hardness in parts of Macomb, Oakland, and Wayne counties, which can lead to faster sediment buildup than in soft-water areas. Homes on well water or older pipes may face even higher particulate loads. That means annual flushing may not be enough for every household—some homes will benefit from more frequent service or water treatment. Testing your water hardness and adjusting your maintenance plan accordingly will help avoid premature heater replacement and keep efficiency up.
Regular maintenance plus targeted mitigation cuts the negative effects of hard water on your system.
How Regular Flushing Helps With Hard Water
Regular flushing removes mineral layers before they harden into dense deposits, preserving heat transfer and easing strain on burners and elements. In hard-water homes, flushing twice a year and pairing that with periodic anode checks or a softener creates a layered defense against accelerated wear. The small cost of extra maintenance usually beats the larger expense of premature replacement or repeated repairs. For businesses and high-demand homes, combining flushing with professional descaling or water treatment typically pays off in lower long-term costs and less downtime.
Faster maintenance cycles plus softening or anode care gives the best protection against hard-water damage.
Frequently Asked Questions
1. What are the long-term benefits of regular water heater flushing?
Regular flushing helps your heater run more efficiently and last longer. Removing sediment prevents element overheating, slows corrosion, and reduces the risk of leaks and tank failure. That means steadier hot water, lower energy bills, and fewer costly repairs over time—making regular flushing a cost-effective upkeep step.
2. Can flushing a water heater improve water quality?
Yes. Flushing removes sediment and rust particles that can cause discoloration or bad tastes and odors. While flushing won’t fix upstream water-quality issues, it usually clears loose particles from the tank and improves water appearance and smell—especially in hard-water areas.
3. How can I tell if my water heater is due for a flush?
Look for reduced hot-water capacity, rumbling or popping noises, and discolored or rusty water. If you notice those signs—or sudden rises in your energy bill—it’s a good indicator that sediment is affecting performance and a flush is needed.
4. What should I do if my water heater is leaking after a flush?
If you find a leak after flushing, turn off power or gas and shut off the cold-water inlet. Inspect the drain valve and connections for visible leaks. If the leak continues or you see heavy corrosion, call a licensed plumber for a professional assessment—don’t try complex repairs yourself.
5. Are there any risks associated with DIY water heater flushing?
DIY flushing is usually straightforward, but it carries risks if safety steps aren’t followed. Dangers include scalding from hot water, electrical shock if power isn’t off, and gas leaks with gas units. Stuck valves or persistent leaks are also a sign to stop and call a pro. Always prioritize safety: wear protective gear and confirm the system is depressurized before you begin.
6. How does water hardness affect the frequency of flushing?
Hard water speeds mineral buildup, so you may need to flush more often—every six months instead of once a year in some homes. Regular flushing prevents thick sediment layers that harm efficiency and cause repairs. Test your water hardness and adjust your maintenance schedule to match local conditions.
7. What are the signs of a failing water heater that flushing won't fix?
Signs that flushing won’t fix include ongoing leaks, persistent discoloration after a flush, and noises that don’t improve. If the unit won’t heat water properly or you lose hot-water capacity despite maintenance, those could indicate a failing element or internal corrosion—time to call a technician for a full inspection or replacement advice.
How Often Should You Flush Your Water Heater?
Annual flushing is a solid baseline for most tank-style water heaters. In homes with hard water or heavy hot-water use, consider shorter intervals—every six months may be appropriate. Watch for the signs described above and adjust your schedule: if problems return quickly after a flush, increase the frequency. Manufacturers often recommend yearly maintenance to protect warranties and performance, but local water chemistry and household demand should guide the final schedule.
What Tools Do You Need to Flush a Water Heater?
For most DIY flushes you’ll need a garden hose rated for hot water, an adjustable wrench or pliers for the drain-valve fittings, a bucket or pan for initial discharge, and basic protective gear like gloves and safety glasses. For electric units, use a non-contact voltage tester or confirm the breaker is off; for gas units, be comfortable with pilot relighting or call a pro. Optional tools—like a wet/dry vacuum—can help remove heavy sediment, and having a replacement drain valve on hand is smart if the existing valve shows corrosion.
These basics will let you perform a safe flush and identify when parts should be professionally replaced.
Frost and Kretsch Plumbing is available if you prefer a licensed technician to handle maintenance, emergency repairs, or full replacements. We offer transparent pricing, experienced licensed technicians, and 24/7 emergency response. To schedule service or to ask if your unit needs professional attention, call (586) 675-0097 or check our Google Business Profile for local hours and details. Our local teams across Macomb, Oakland, and Wayne counties are familiar with regional water issues and code requirements.
Conclusion
Flushing your water heater regularly keeps it running efficiently, extends its service life, and helps avoid unexpected repairs. Removing sediment restores performance, reduces energy costs, and improves reliability. If you’d rather not DIY or you’ve found signs of deeper issues, Frost and Kretsch Plumbing is ready to help with professional maintenance and repairs. Call us today to schedule your water heater service and keep your hot water running smoothly.